Amaran Ray 360c Review: Worth Upgrading from the 200x?
Dec 29, 2025Amaran Ray 360c: quick verdict
The Amaran Ray 360c promises more than a brighter 200x: full RGB color, a wider color-temperature range, and an all-in-one design with the power supply built into the head. For a cinematographer who travels, removing the external ballast can matter as much as the extra output.
I tested the 360c against my 200x in the situation that exposes a light’s real limits: an interview framed against bright daylight, first with the reflector and then through diffusion. The result was not a simple “twice as bright” story. The 360c’s wider beam and extra usable output changed where it helped—and where it still fell short.
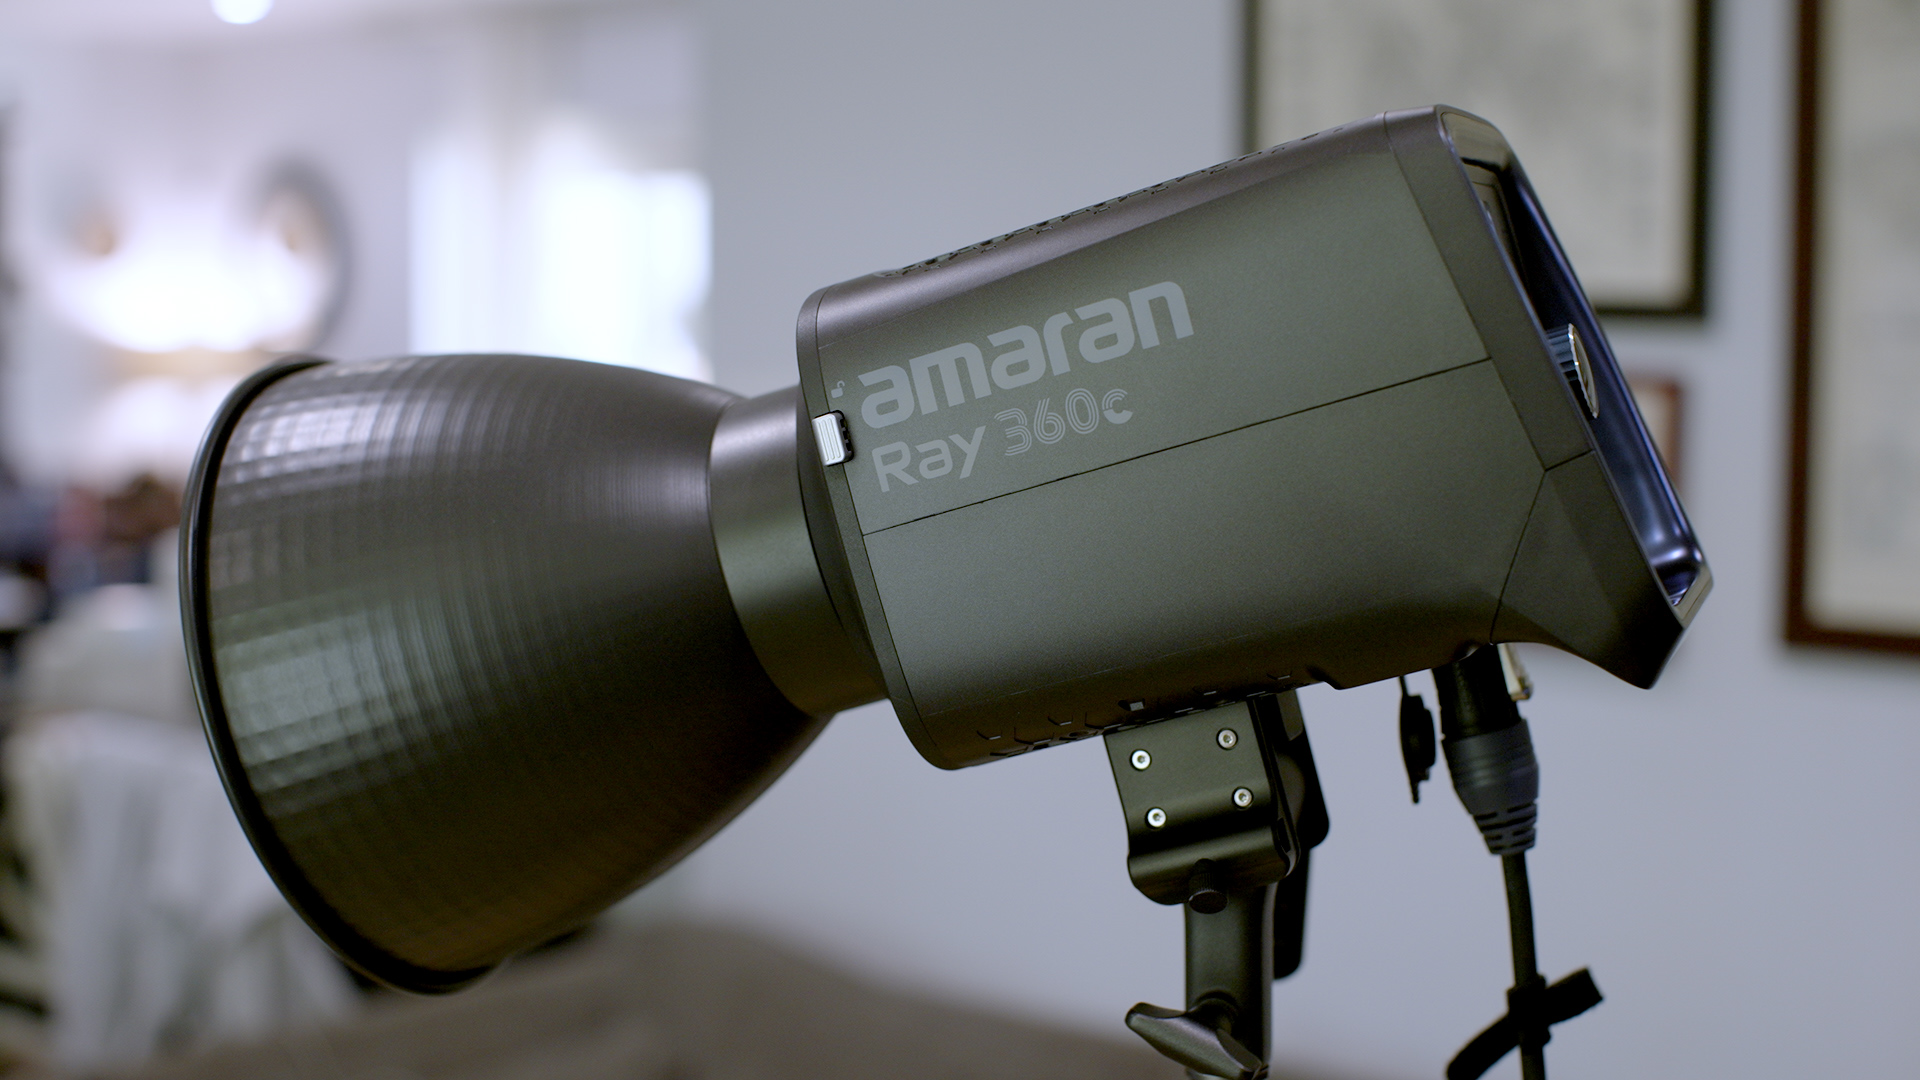
Amaran 360c
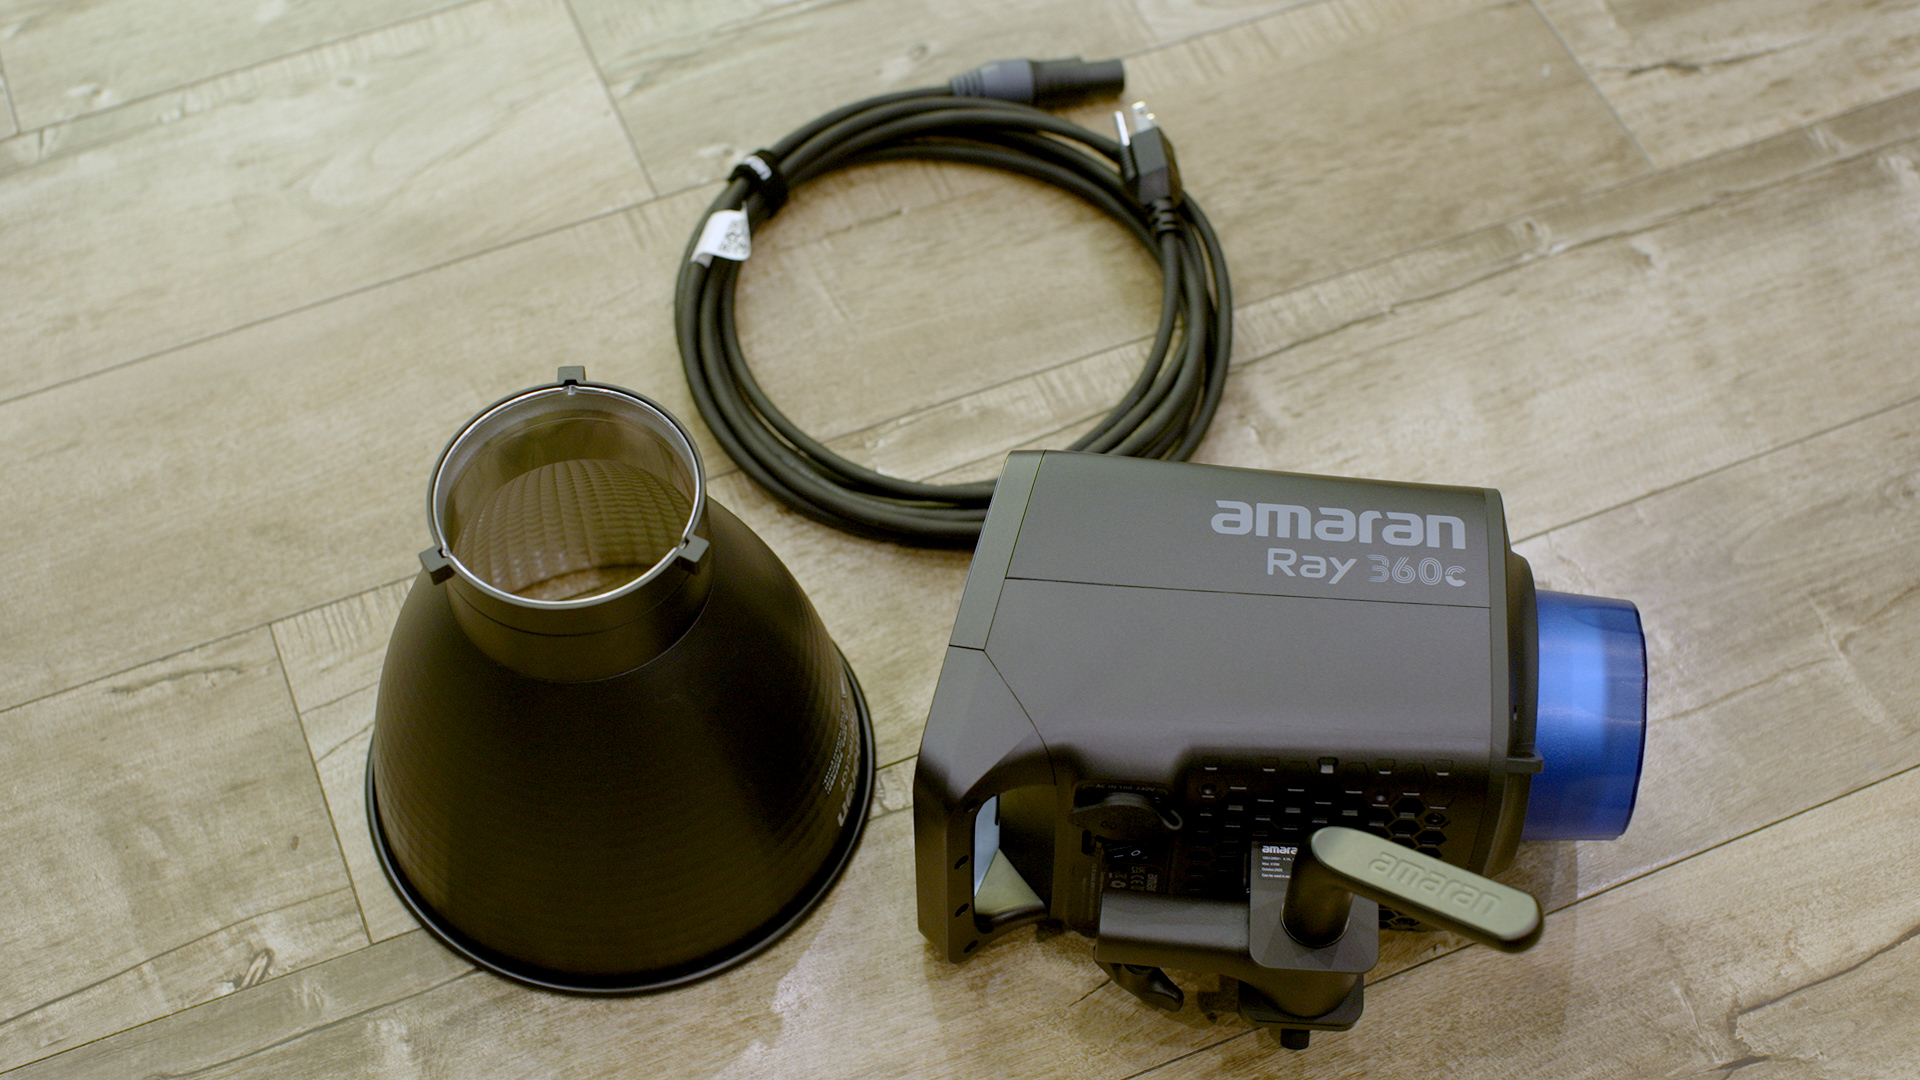
No power ballast
This matters because most of my work requires traveling out of state. For me, size and weight are everything. In the past, whenever I knew I needed more punch, I rented an Aputure 600x at my destination. That light is fantastic, but it’s also big, heavy, and not realistic for me to travel with. So when Amaran released both the 360c and the 660c, I paid attention. The 660c clearly has more power, but I was concerned about the size and weight it would add to my kit. So I decided to try the 360c, hoping it would deliver a meaningful increase in punch over the 200x without changing the way I travel.
Why the integrated power supply matters
The main thing that makes the 360c feel different from a lot of other lights in its class is simple: the power supply is integrated within the lamp. No box to mount, no extra cable to manage, no heavy ballast to pack. Just plug a power cord into a wall outlet and you’re ready to work. If you travel constantly, this is not a small detail. It changes how you pack, how you move, and how quickly you can get a setup running.
Beyond that, the 360c brings serious flexibility:
- CCT range from 2300K to 10,000K (and extended modes reaching far beyond that)
- Tint adjustment to push green or magenta and match other sources on set
- HSI / full RGB mode for creative color control
- Improved controls, including a fast, easy dial behavior that makes quick adjustments feel effortless
- Build quality that feels more solid and professional than the 200x
Now, the 360c is bigger and heavier. The 200x is around 3.6 lbs, and the 360c is around 7.4 lbs. But the 200x also has a power supply you have to carry, so when you factor that in, the real-world difference is closer to about two pounds. Still heavier, but not as dramatic as it seems at first glance.
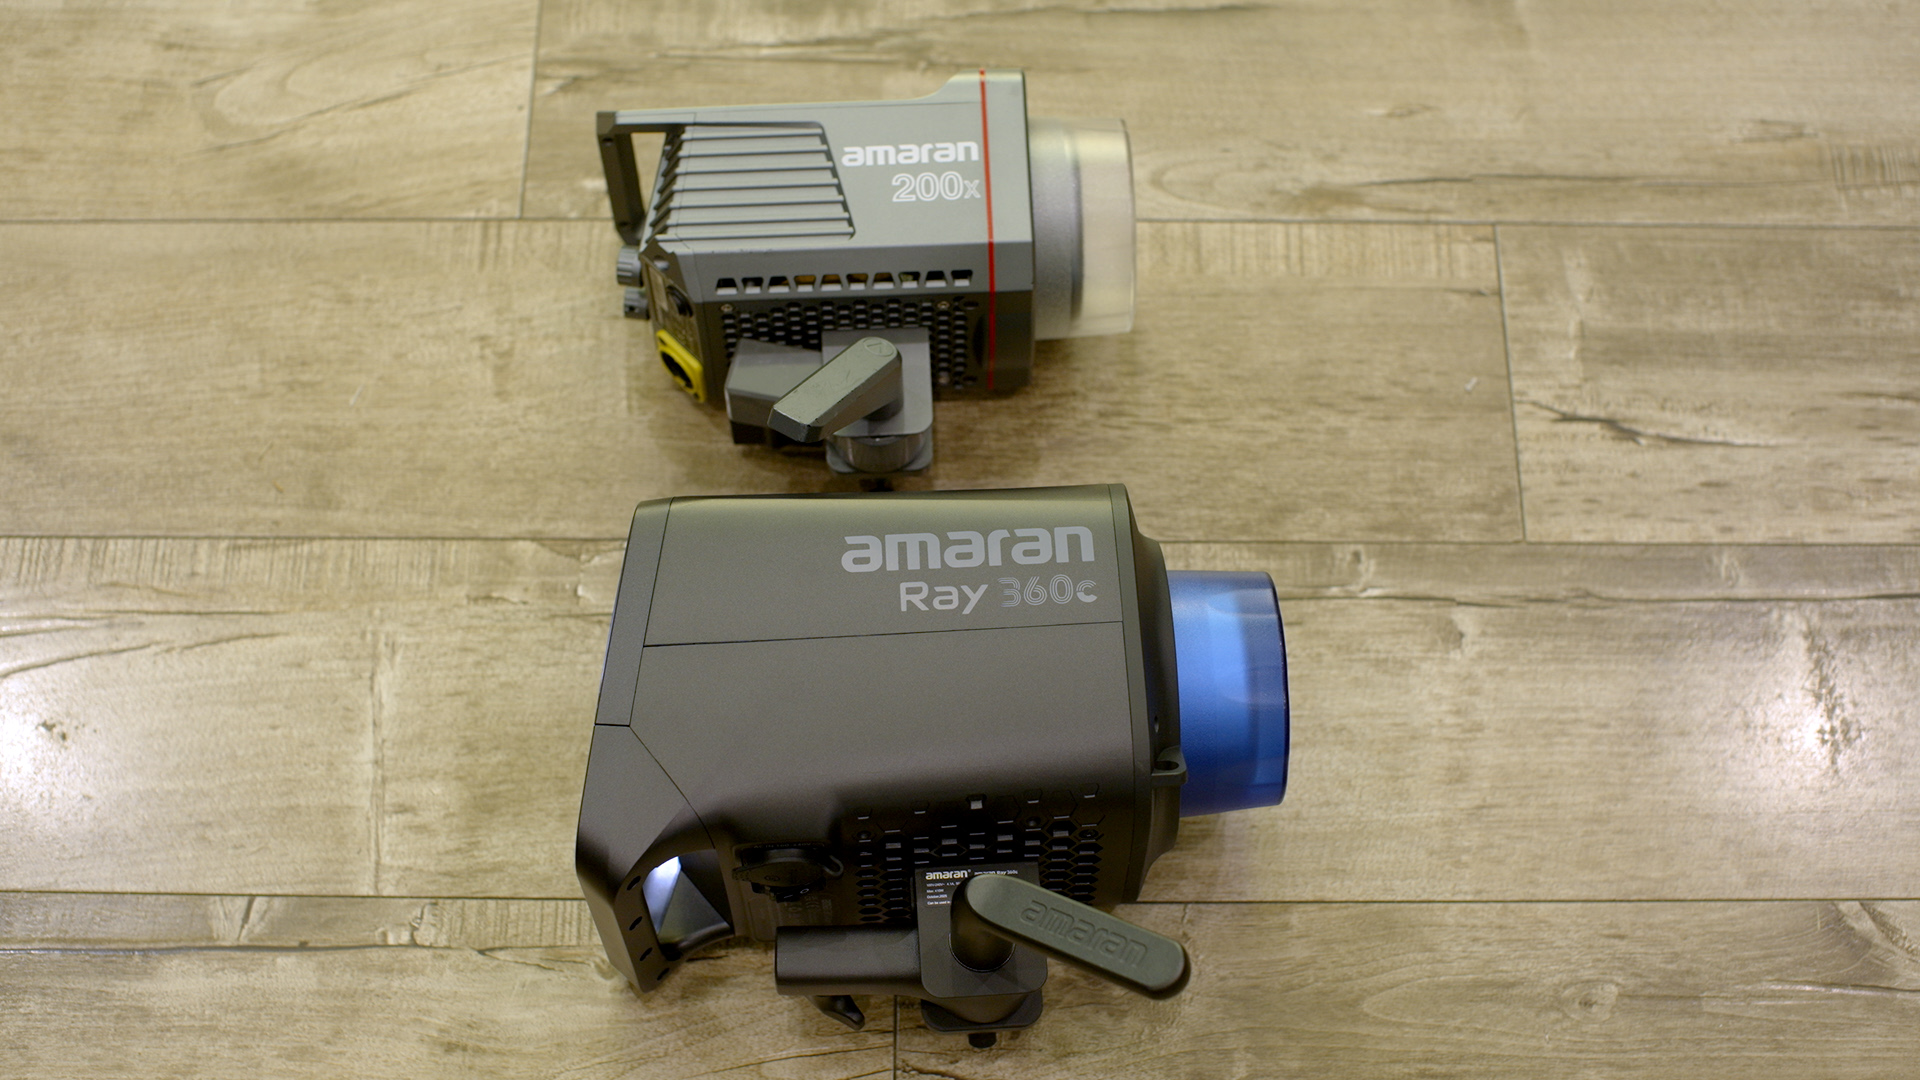
Amaran Ray 360c vs. 200x: the real-world test
I wanted a real-world scenario, not just a spec sheet comparison. So I set up a classic interview problem: subject inside, large bright window behind. The goal was simple: expose the window correctly and see if these lights can bring the subject up to a usable level.
My target settings were:
- Aperture: f/2.8
- Shutter: 1/48
- ISO: 800
Can the 360c balance a bright window?
Stops are the universal language between DPs and gaffers. Each stop is a doubling of light relative to middle gray. And in this case, I needed to know how far the interior exposure was from the window exposure. For a deeper look at this workflow, see The Real Power of a Light Meter.
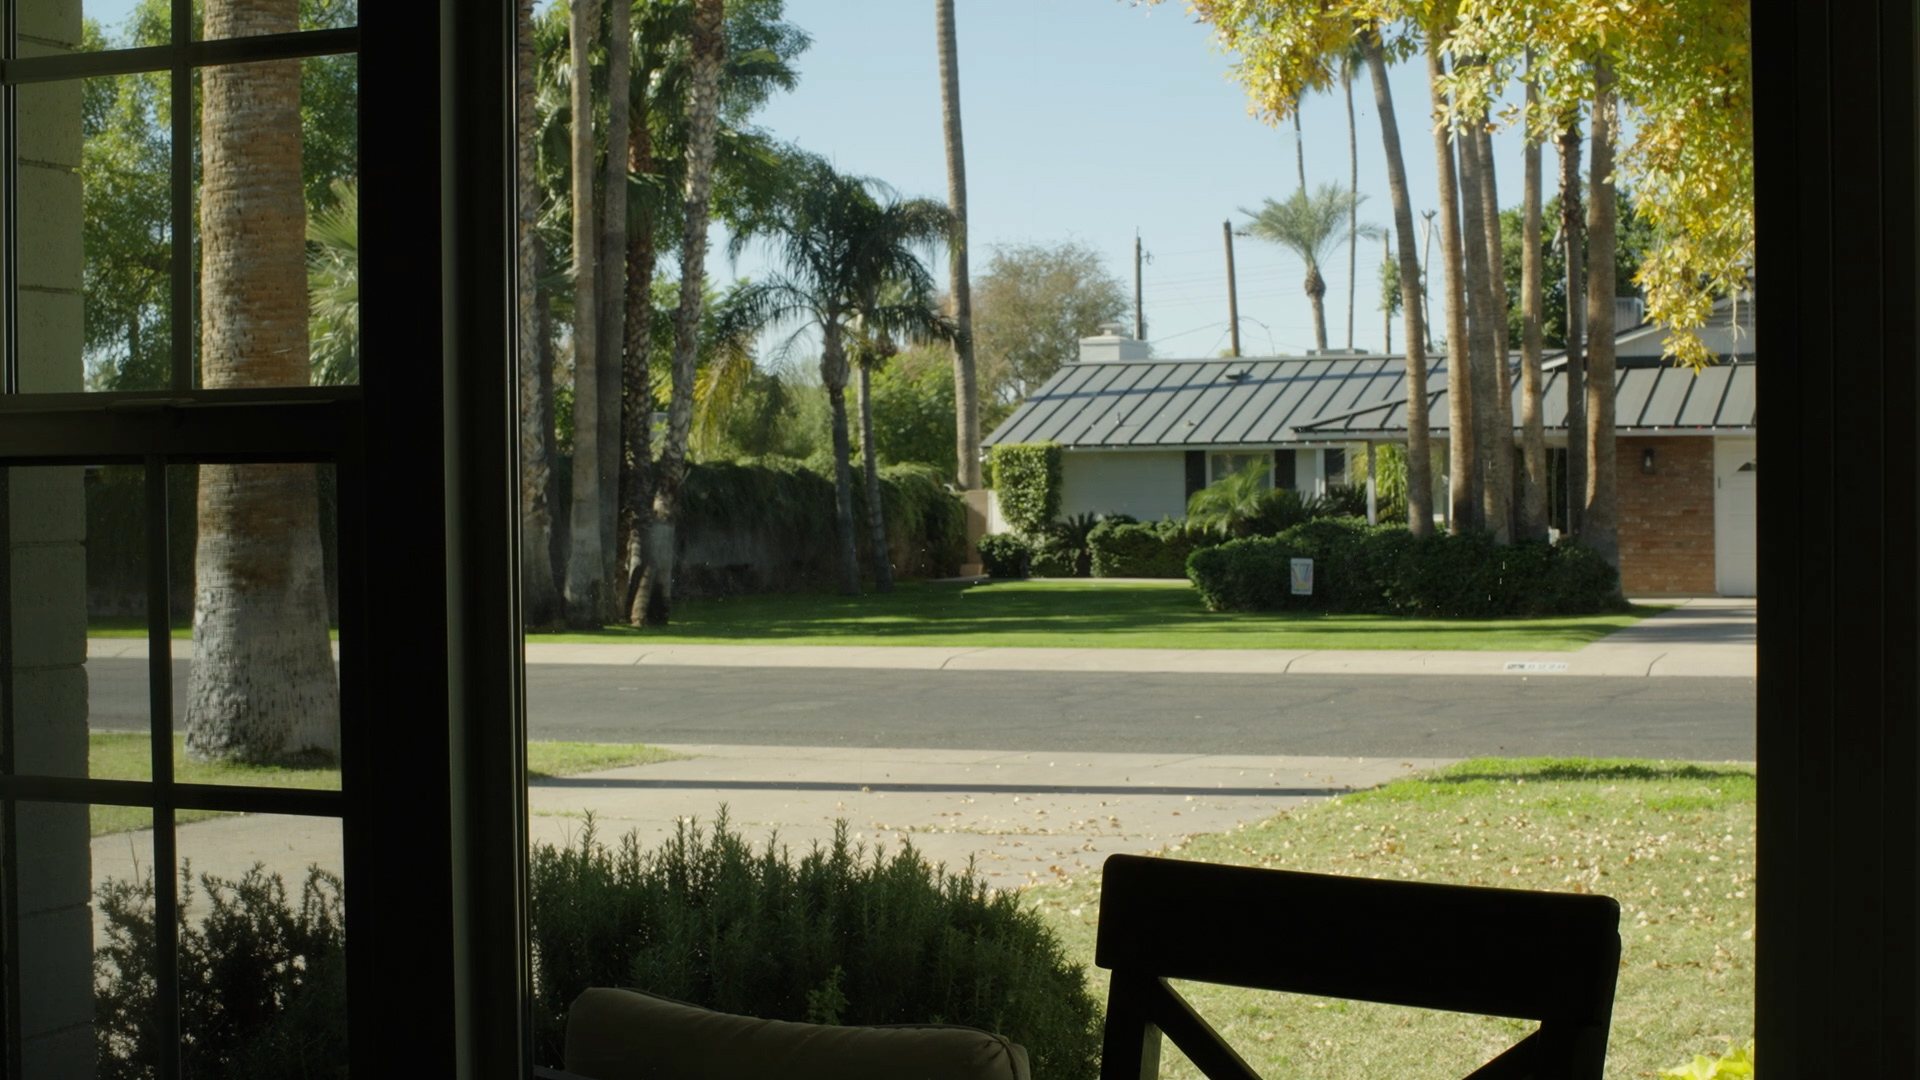
Here’s the practical method I used: I closed the aperture while watching false color and counted how many stops it took to expose the window correctly. 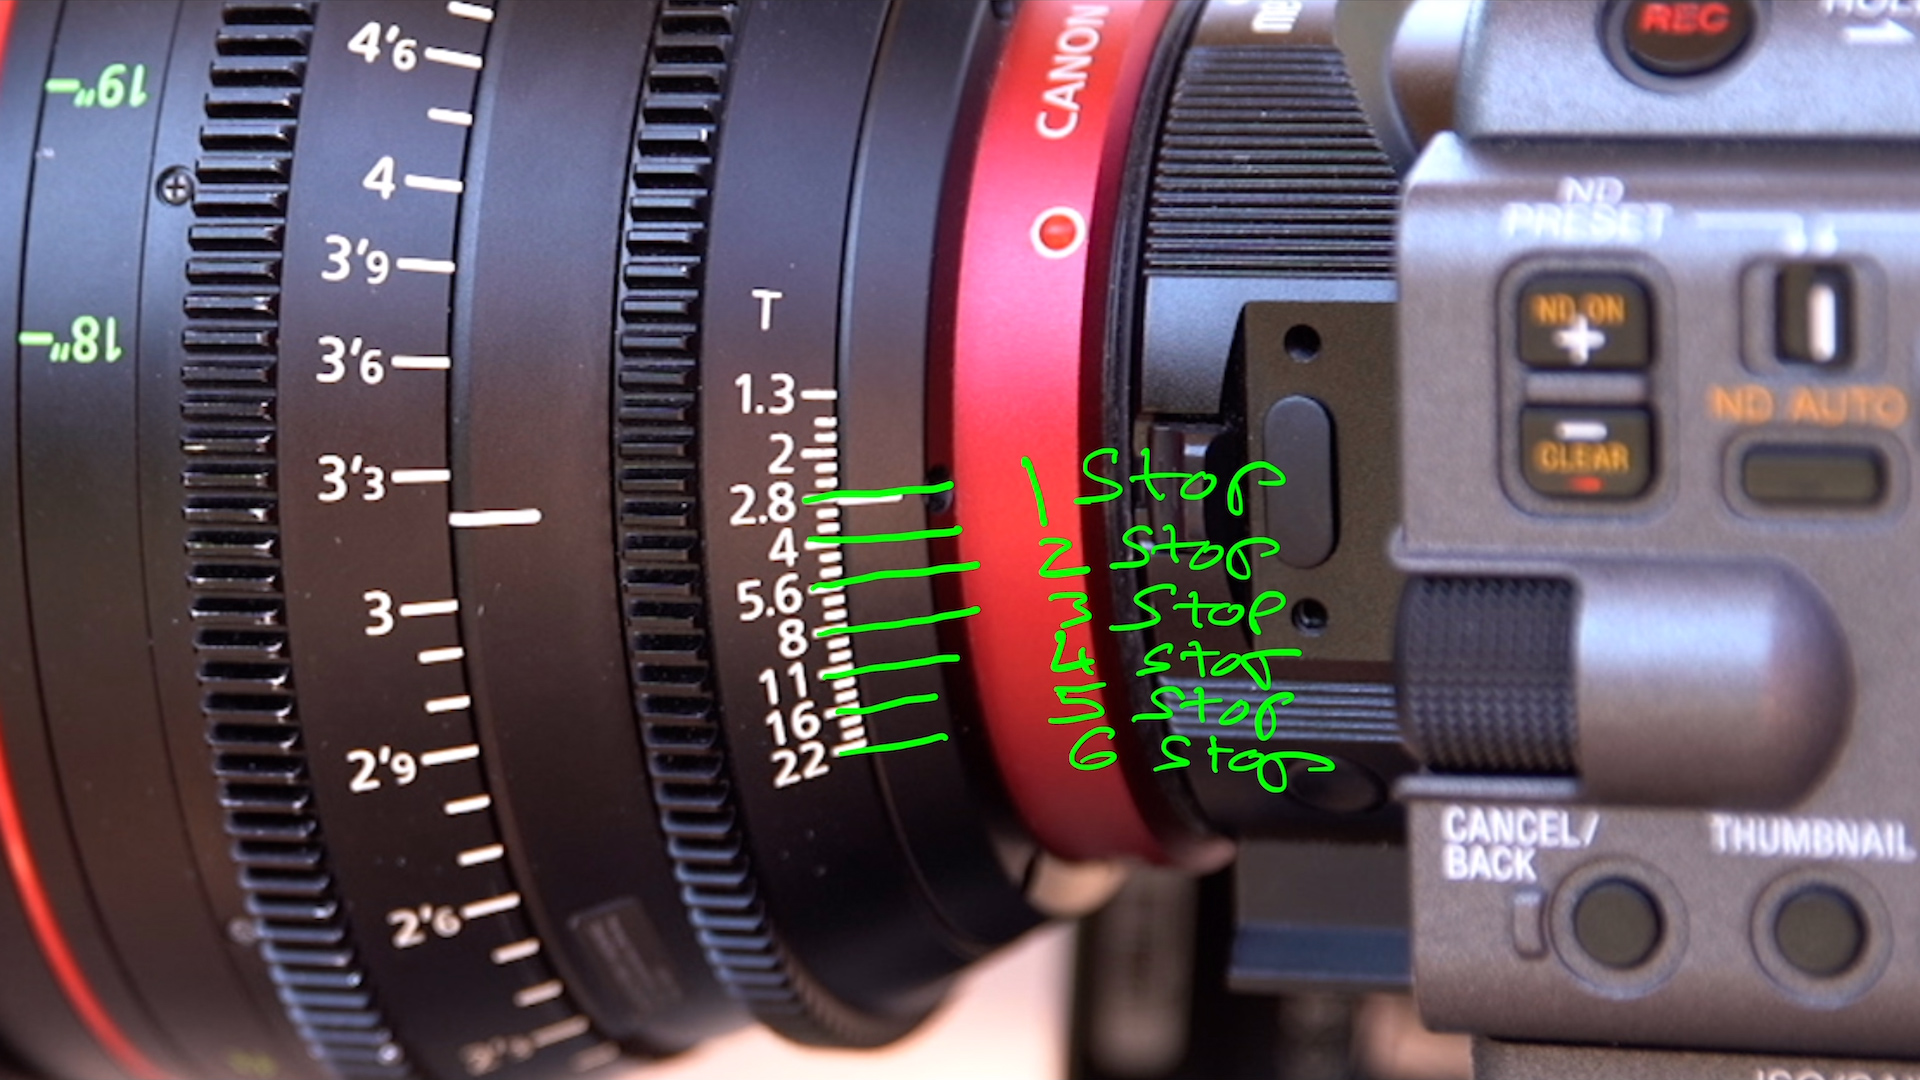
Starting from f/2.8, it took:
1 stop, 2 stops, 3 stops, 4 stops, 5 stops, and 6 stops.
At that point, the window looked balanced, the sky wasn’t clipping, and the exposure felt clean. That told me something critical: I needed roughly six stops of light above middle gray to balance this room.
But I still wanted to shoot at f/2.8. So instead of leaving the aperture closed down, I opened back up to f/2.8 and added six stops of ND:
- ND2 = 1 stop
- ND4 = 2 stops
- ND8 = 3 stops
- ND16 = 4 stops
- ND32 = 5 stops
- ND64 = 6 stops
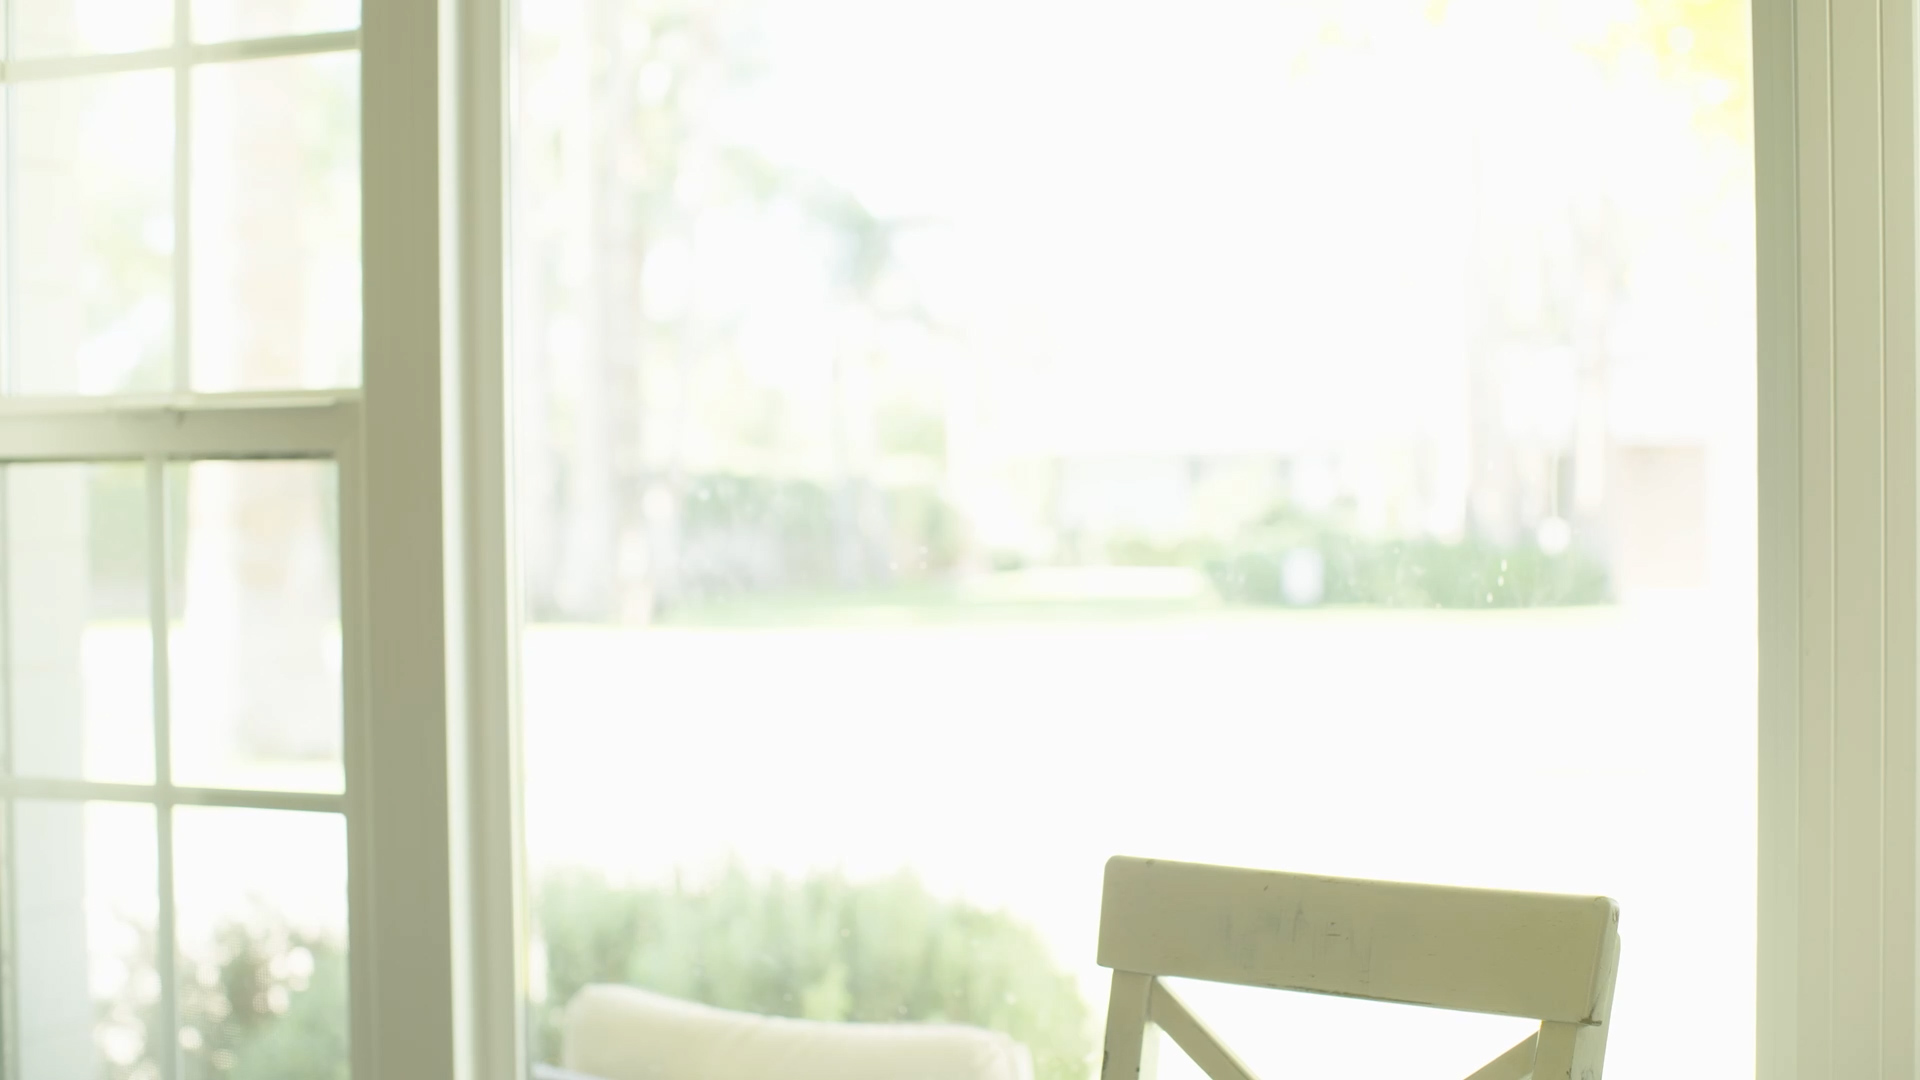
F2.8 no ND
F2.8 ND64
Now the exposure was locked. The window was protected, my camera settings were where I wanted them, and the only remaining question was: how dark is the subject going to be once I sit down?
Reflector results: the 360c gets very close
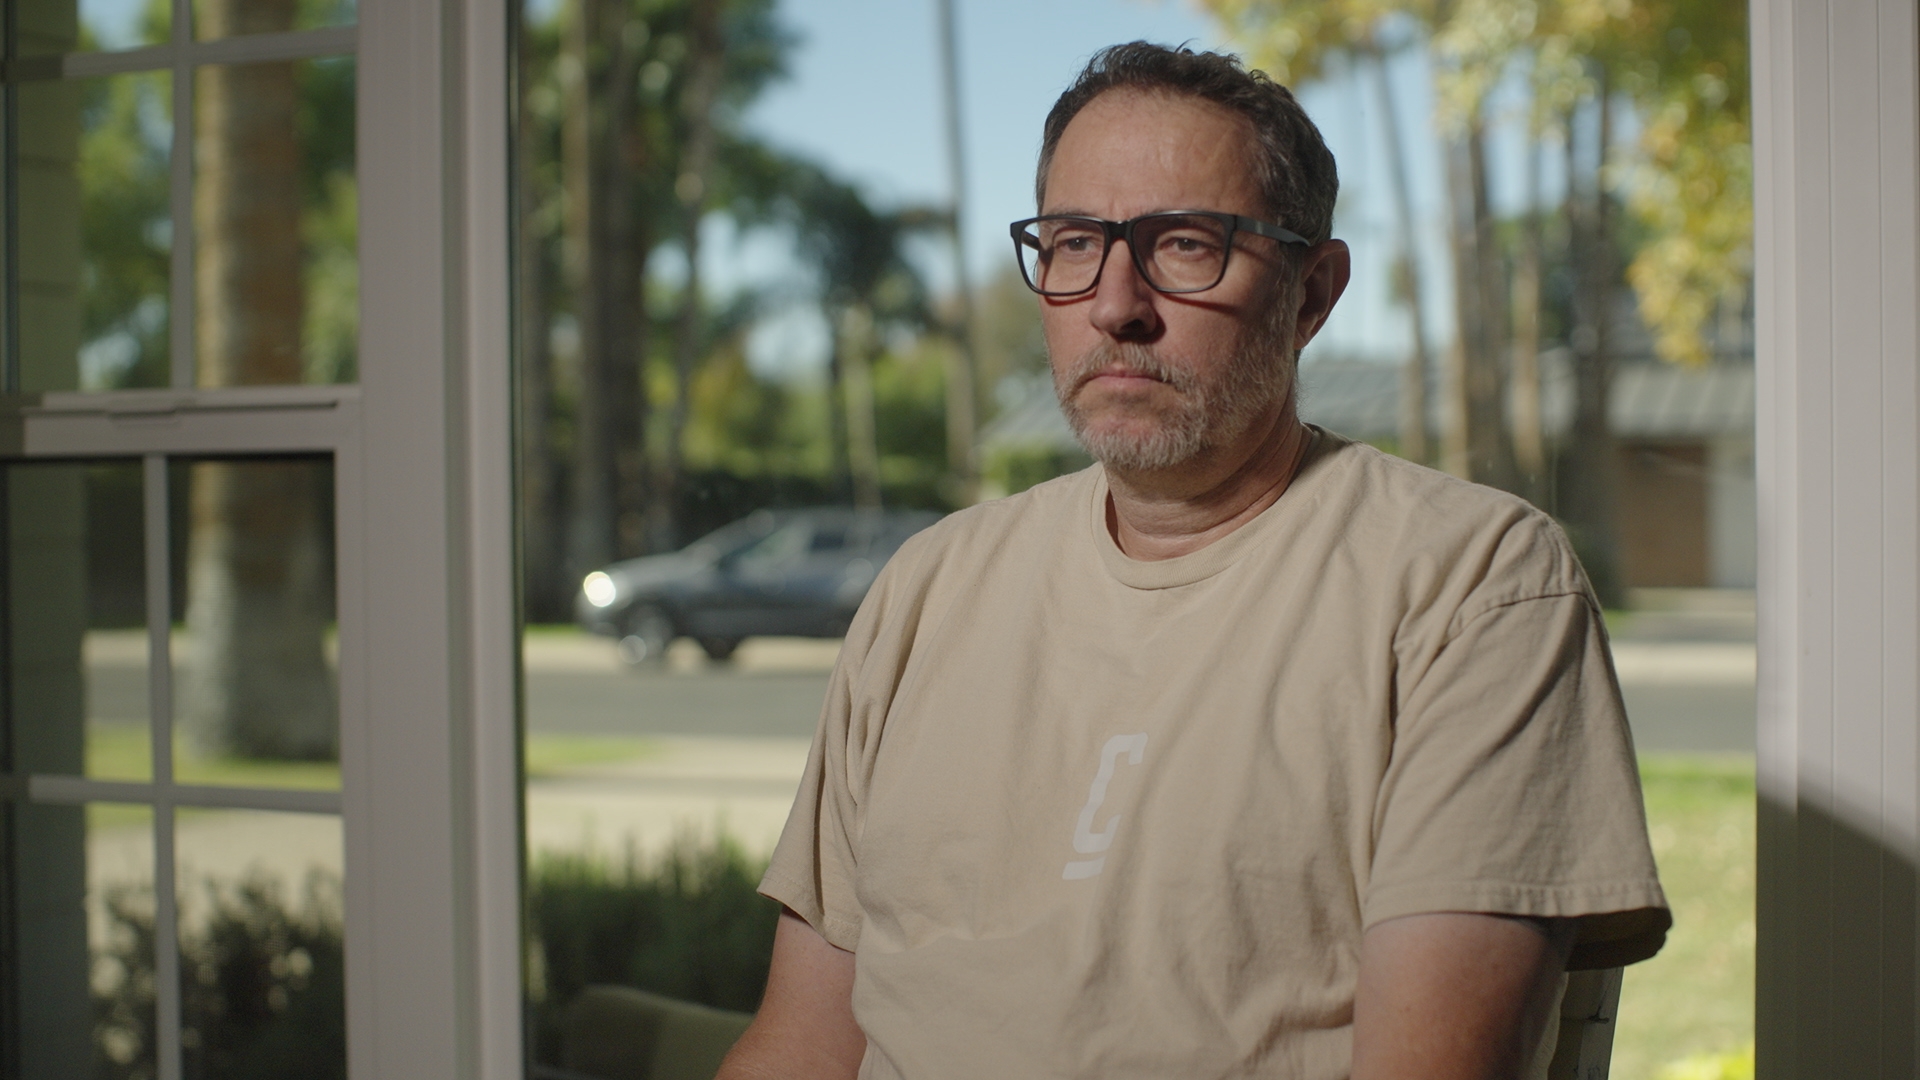
I started with the 360c using the provided cone/reflector. I raised intensity while monitoring false color. At 100%, my face was almost where I wanted it. I was seeing green values in the 45–50 IRE range, and ideally I would like to be closer to around 60 IRE with a touch of pink on the brightest points.
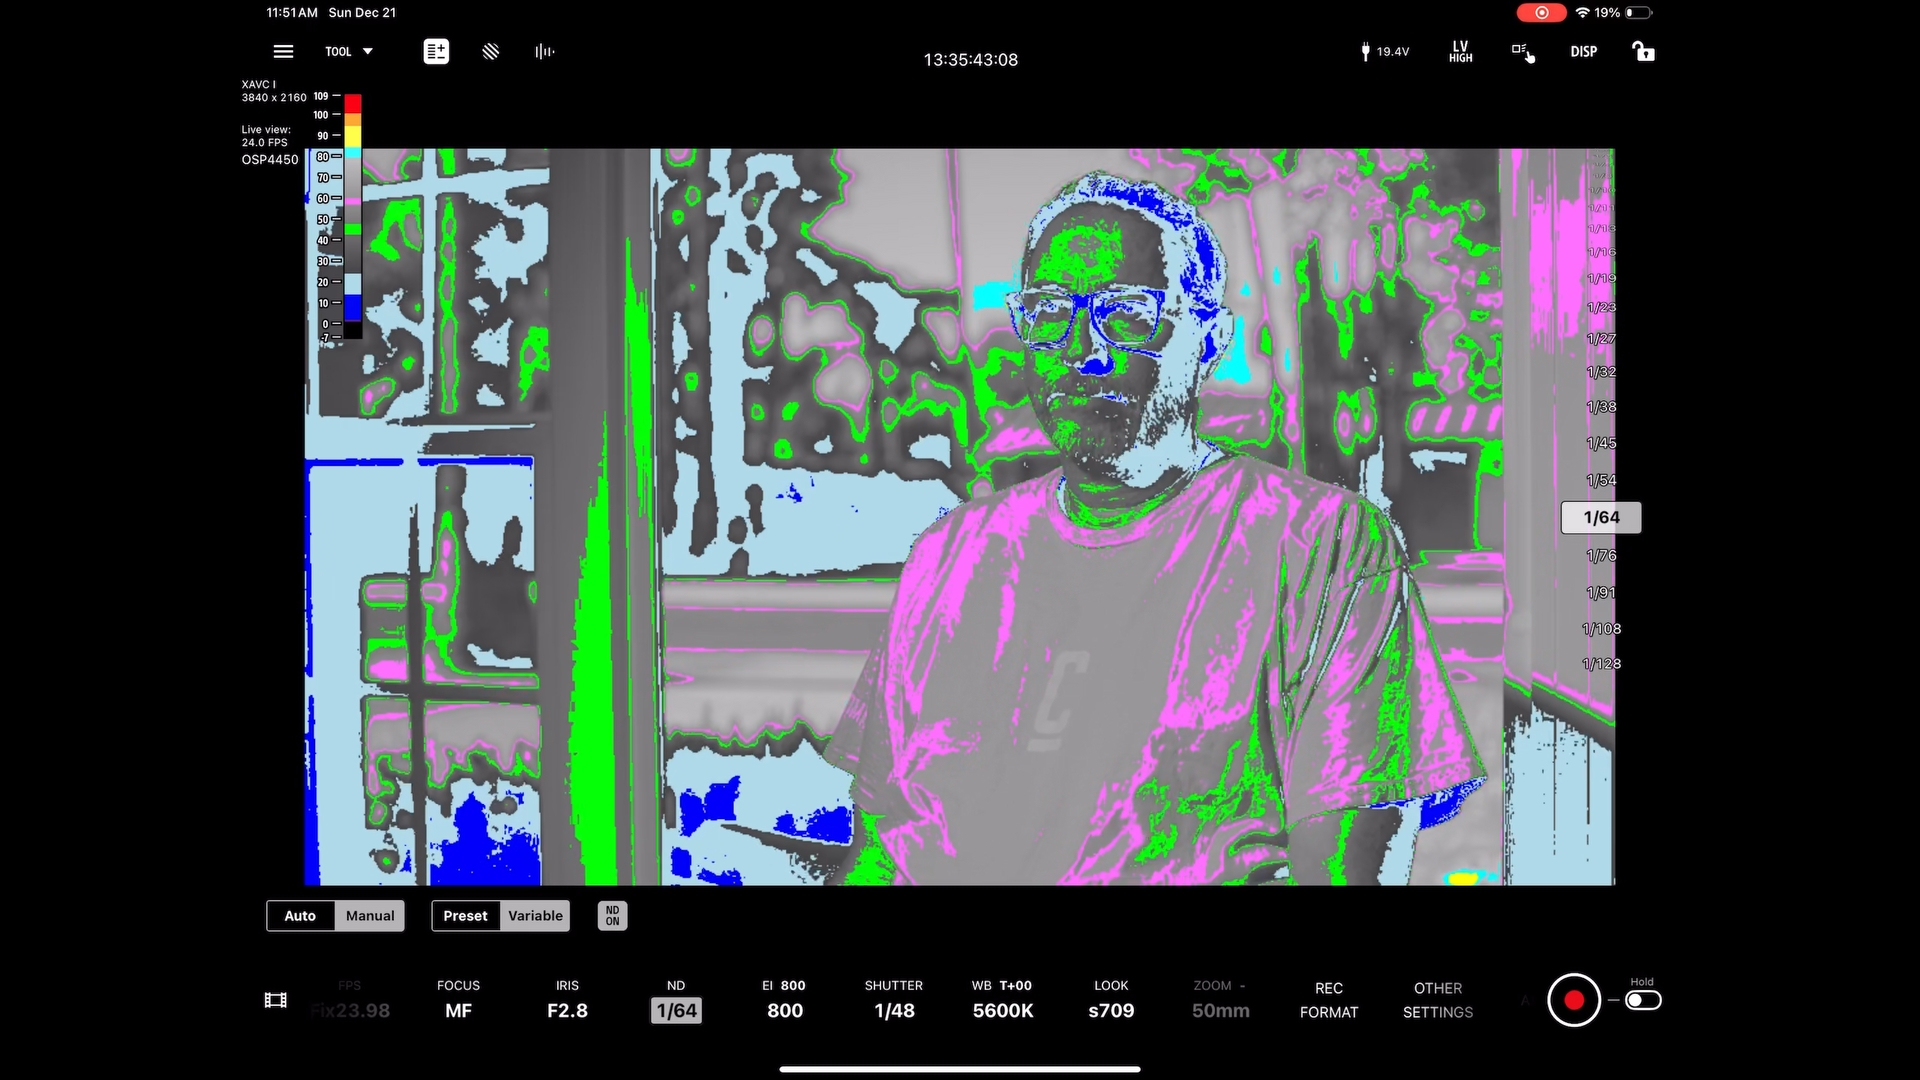
But when I looked at the actual shot, I was pleasantly surprised. The exposure looked usable. I felt comfortable that with a small lift in post, I could get the subject into a solid place without destroying the window.
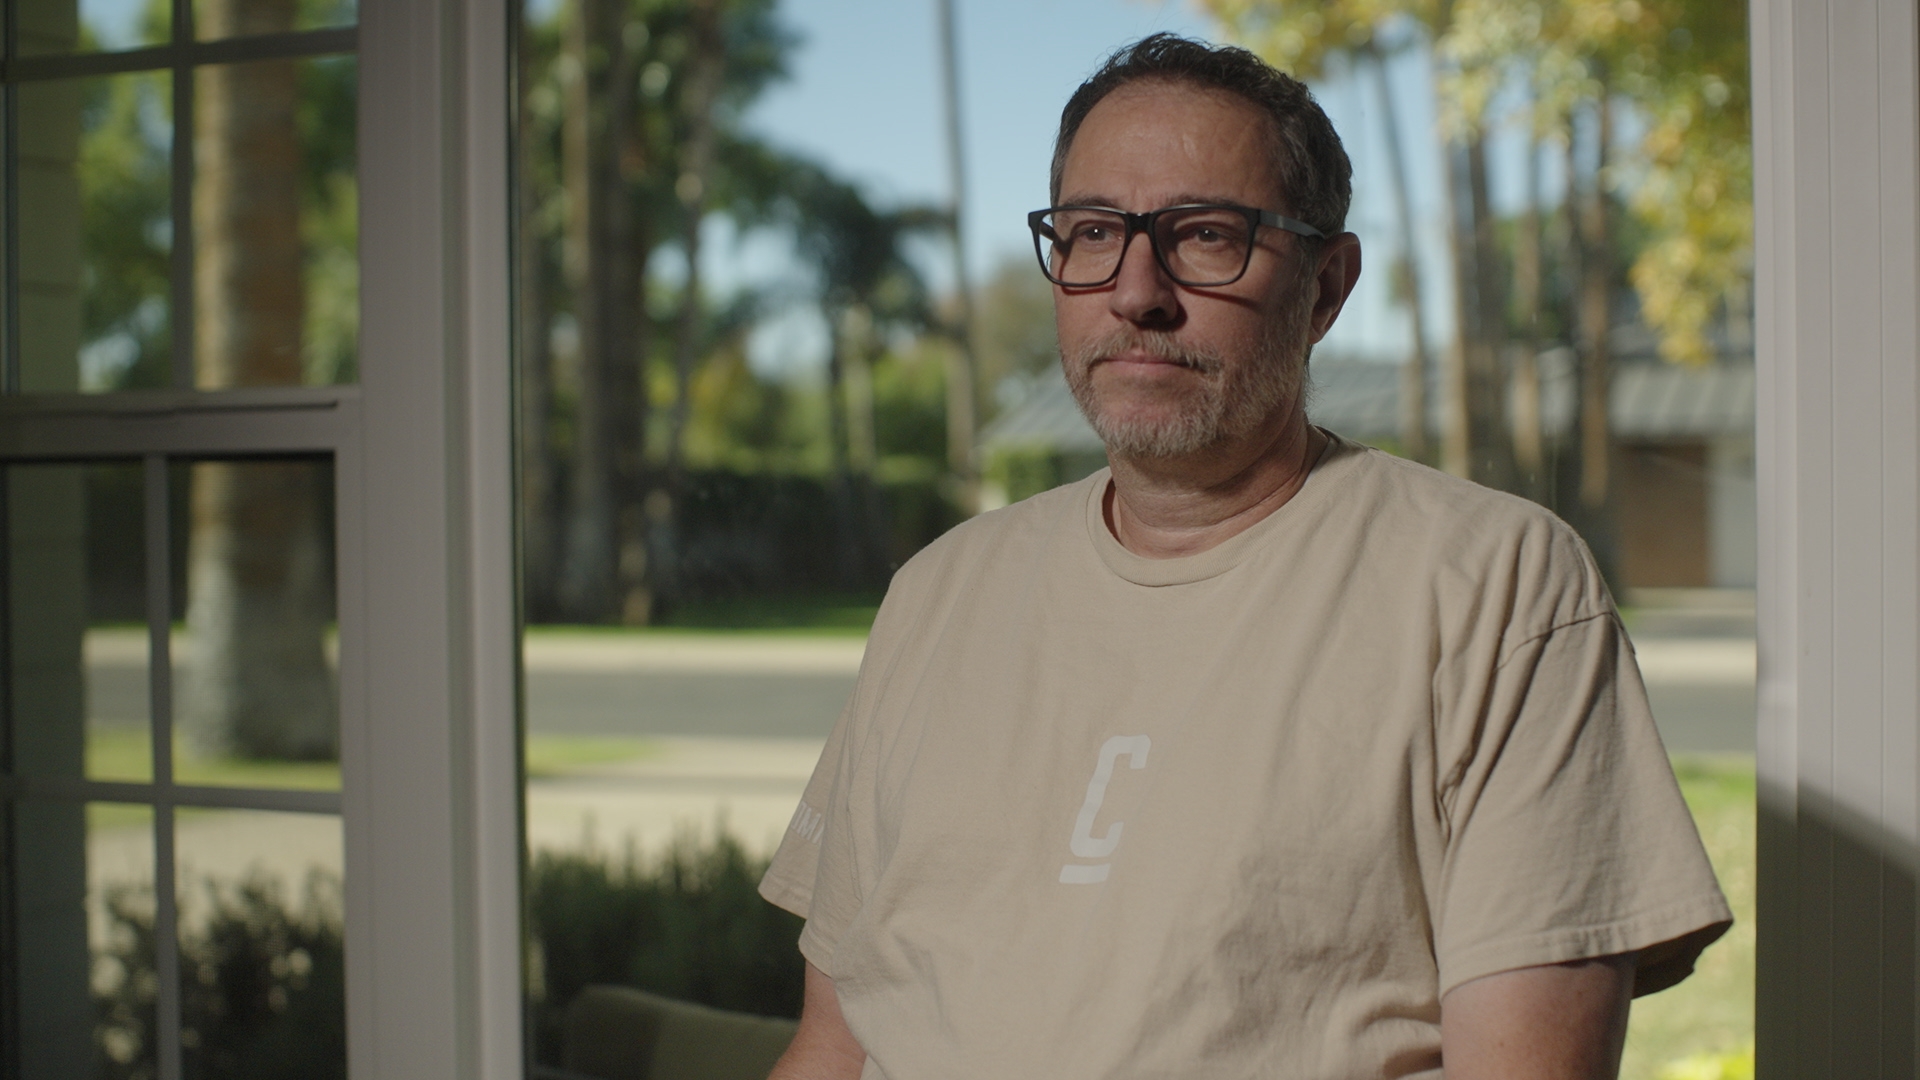
That said, I would not use the cone alone for an interview. It’s too harsh, especially with glasses. The exposure may work, but the quality of light is not pleasant. In the real world, I’m almost always adding diffusion.
Why the 200x can look just as bright
Next, I ran the exact same setup with the Amaran 200x, same camera settings, same position. And here’s what surprised me: the false color looked like the 200x was exposing my face brighter than the 360c. That made no sense at first. I double-checked everything.
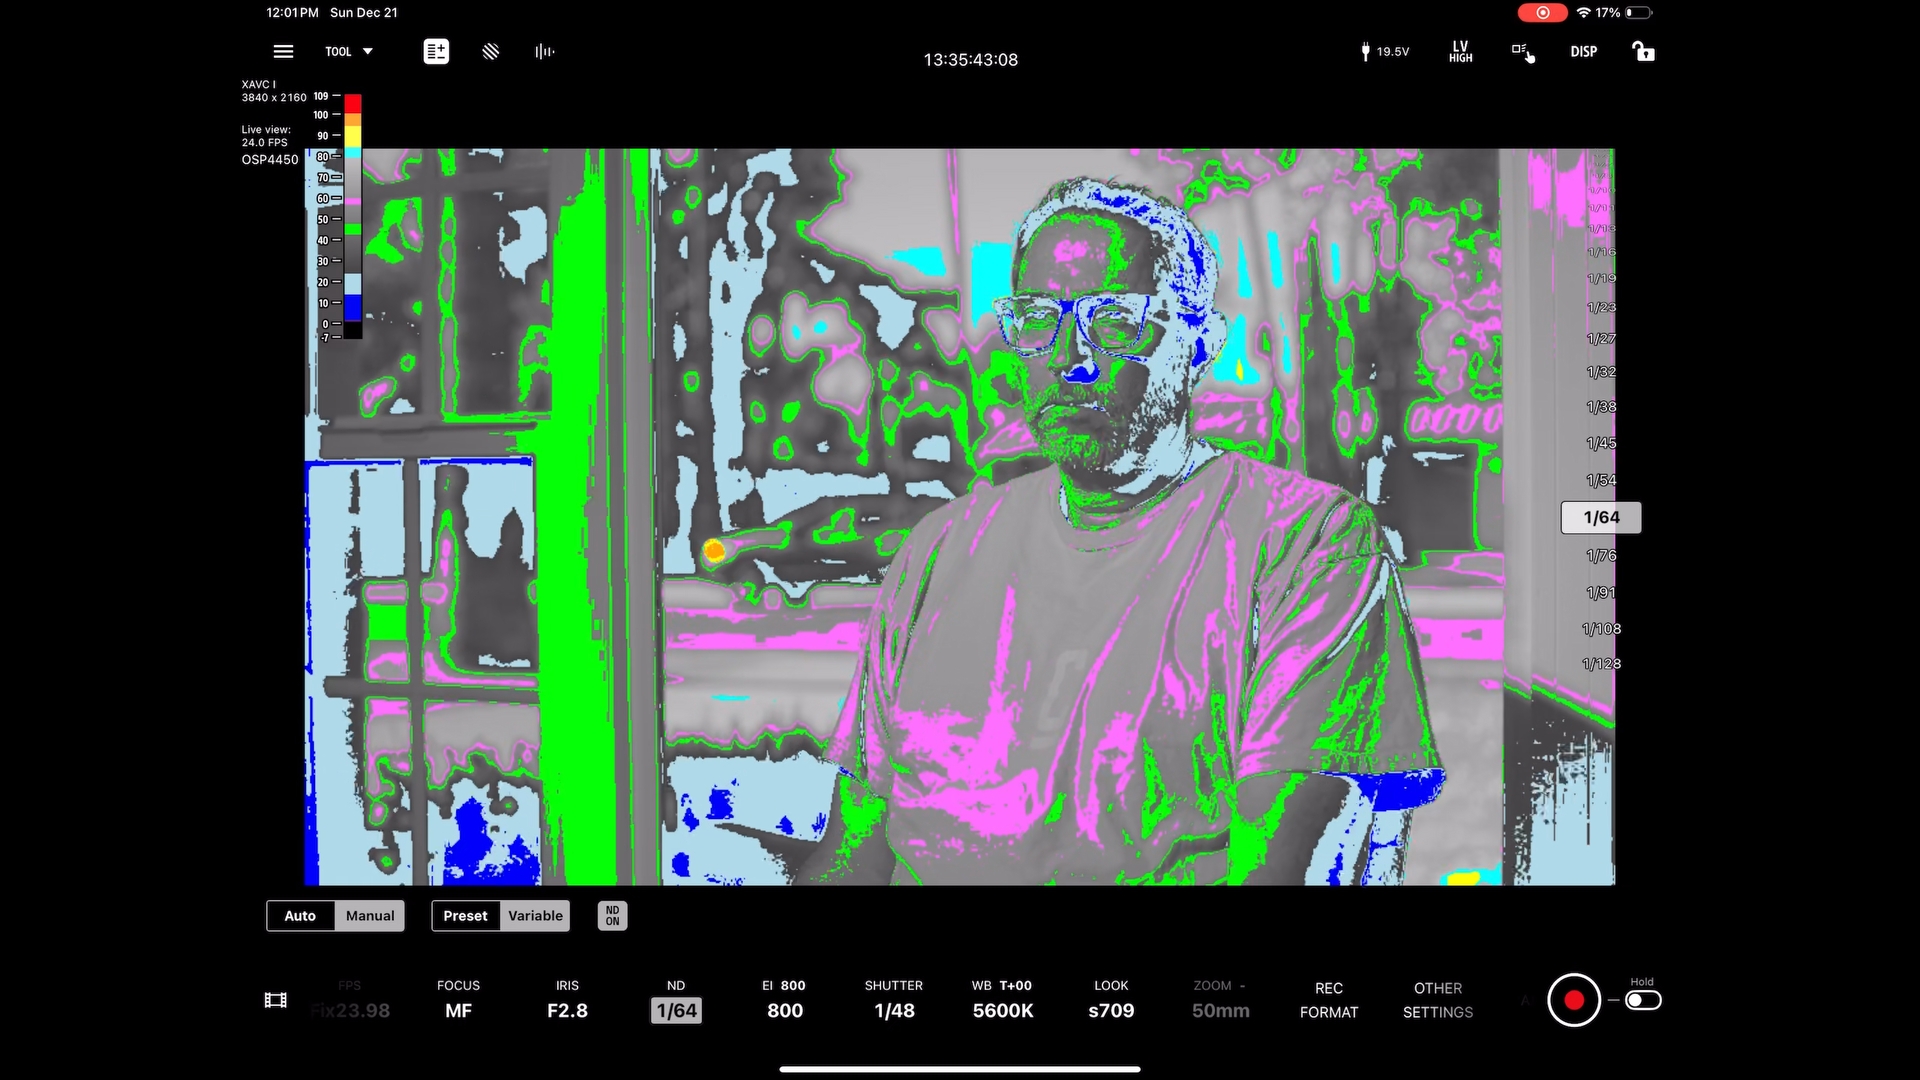
200x false color
200x is brighter
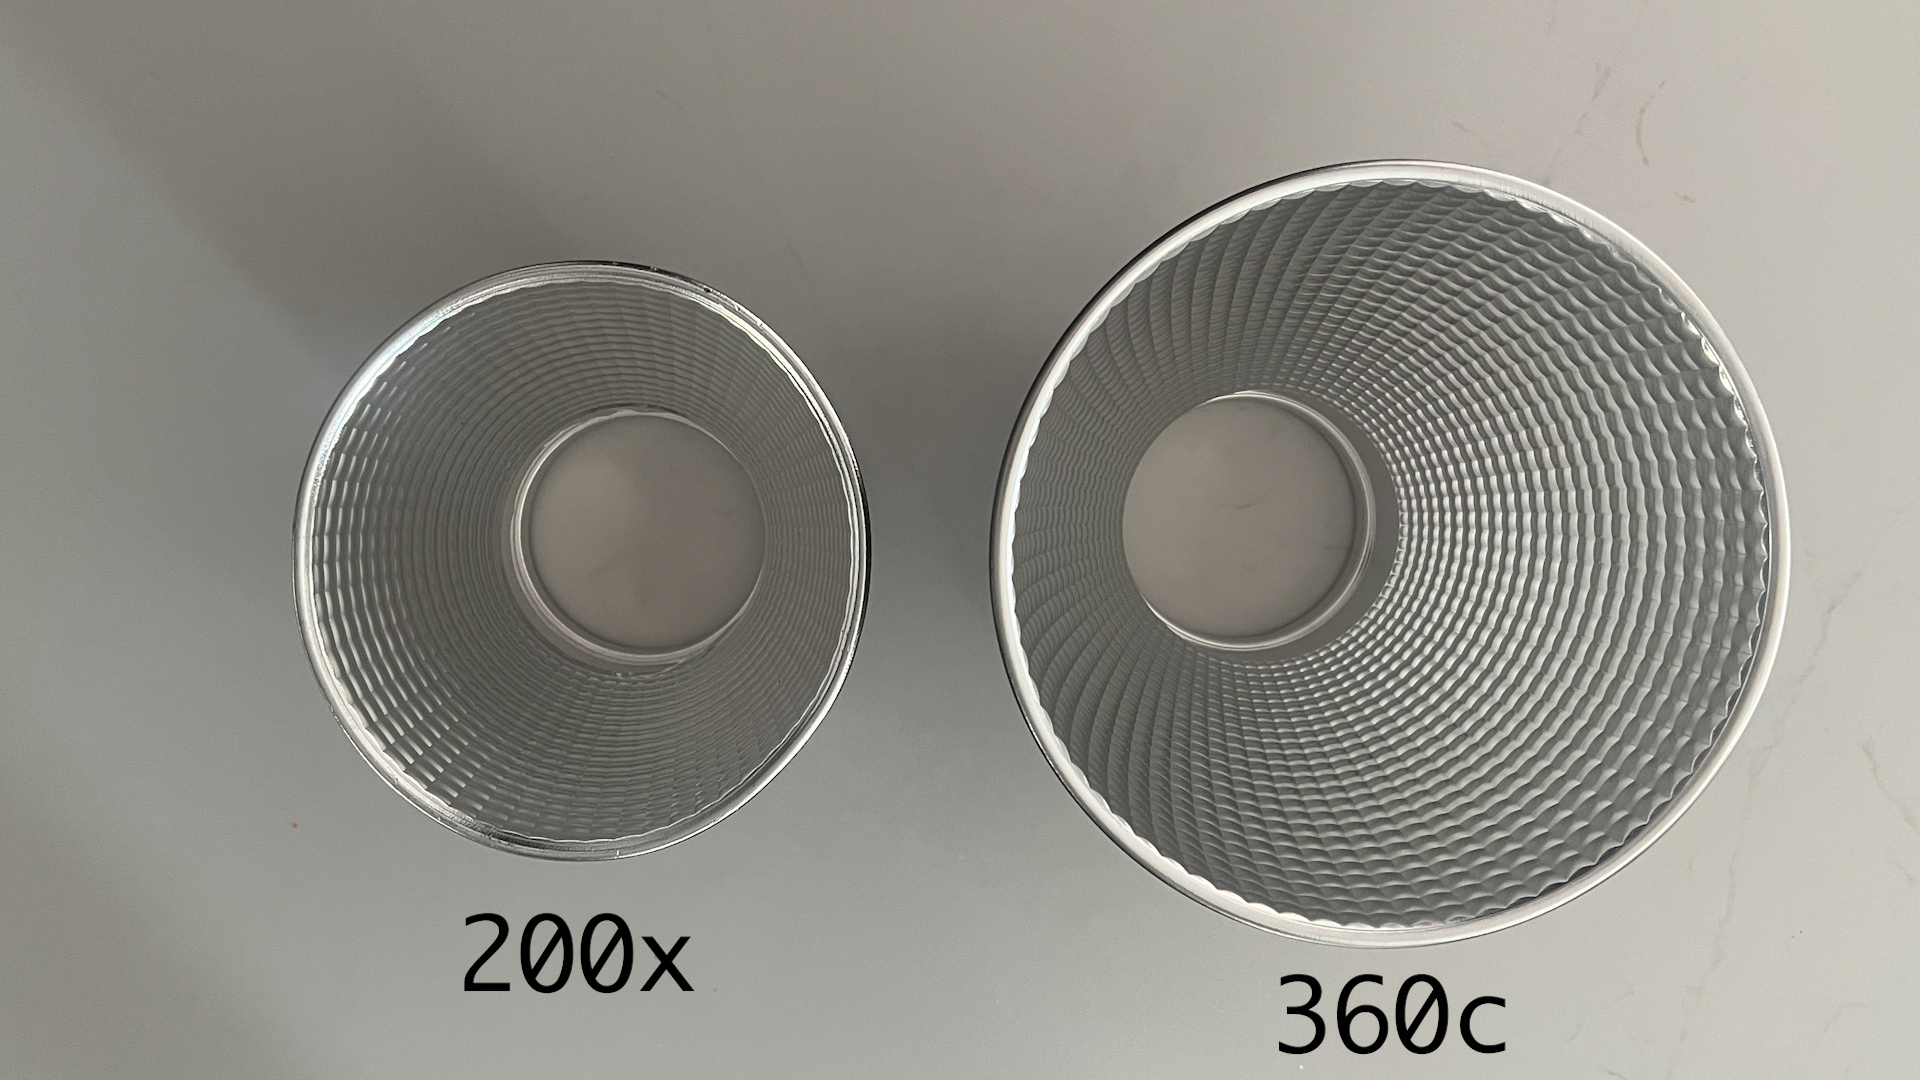
The explanation is in the official photometric data and beam angles. In the specs, the 360c unmodified is much brighter than the 200x. But once you add the included reflectors, their on-axis output becomes very similar because:
- The 200x reflector is a 26° beam angle
- The 360c reflector is a 45° beam angle
The 200x narrows the beam much more aggressively, concentrating light into the center and making it appear extremely bright on-axis. That’s why, with reflectors, the two lights can look surprisingly close when you’re judging only the center of the frame.
How much brighter is the 360c than the 200x?
Even when a light is multiple times brighter on paper, the real-world translation in stops is more modest than people expect. A one-stop increase is a doubling of light. So two-and-a-half times brighter sounds huge, but it translates to roughly about 1.25 stops.
And that’s not irrelevant. One stop can be the difference between:
- shooting at f/2.8 instead of f/4
- keeping the sky from clipping
- or saving a shot when you’re on the edge
One stop is often the difference between “this works” and “this doesn’t.”
Softbox results: where the 360c pulls ahead
Then I repeated the test using a softbox, which is how I would typically light an interview. This is where output disappears fast, because diffusion always costs you light.
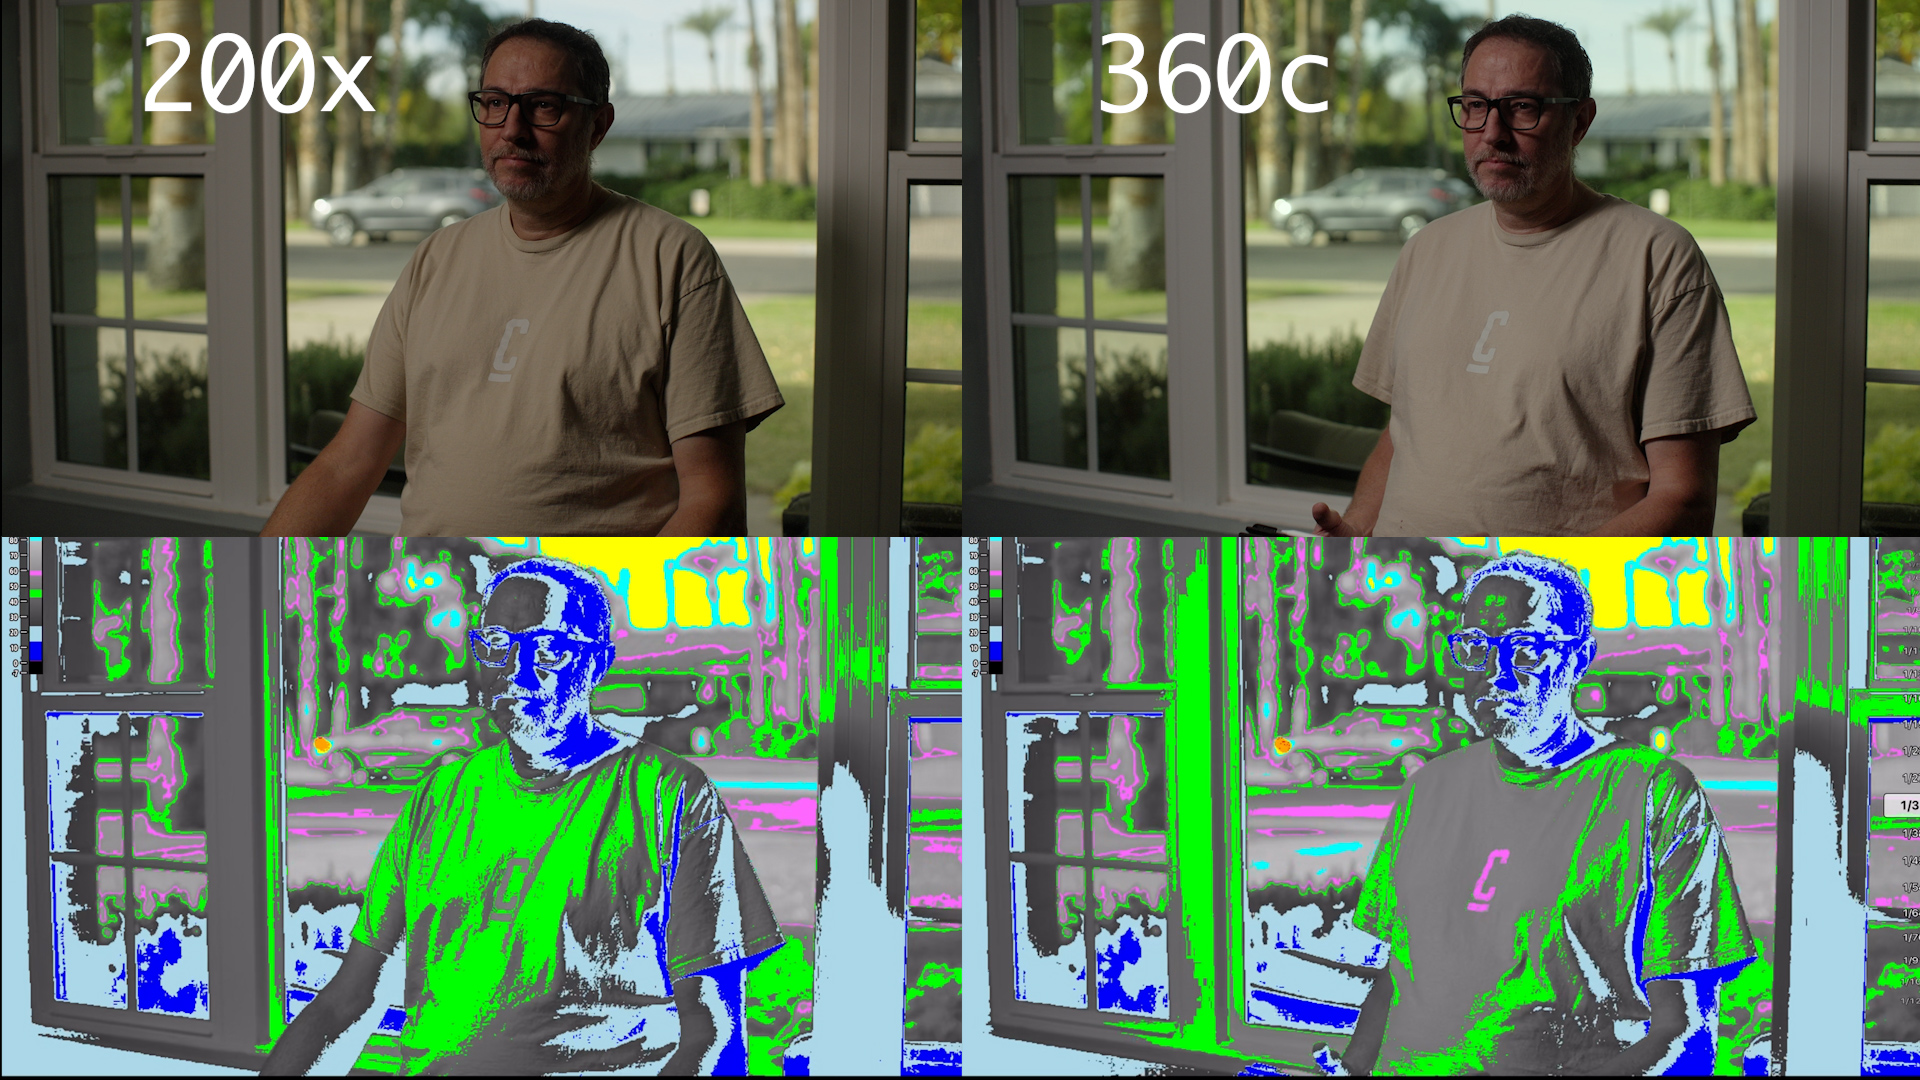
With the 360c at 100%, the subject was still underexposed. I could see green values again around the 45–50 IRE range, but visually I felt less comfortable. The shot looked under. The options at that point were real-world compromises:
- bring the softbox closer
- drop ND another stop
- or accept losing the sky
This was a clear limitation: even the 360c was near the edge of what I needed for this exact window scenario with diffusion.
But when I switched to the 200x with the softbox, the difference became obvious. The levels dropped further, the falloff hit faster, and both the key and fill side suffered. The 200x simply had less flexibility once diffusion entered the equation.
And that’s where the real value of the 360c shows up. That extra stop and a bit of change in beam behavior isn’t something to dismiss. It can be the difference between recovering a shot and not having it at all.
That difference matters most on real jobs, where diffusion and distance consume output quickly. In How I Lit a Bad Conference Room, I used the 360c through a softbox and a larger diffusion frame to turn it into a softer interview key.
Who should upgrade to the Amaran Ray 360c?
If you shoot tight interviews in controlled environments and you don’t need RGB, the Amaran 200x remains an excellent light and an incredibly efficient tool. It punches hard with its narrow reflector, it’s reliable, and it’s easy to travel with.
But if you want more flexibility, better performance through diffusion, RGB capability, and a truly travel-friendly workflow thanks to the integrated power supply, the Amaran 360c feels like a meaningful step forward, not just specs on paper.
I also think the 360c will prove its value more and more as I take it out on real jobs, especially when lighting larger rooms, shooting B-roll, and needing to flood bigger spaces with more output while still keeping the kit travel friendly.
I have also used the 360c as both fill and key while keeping the camera exposure locked. The full breakdown is in How to Light Interviews in a Glass Conference Room.
If you need a much smaller bi-color fixture for overheads, accents, and tight rooms, read my Amaran Halo 100x review. For the exposure decisions behind both tests, continue with The Real Power of a Light Meter.
by Chris Tinard © cNOMADIC 2025
Learn more about cNOMADIC’s online cinematography philosophy and training at cNOMADIC.com