
Cinematic Lighting Isn’t About the Lights
Jun 29, 2026Cinematic Lighting Isn’t About the Lights
The strongest interview images begin with reading the room, choosing a visual direction, and using light to support it.
When I arrive at a location to film an interview, I do not begin by asking where I should place the lights.
Before a stand comes out of the case, I need to understand what the room has to offer. I want to know where the natural light is coming from, which parts of the location support the story, what I can control, and what limitations I will have to accept.
Only then do I decide what kind of image I want to create.
Lighting is there to support that vision. It should not dictate the image simply because a certain fixture, modifier, or familiar setup happens to be available.
This recent interview for a successful team of wealth managers is a good example. The image needed to communicate professionalism, intelligence, and success while still feeling warm, inviting, and approachable. The location already contained many of those qualities—but it also presented several challenges.
The job was not simply to light the room. It was to read the room and make intentional choices.
Lighting begins with observation
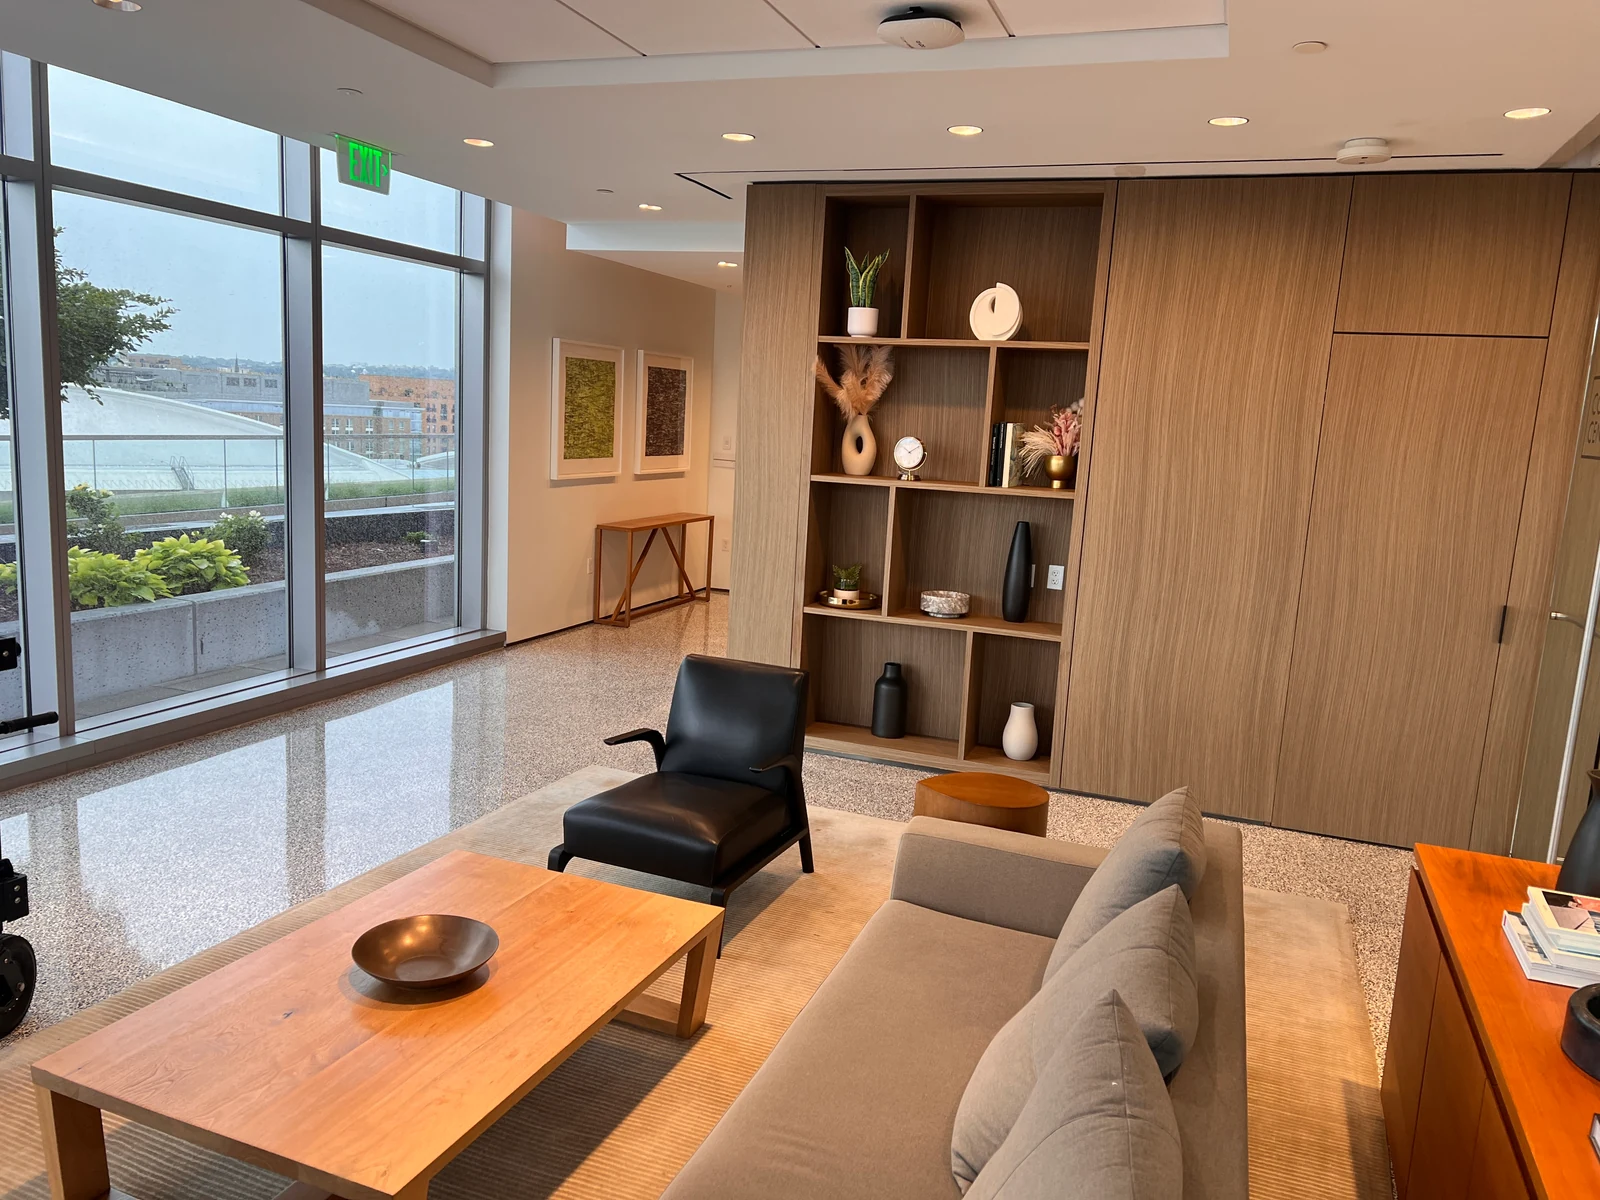
The first thing I noticed was the amount of daylight.
Large windows ran along one side of the room, with additional daylight entering from behind the camera position. That gave me a beautiful soft source, but it also flooded the entire space. Without intervention, much of the room would sit at similar exposure levels and the image would lack contrast.
The direction of that daylight also influenced where the subject needed to sit and which way she should look.
I wanted the window side to become the key side of her face. That direction made visual sense because the source was visible in the composition. Reversing the interview direction would have meant blocking the existing daylight, then rebuilding a key from the opposite side.
I could have done that, but the more important question was: why fight a beautiful source that already belonged to the room?
Using the window reduced the amount of equipment required and created a result that felt more natural. The location was already telling me where the light wanted to come from.
Understand what you cannot control
The ceiling fixtures were another immediate concern.
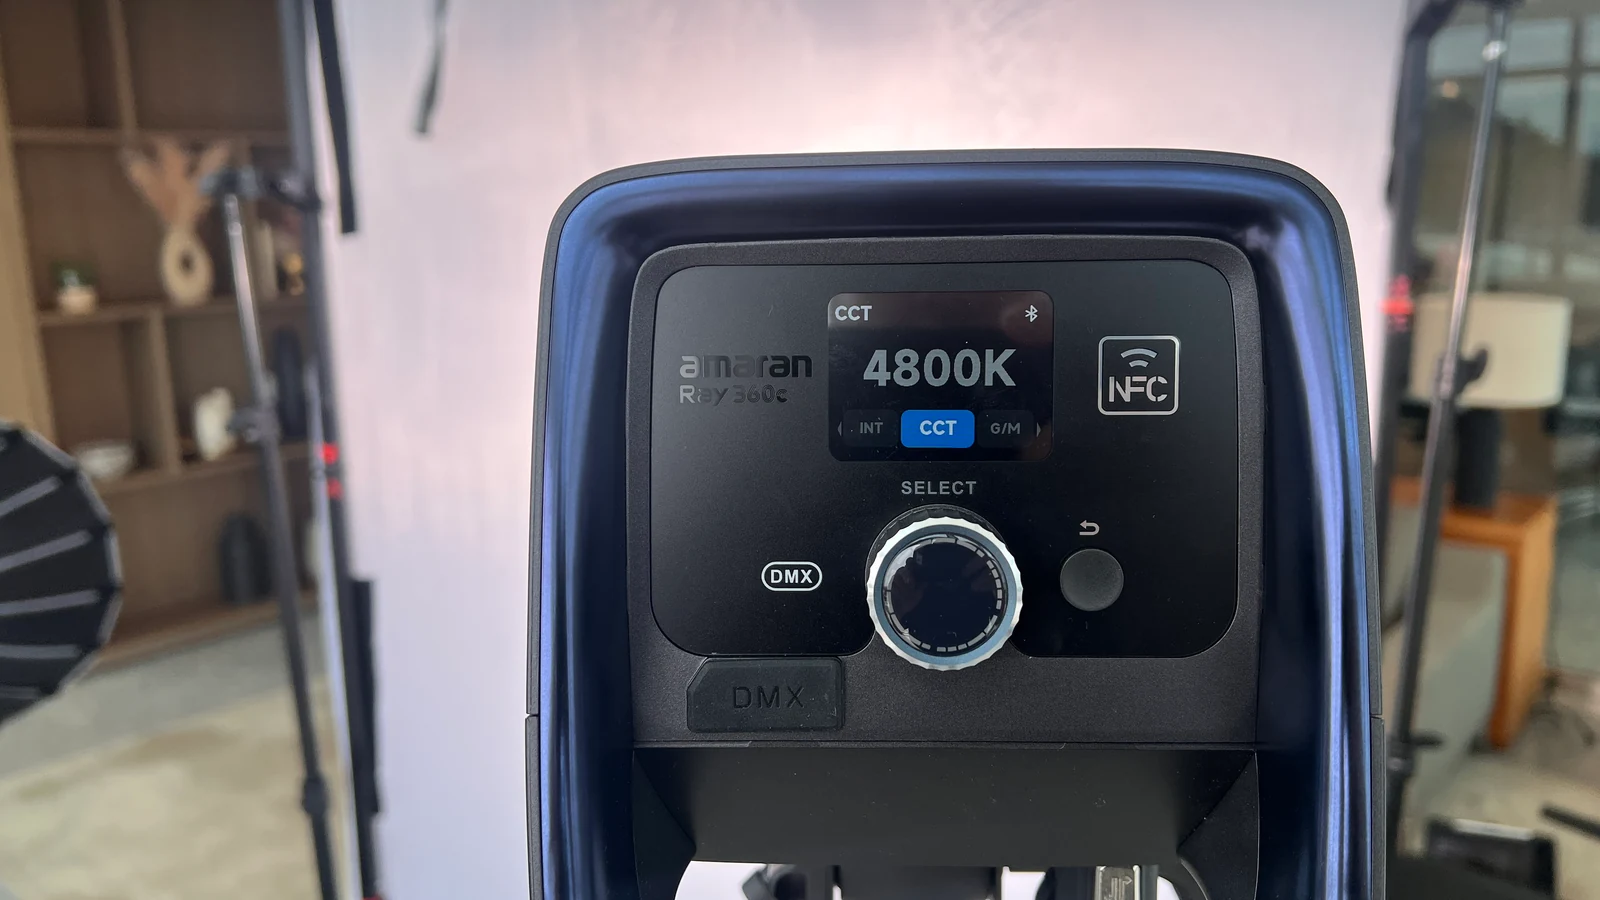
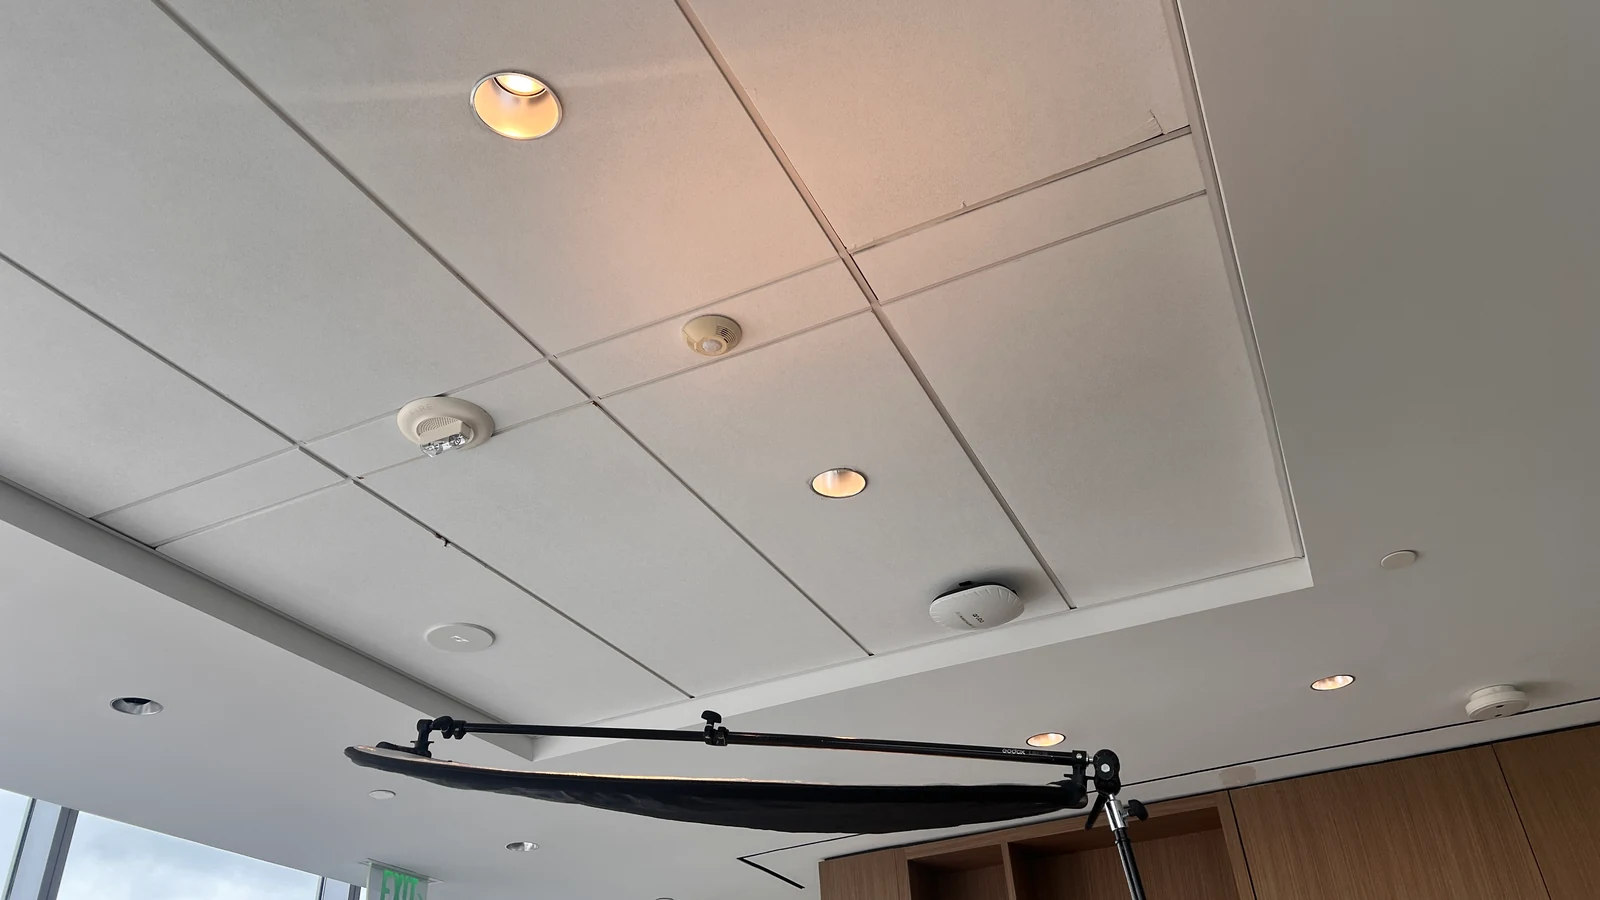
They were warmer than the daylight and could not be switched off. That meant the mixed color temperature had to become part of the plan rather than something I could eliminate.
I was comfortable allowing the room to feel warm. It supported the welcoming tone the client wanted. But I still needed to understand how those fixtures affected the subject, the background, and my camera’s white-balance decision.
This is an important part of location work: control is not always about removing everything imperfect. Sometimes it is about recognizing what must remain and integrating it deliberately.
Let the frame motivate the light
When I first placed the camera, I liked having the window in the shot.
It added depth and prevented the interview from feeling trapped inside a closed room. It also motivated the lighting direction. The viewer could see where the brighter side of the subject’s face was coming from.
A window in frame always introduces risk because its level can change. In this case, the sky was overcast and there was no valuable view outside. I made a conscious decision to let the window go bright rather than compromise the rest of the image trying to preserve a gray exterior.
That was not an exposure mistake. It was a storytelling decision.
Exposure and lighting are one process
I do not think of lighting first and exposure second. The two decisions happen together.
Once I decided to keep the window and allow it to approach white, I used internal ND to establish the overall exposure of the room. False color gave me an objective reference for the window, the subject, and the background.
After the window reached the level I wanted, the camera was essentially set. I could keep the aperture, shutter, ISO, and depth of field consistent, then shape the rest of the image with light.
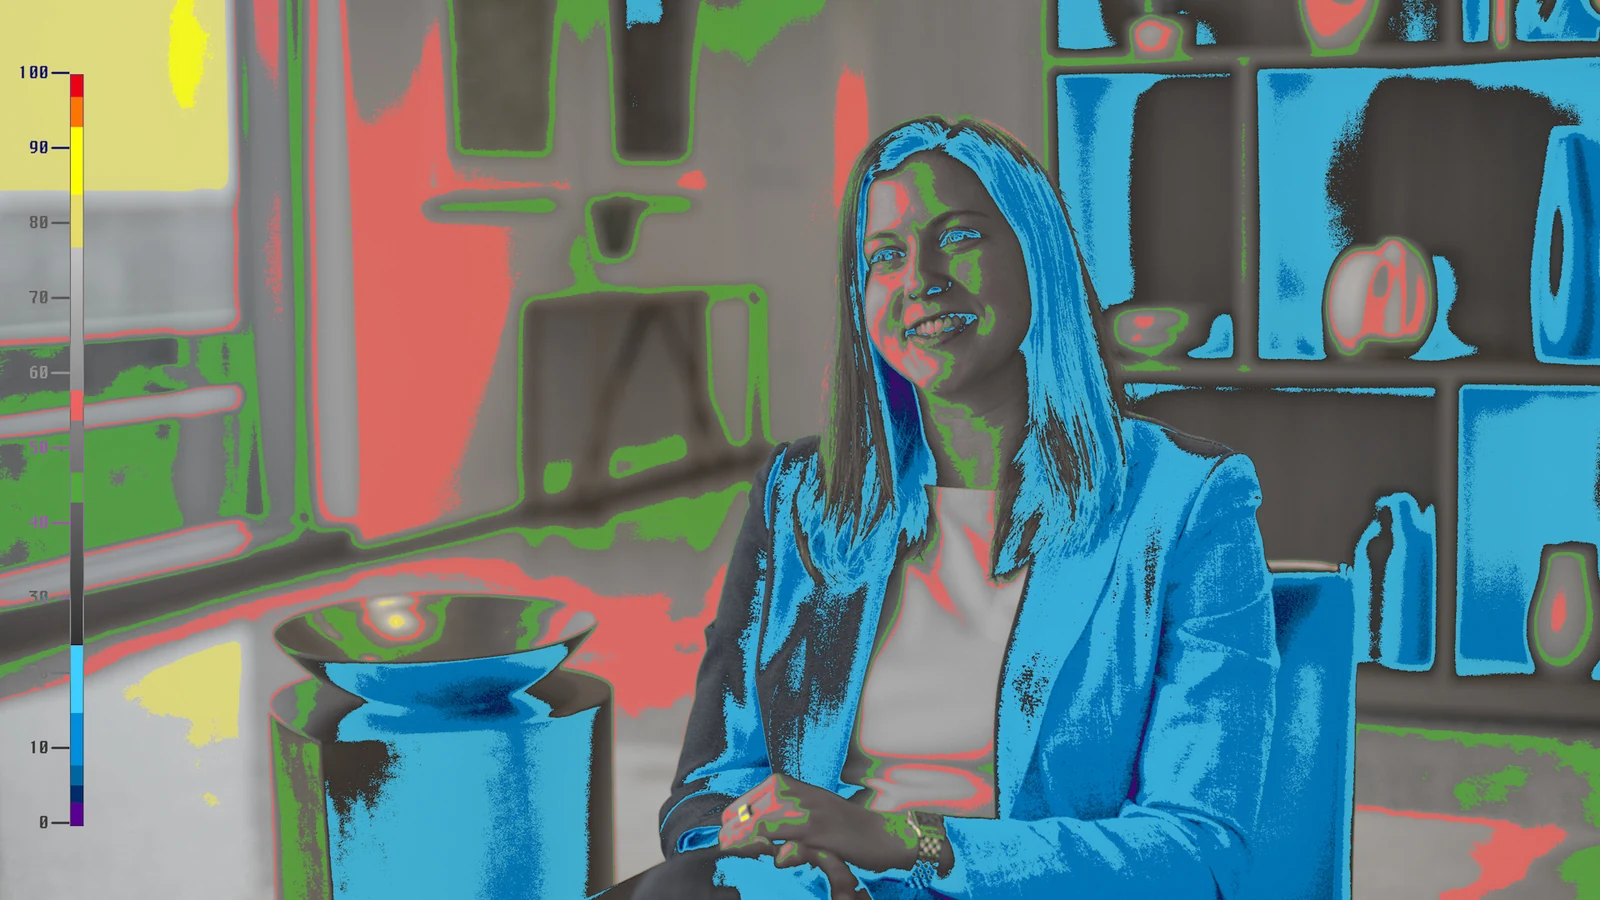
This order matters. If the camera exposure keeps changing after the lighting is built, every source has to be reconsidered. Setting the overall level first creates a stable foundation.
Supplement the daylight instead of replacing it
The window provided the direction of the key, but I still needed control over the subject’s level and the softness of the light.
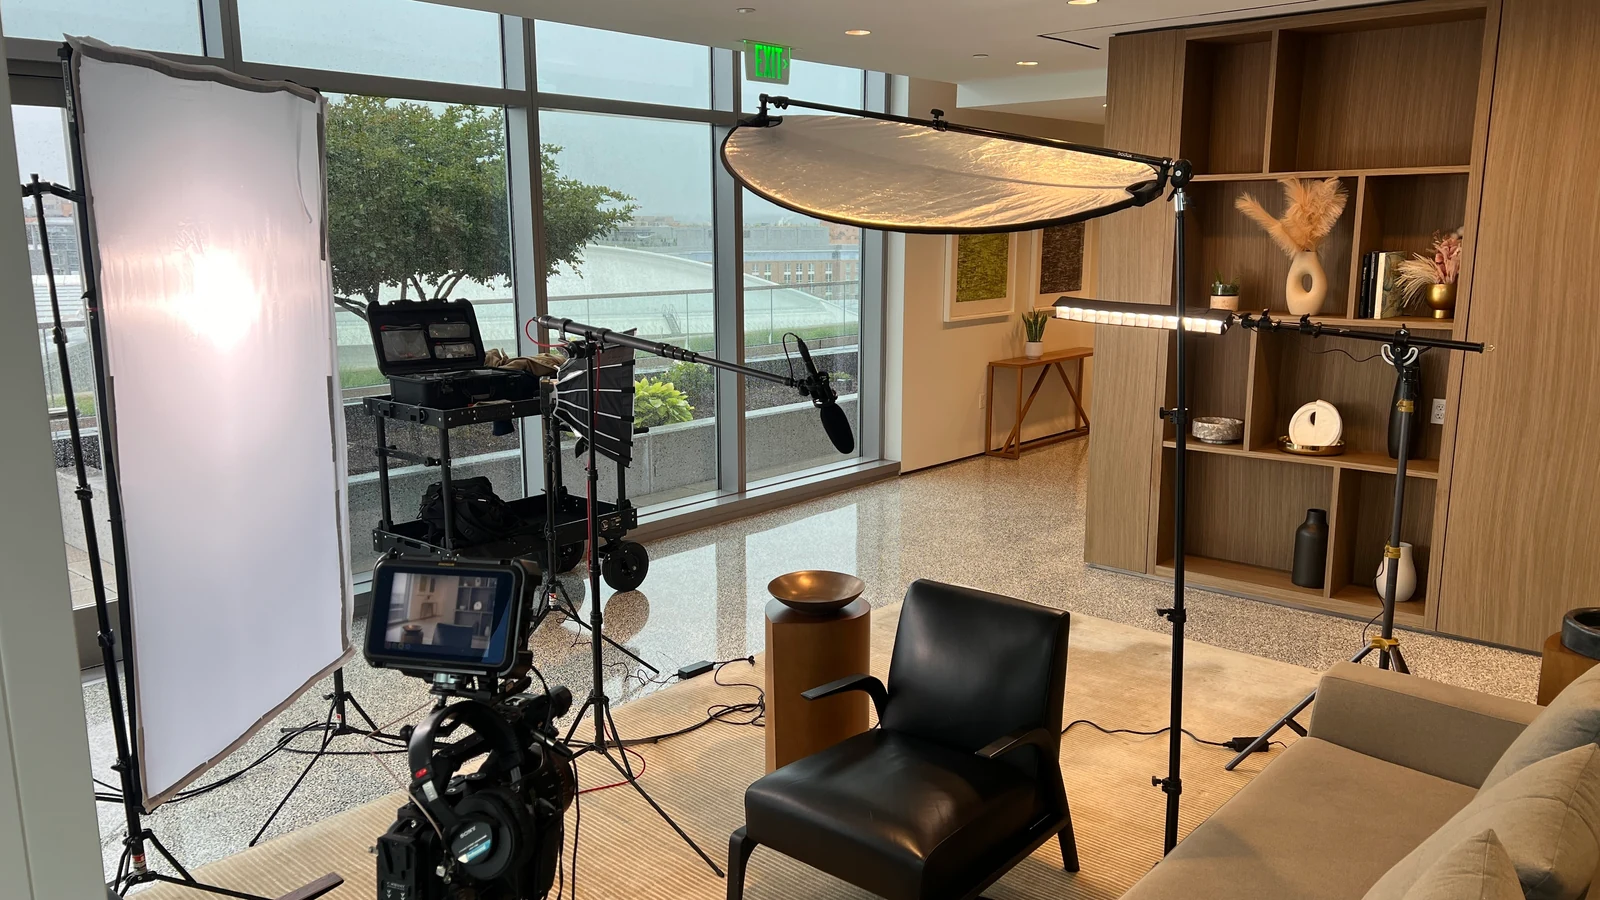
I used a four-by-six-foot diffusion frame vertically beside the subject. The frame softened both the daylight entering from that direction and the controlled key placed behind it.
The distance between the fixture and diffusion allowed me to change the character of the source. Moving the fixture farther from the frame spread the light and created a softer source. Moving it closer made the source more concentrated.
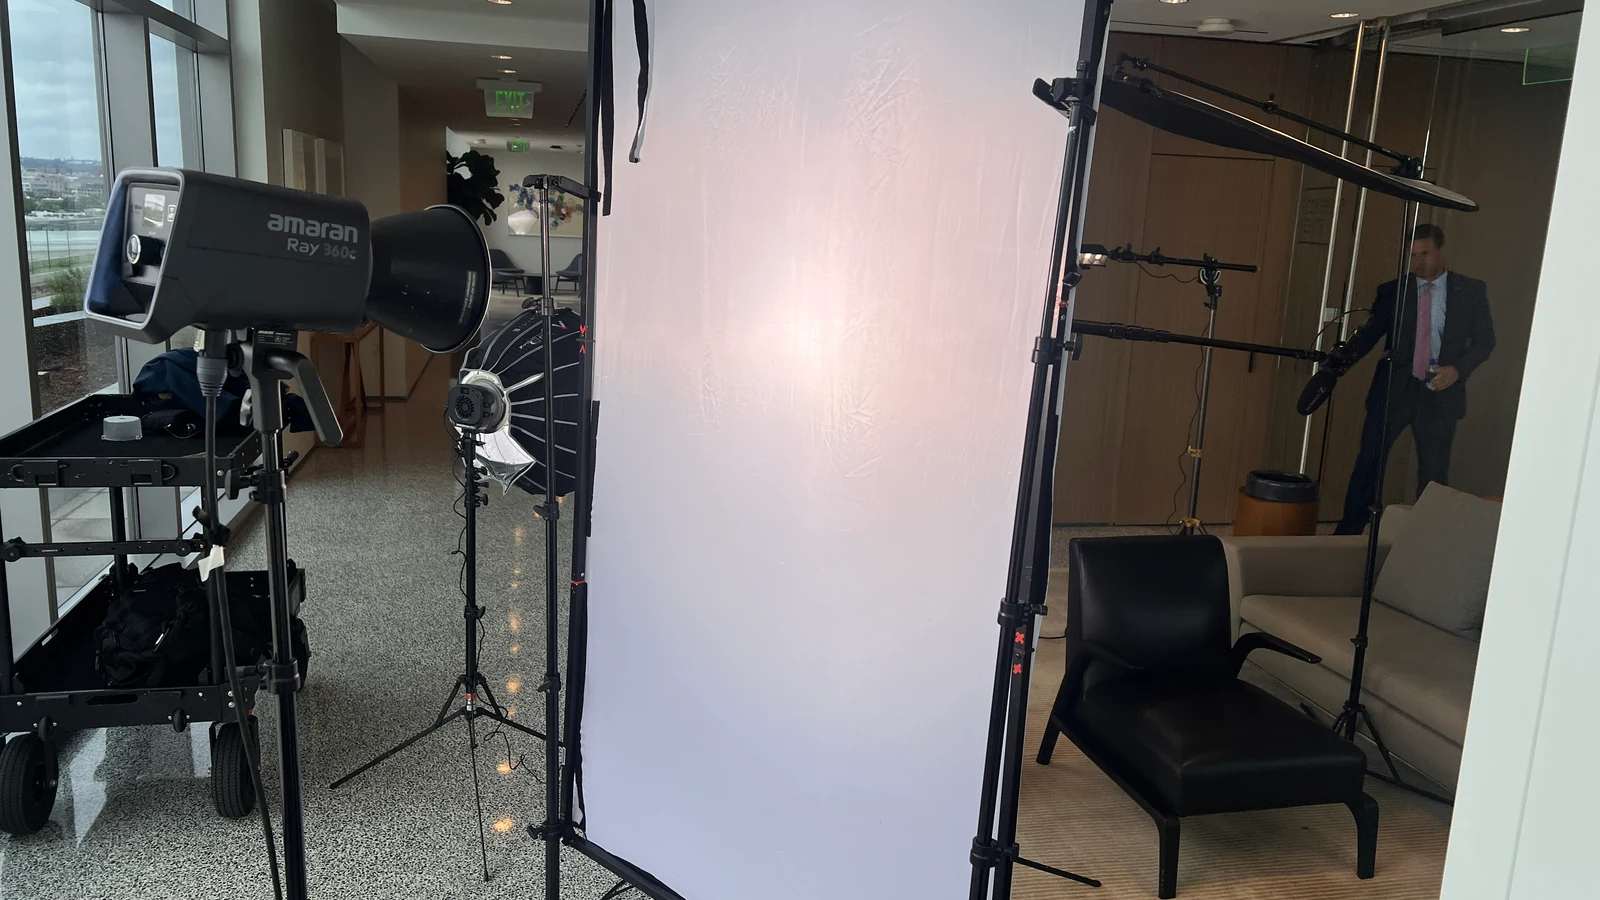
The key was not there to invent a new direction. It supplemented the daylight and gave me precise control over the exposure of the subject’s face.
I could watch false color while a crew member adjusted the fixture, or make the change remotely through the lighting app, until the skin landed where I wanted it.
Subtract light when the room has too much
Once the key was working, the ceiling fixtures became more noticeable on the subject.
Because I could not switch them off, I placed a small black overhead flag above her. It blocked much of the direct ceiling light and also introduced a little negative fill.
I could have created more contrast by bringing a larger negative closer to the camera-facing side, but the image did not need to become dramatically dark. The goal was controlled shape, not contrast for its own sake.
This is why lighting is not only about adding fixtures. In a daylight-filled location, subtraction can be just as important.
Create separation where the frame needs it
The subject’s dark hair sat against a dark section of the bookshelf. Without separation, those tones would merge.
I added a tube fixture behind her to create a narrow highlight along her hair and shoulder. The purpose was not to make the presence of a backlight obvious. It was simply to define the edge of the subject against the background.
The bookshelf also became too dark after the ND was added. I raised it with a separate soft source, but the direction of that light was critical.
I angled the fixture to mimic the window rather than oppose it. That preserved believable shadows across the shelves and created a natural gradient instead of flattening the entire background to one level.
The full setup supports one visual idea
Viewed from behind the camera, the setup included several pieces: the window, diffusion, a controlled key, overhead negative, tube backlight, and a background source.
But none of those decisions existed independently.
Every source supported the same visual idea: a bright, professional, open environment with enough contrast and separation to keep the subject as the focus.
The finished image
The final interview feels warm and polished without losing the natural character of the location.
The window establishes openness and motivates the key. The subject remains bright enough to command attention. The backlight separates her from the bookshelf. The background retains depth and texture, while the warmer practical ambience helps communicate approachability.

A repeatable process for location lighting
Every location is different, but the decision-making process can remain consistent:
- Define what the image needs to communicate. Begin with the story and the client’s objectives.
- Observe before unloading equipment. Identify useful natural light, depth, color, and existing practical sources.
- Recognize what you cannot control. Windows, ceiling fixtures, and changing daylight need to become part of the plan.
- Choose the frame and lighting direction. Let visible sources motivate the subject’s placement whenever that choice supports the image.
- Establish exposure early. Use ND and objective tools such as false color to create a stable foundation.
- Supplement rather than fight. Support useful available light instead of replacing it without a reason.
- Subtract where necessary. Flags and negative fill can restore shape when the room contains too much uncontrolled light.
- Add separation and background light with purpose. Every source should solve a specific problem inside the frame.
Final thoughts
The goal is not to force every location into the same lighting setup.
It is to understand the room’s strengths, recognize its limitations, and use the tools you have to create the strongest image possible.
That is why cinematic lighting is not really about the lights.
It is about observation, intention, and making every technical decision support the story.
If you would like to learn more about exposure, camera control, lighting, composition, and creating more intentional images, be sure to check out my online course, Essential Camera Settings.
by Chris Tinard © cNOMADIC 2026
Learn more about cNOMADIC’s cinematography philosophy and training at cNOMADIC.com.