
How I Lit a Bad Conference Room | Cinematography Breakdown
Aug 17, 2026How I Lit a Bad Conference Room | Cinematography Breakdown
When our planned location fell through, I had to turn a flat white conference room into a controlled interview setup. Here is how I reduced the ambient light, rebuilt the image one layer at a time, and used contrast to create depth.
We had already spent about two hours building a cinematic interview setup when we learned that the client did not have authorization to film in that location.
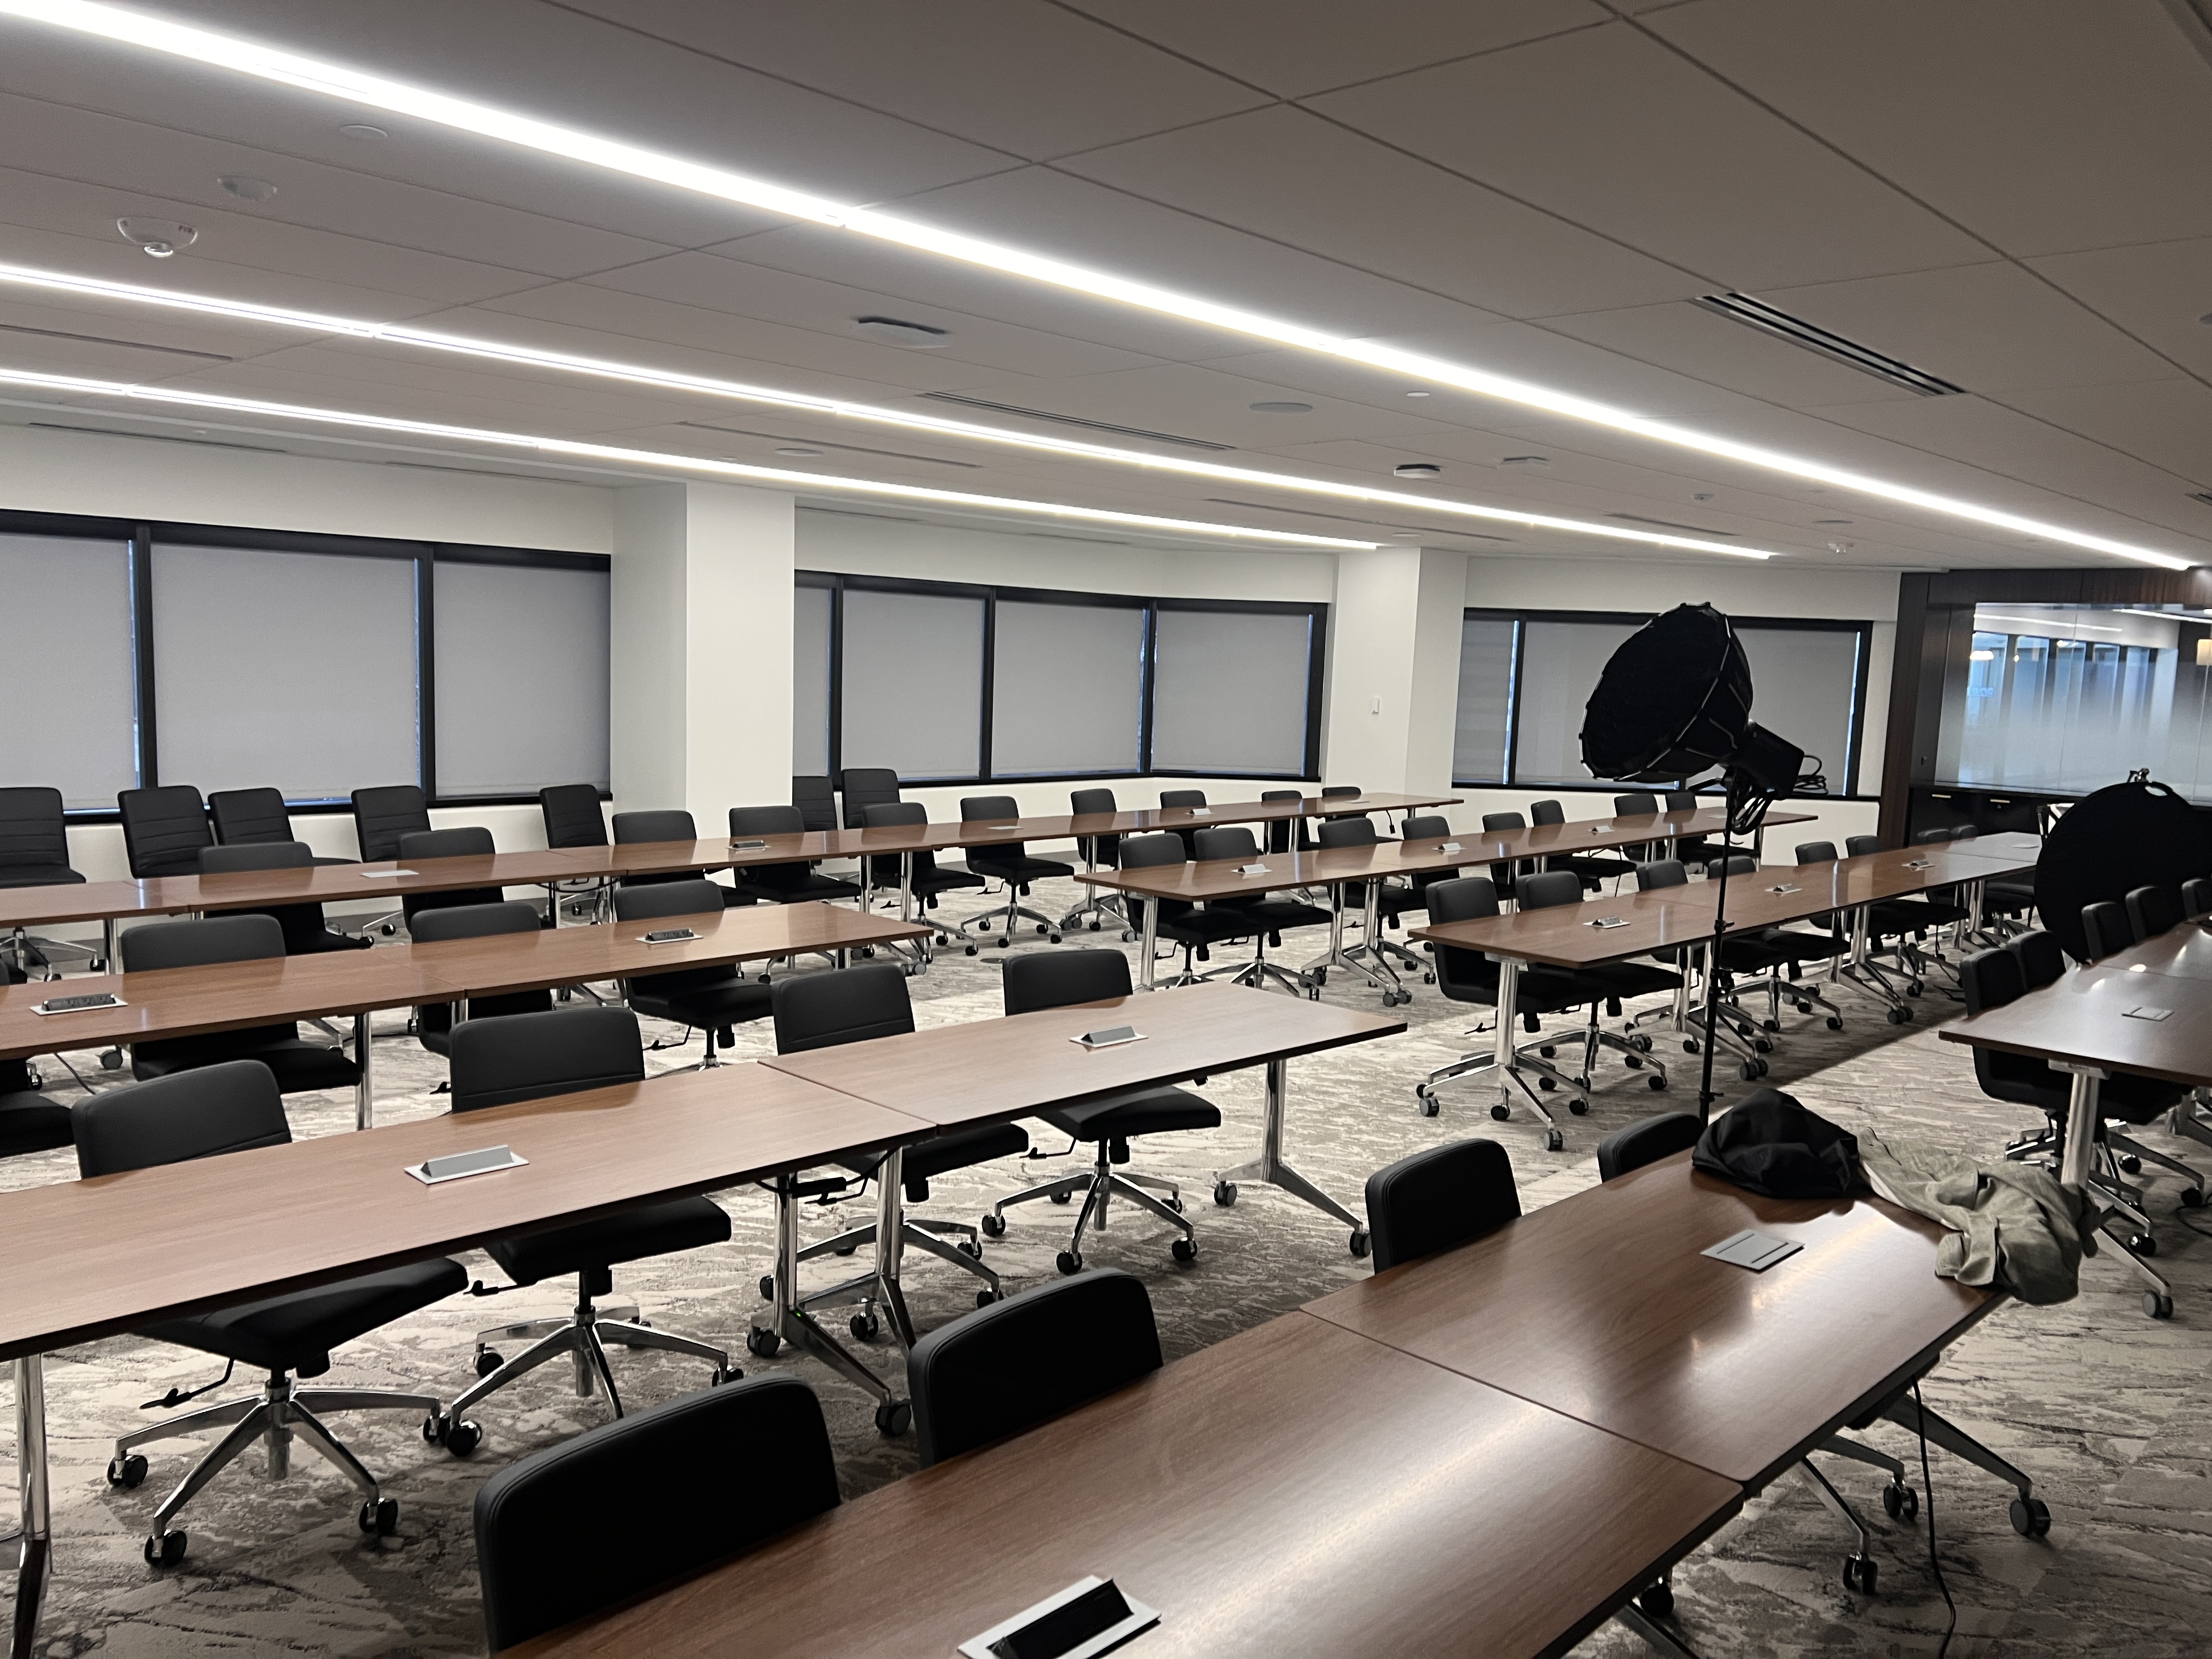
There was no time to keep searching. The available alternative was a conference room with white walls, a white ceiling, and flat overhead light. It was functional, but it had almost none of the depth or separation I wanted for the interview.
The solution was not to add more light to an already bright room. It was to take control of the existing light first, then rebuild the frame deliberately.
Start by lowering the room, not lighting the subject
My first objective was to create a meaningful difference between highlights, midtones, and shadows. With the room sitting at a high ambient level, every surface wanted to live in the same tonal range.
I added three stops of neutral density, set the lens to f/1.2, kept the shutter at 180 degrees—1/48 second for this frame rate—and worked at the camera's native ISO 800. The ND did not change the character of the room by itself. It simply lowered the ambient exposure enough to give the fixtures room to shape the image.
That is an important distinction. ND is not only a tool for maintaining a shallow depth of field outdoors. In a bright interior, it can also help suppress uncontrolled ambient light so the lighting you add becomes the dominant visual information.
Create a background gradient before building the face
The white wall behind the subject needed shape. A flat, evenly lit wall would only reinforce the feeling of a conference room.
I used an amaran 200x with its narrowest 22-degree cone to place a hot spot behind the subject. Even at that setting, the beam was wider than I wanted. A tighter optical modifier or black foil would have helped contain it further, but the available cone was enough to create a transition from bright behind the subject to darker edges around the frame.
That gradient did several jobs at once: it created depth, directed the eye toward the subject, and gave the plain wall a visual structure it did not have on its own.
Turn a fixture into a larger, softer source
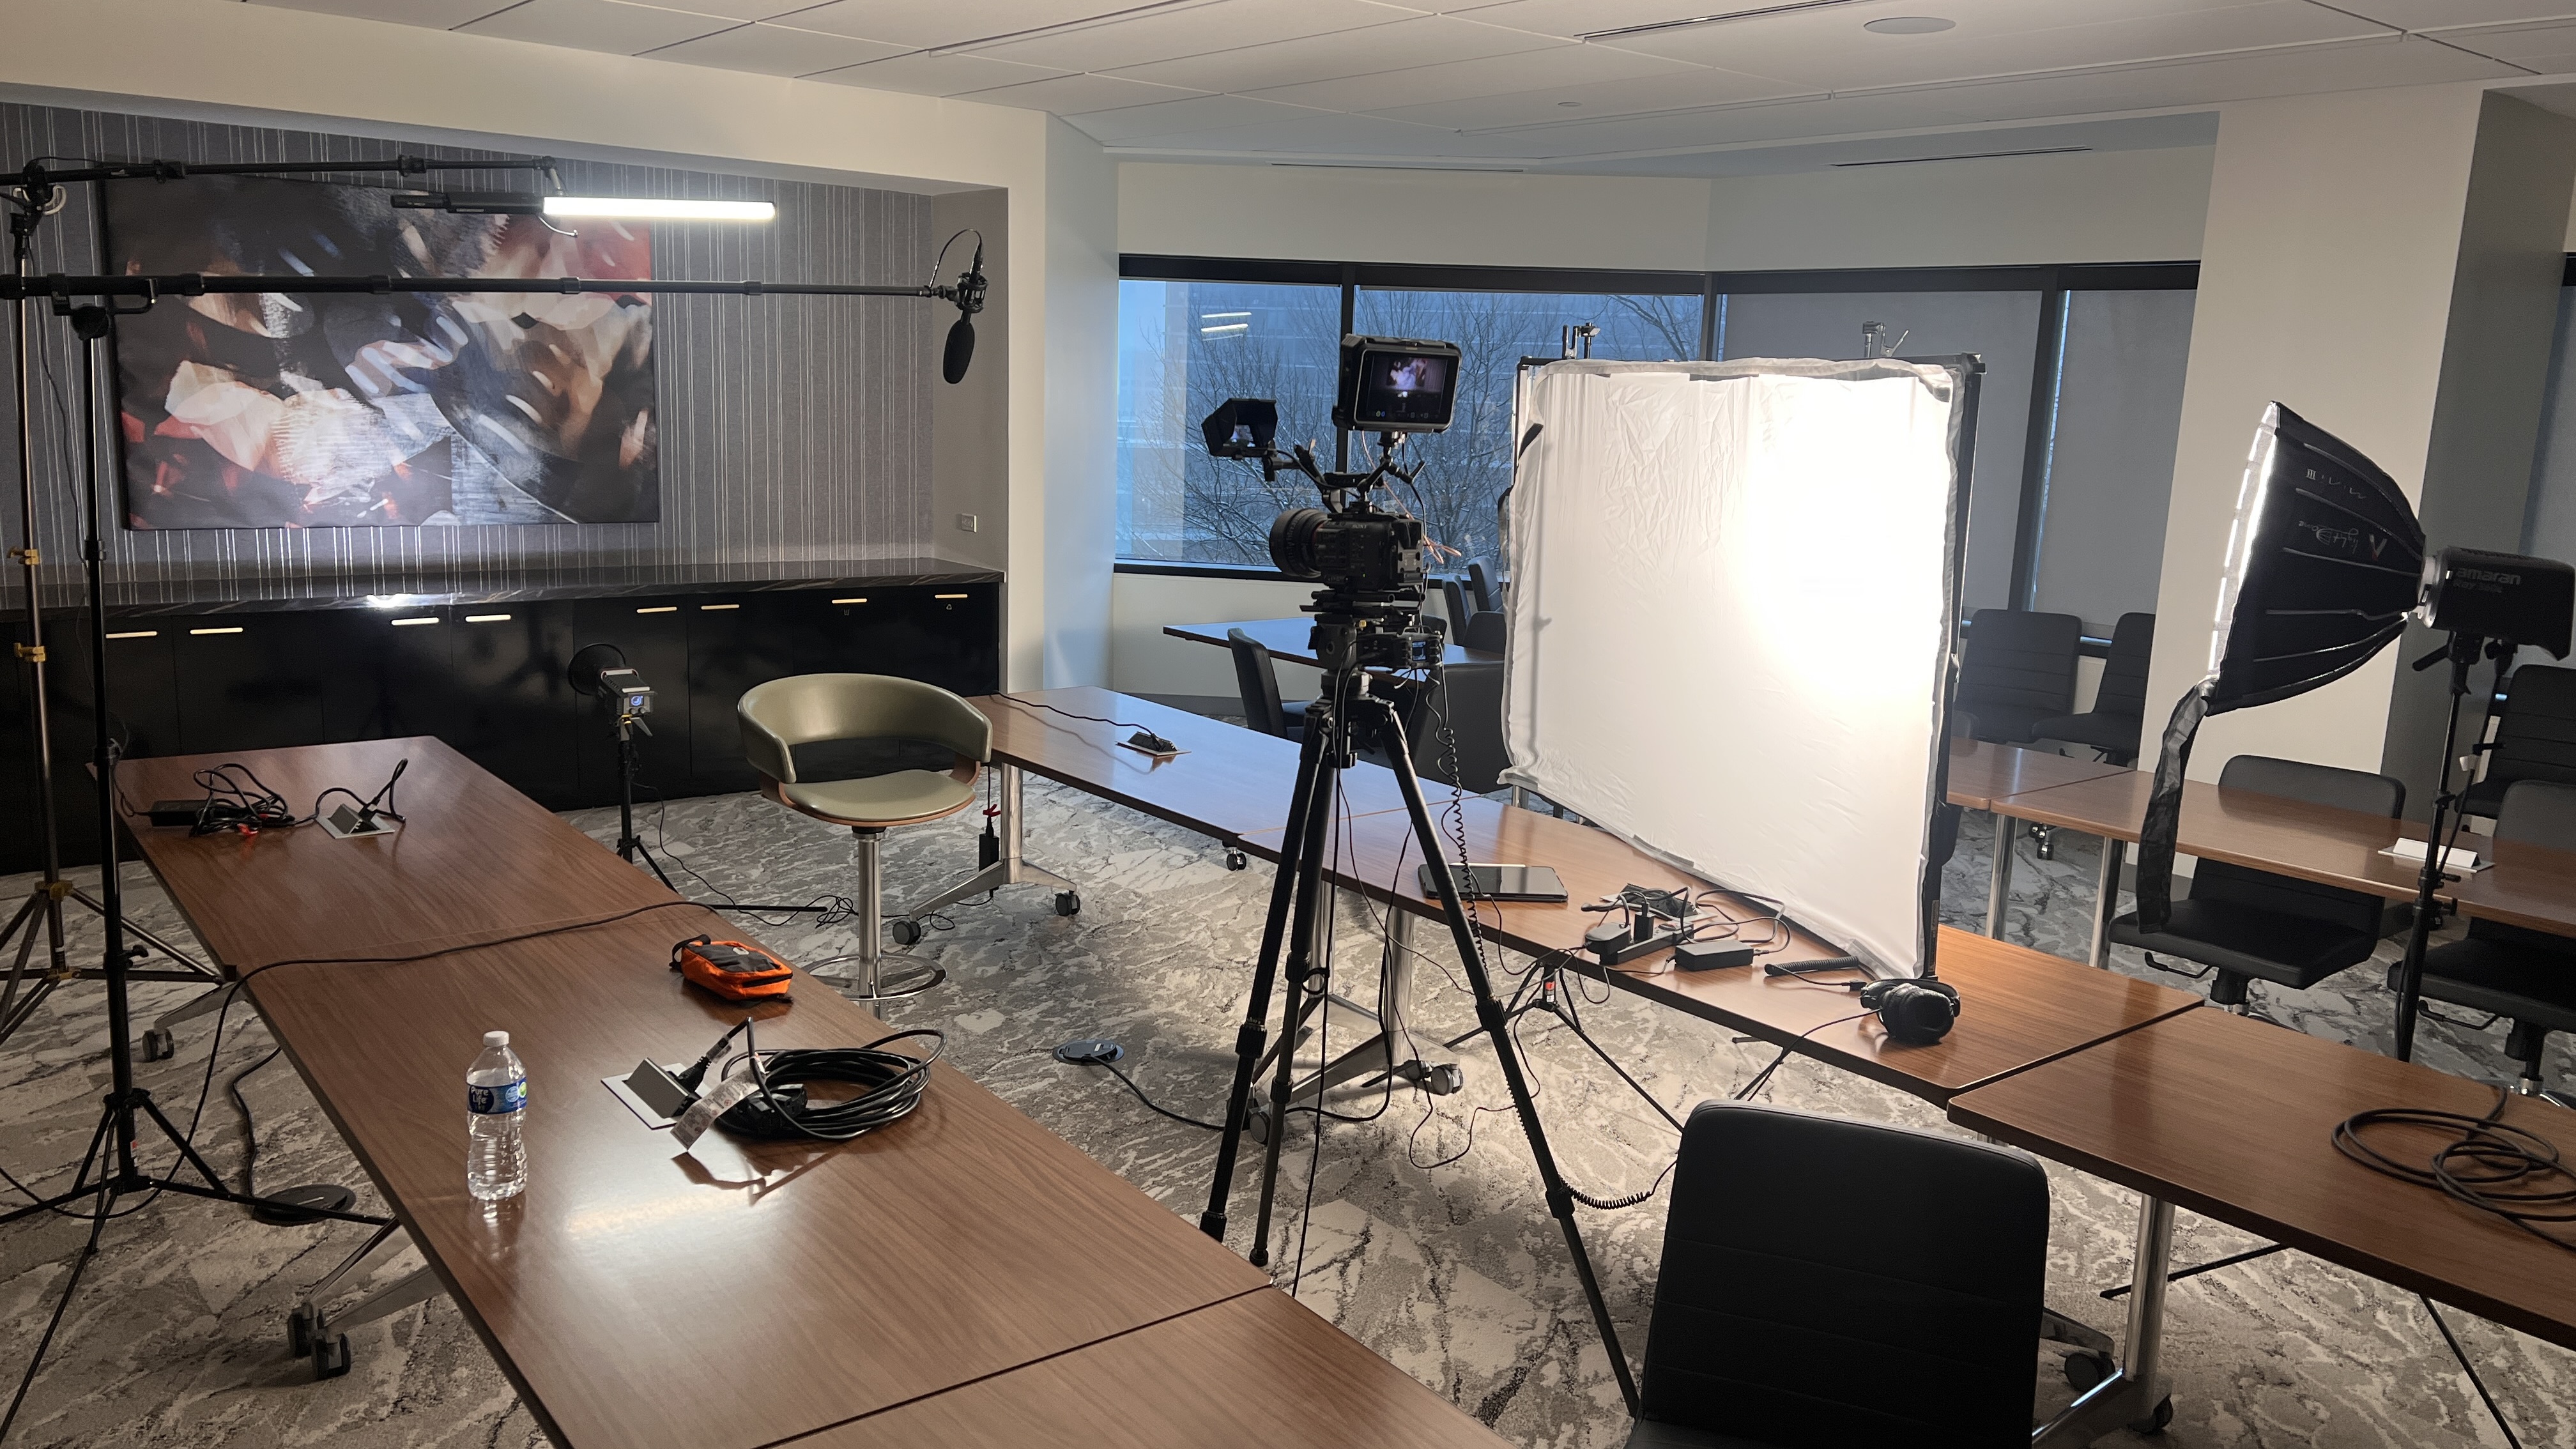
For the key, I used an amaran 360c through a softbox. My first instinct was to keep the grid on the softbox, but the grid made the source too narrow for the position I needed.
I removed the grid and pushed the light through a 4-by-6-foot Scrim Jim with roughly half a stop of diffusion. The extra diffusion increased the apparent size of the source and produced a softer transition across the face. From there, I adjusted intensity until the skin sat at the exposure I wanted.
This is why softness is not defined by the fixture alone. It depends on the apparent size of the source from the subject's position. A softbox can still feel relatively hard if it is too small or too far away. Adding a larger diffusion surface gave me a more forgiving key in a room that otherwise felt clinical.
Use false color to judge relationships, not isolated numbers
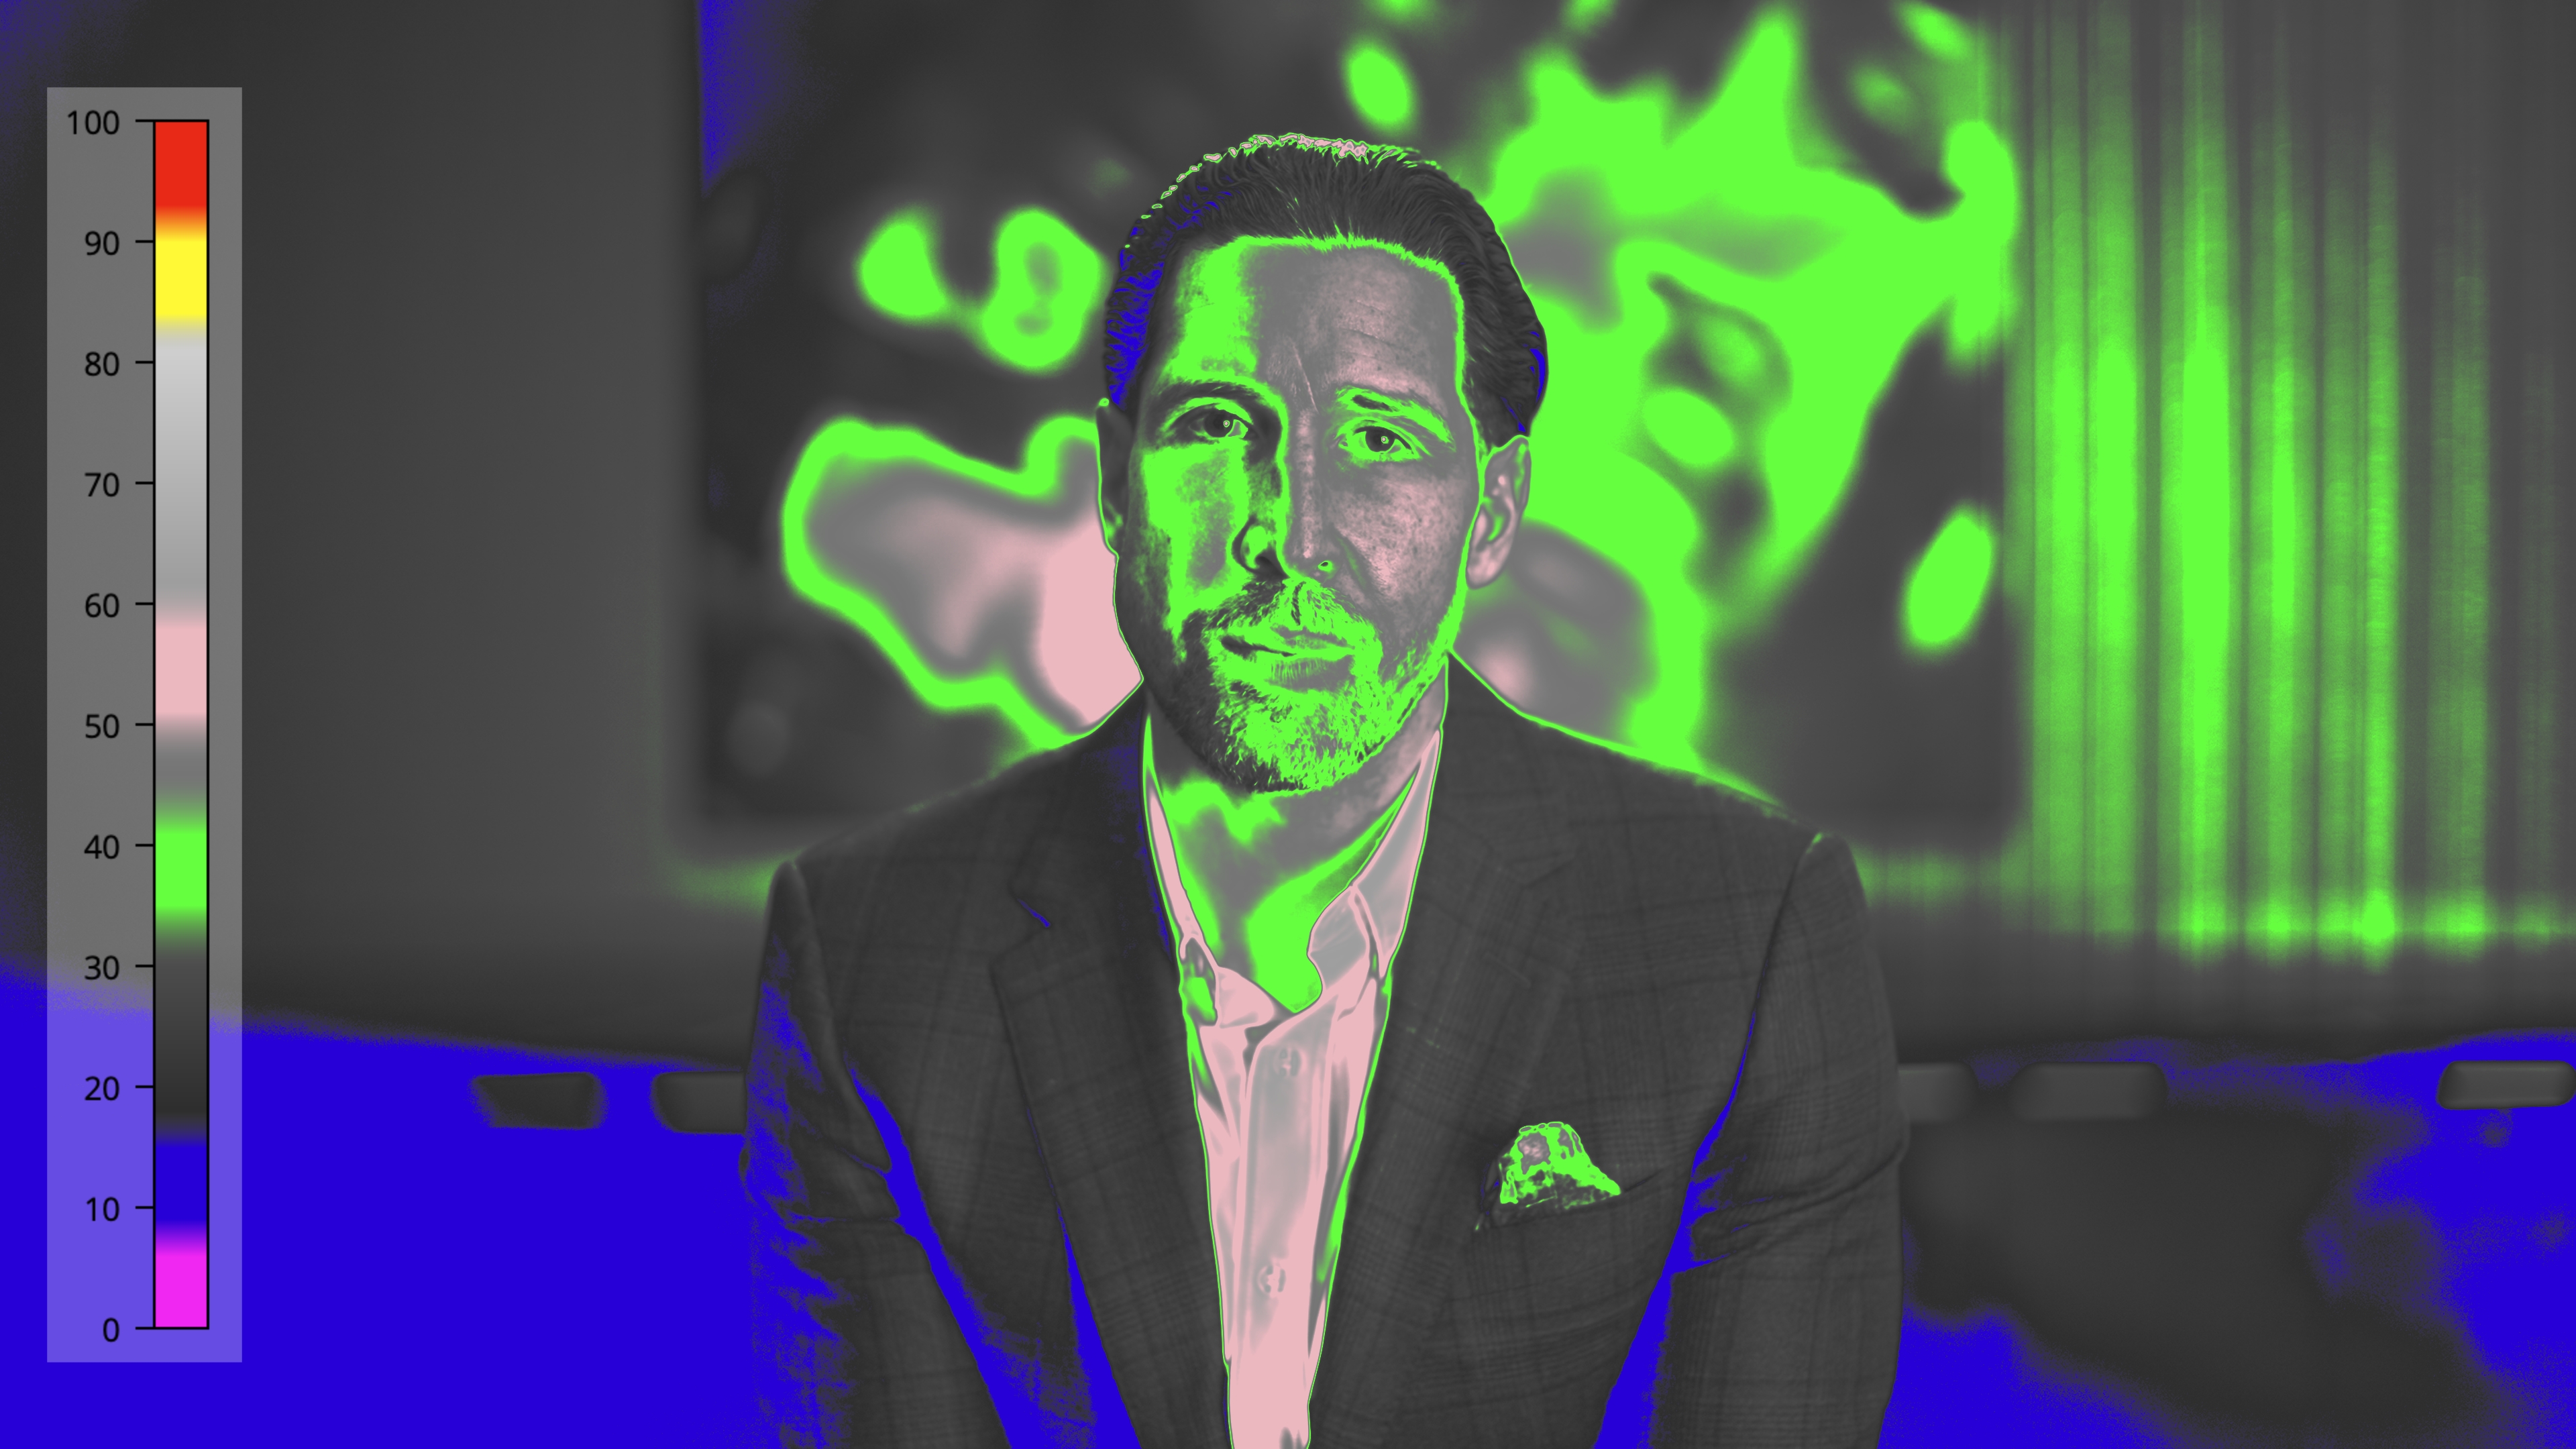
I was not only checking whether the face was exposed correctly. I was looking at the relationship between the key side, the fill side, and the background.
In the S-Log image, the fill side of the face sat at approximately the same level as part of the background. Ideally, I would have liked the background to fall a little darker. But the 200x was already at minimum output. Making the hot spot brighter would have looked unnatural, and moving the light farther away would have widened the beam.
That left me with a practical compromise: protect the face, preserve the gradient, and accept that one part of the background would live closer to the fill-side exposure than I originally intended.
Build contrast with the fill side
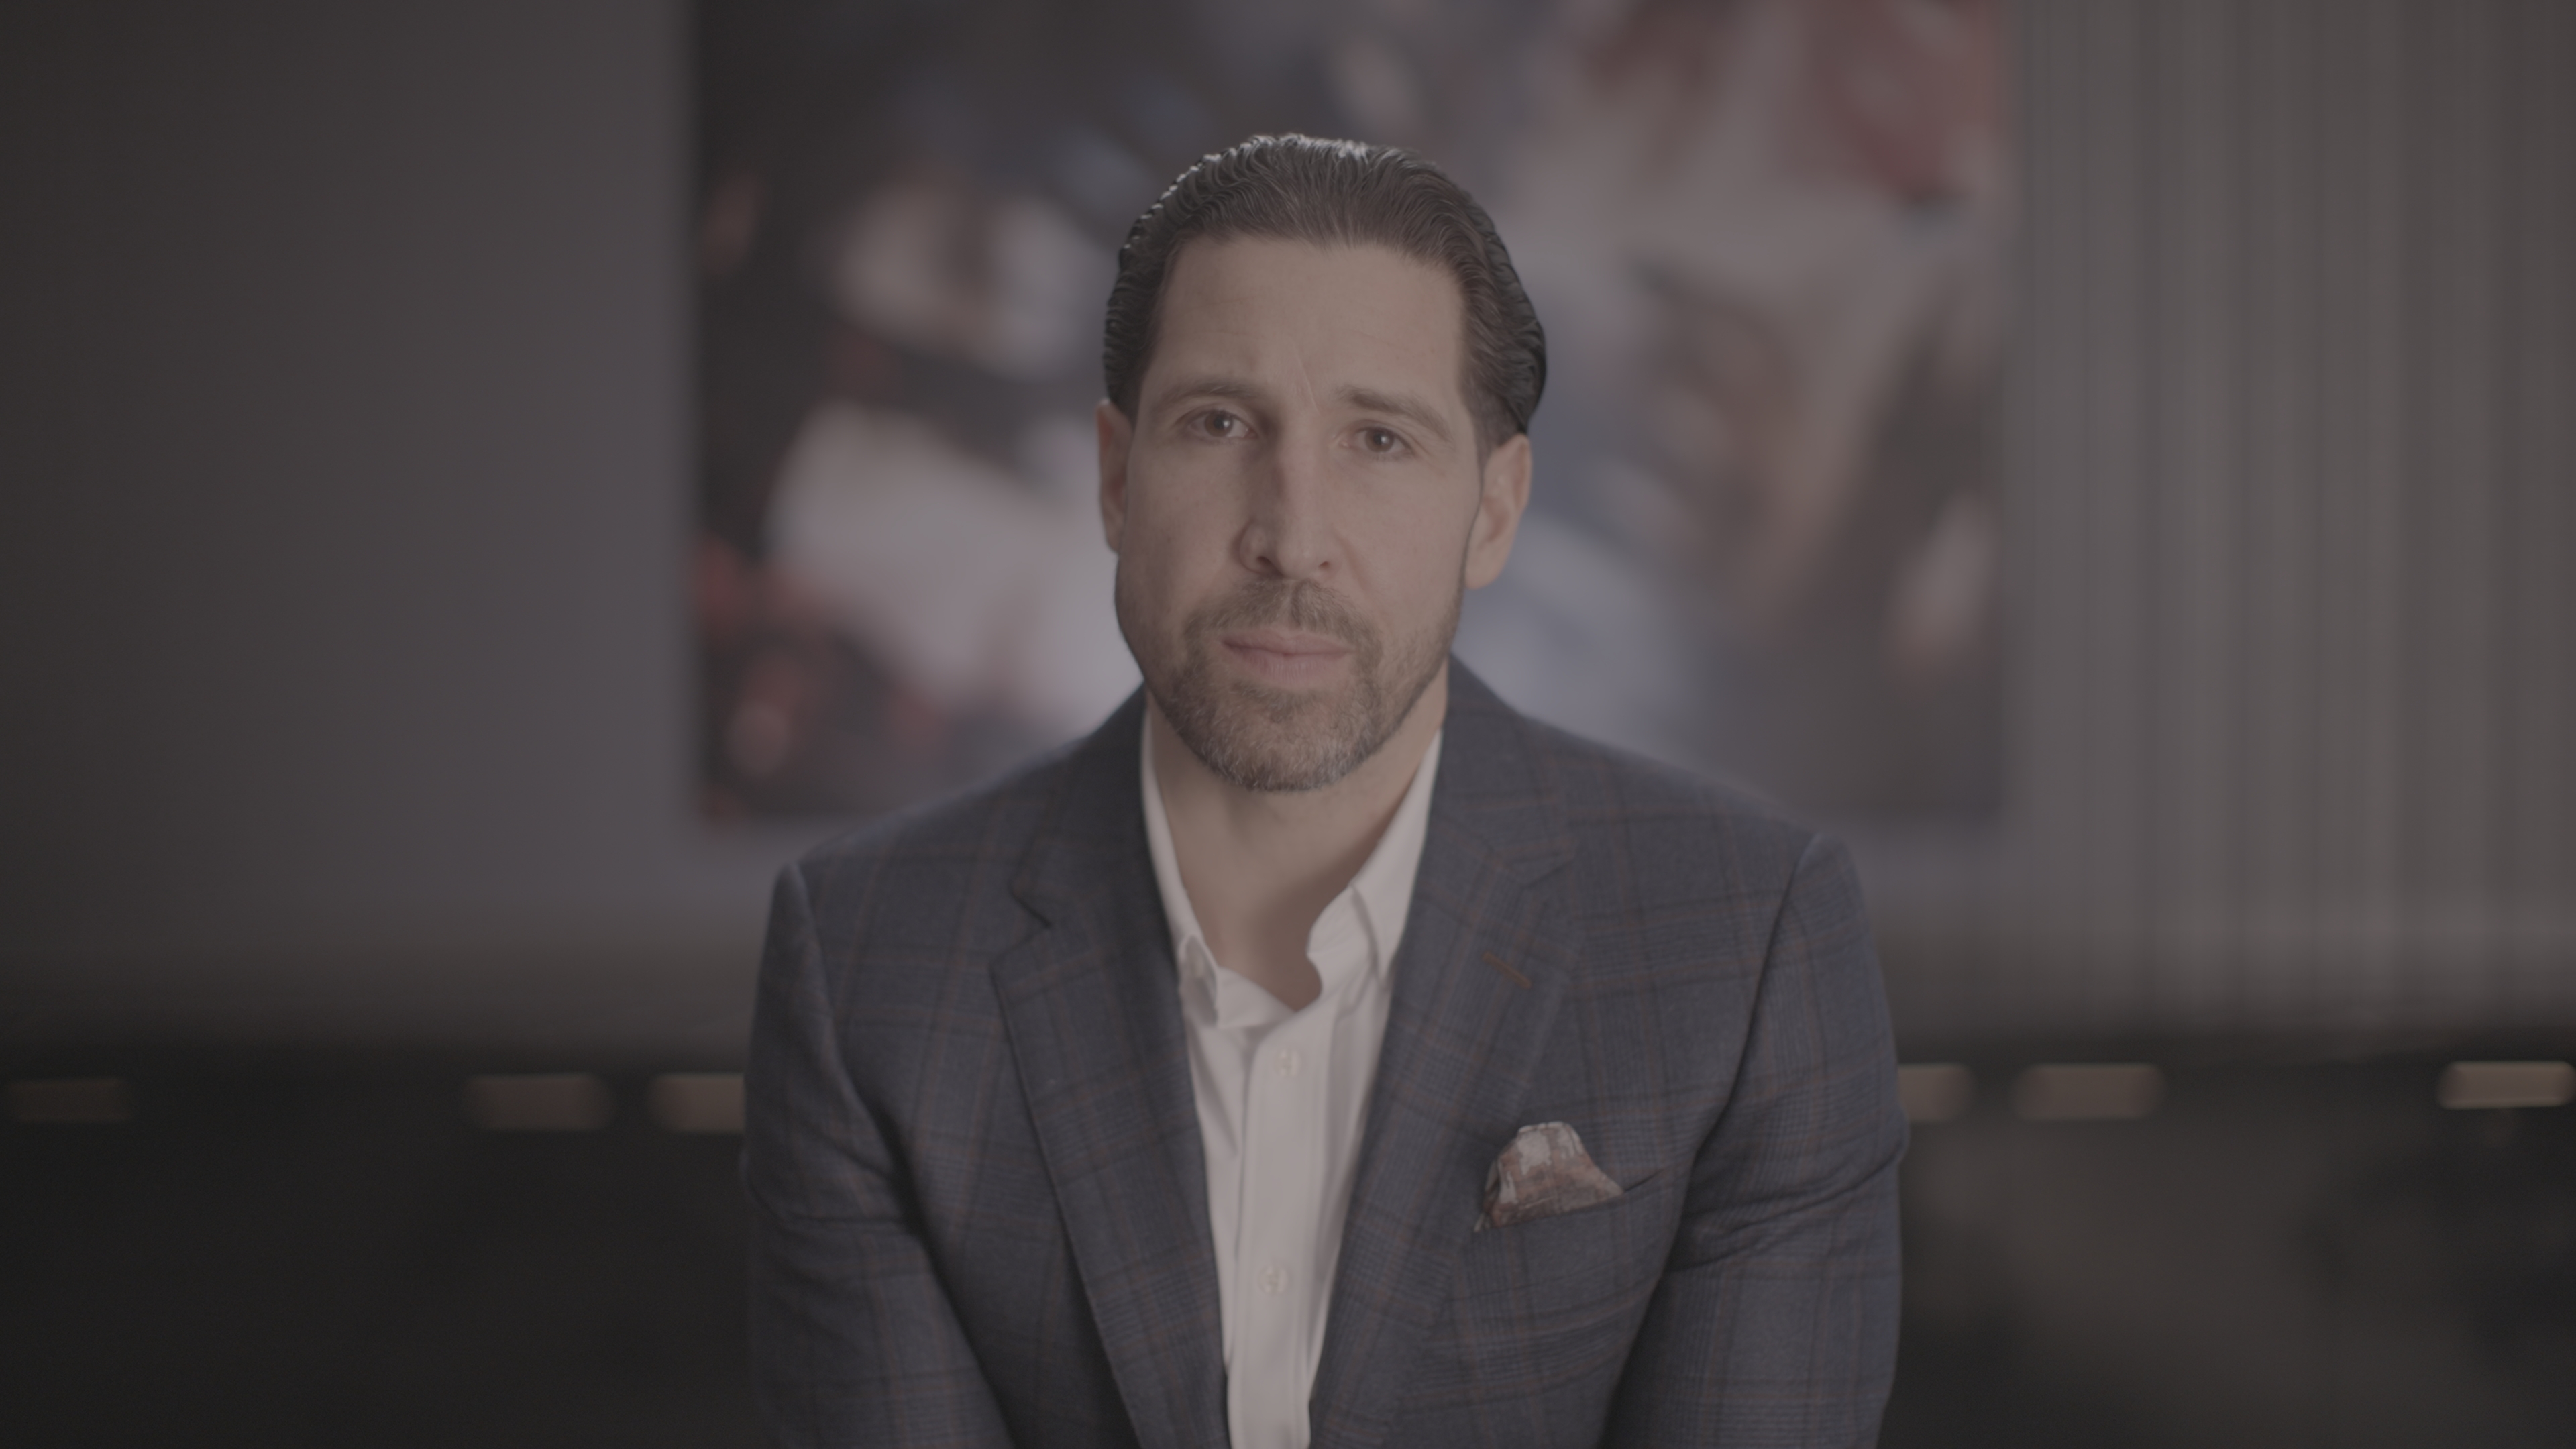
I measured a two-stop difference between the key and fill sides of the face. Two stops equals a 4:1 lighting ratio, which gave the interview enough contrast to feel shaped without becoming too dramatic for the job.
At first, a white bounce was returning too much light into the shadow side. Removing it allowed the fill side to fall and restored the contrast I wanted. I could have added negative fill and taken the ratio another stop darker, but 4:1 felt appropriate for the subject and the project.
The goal was not to chase the highest possible contrast ratio. It was to choose a relationship that supported the image.
Use backlight for separation, not decoration
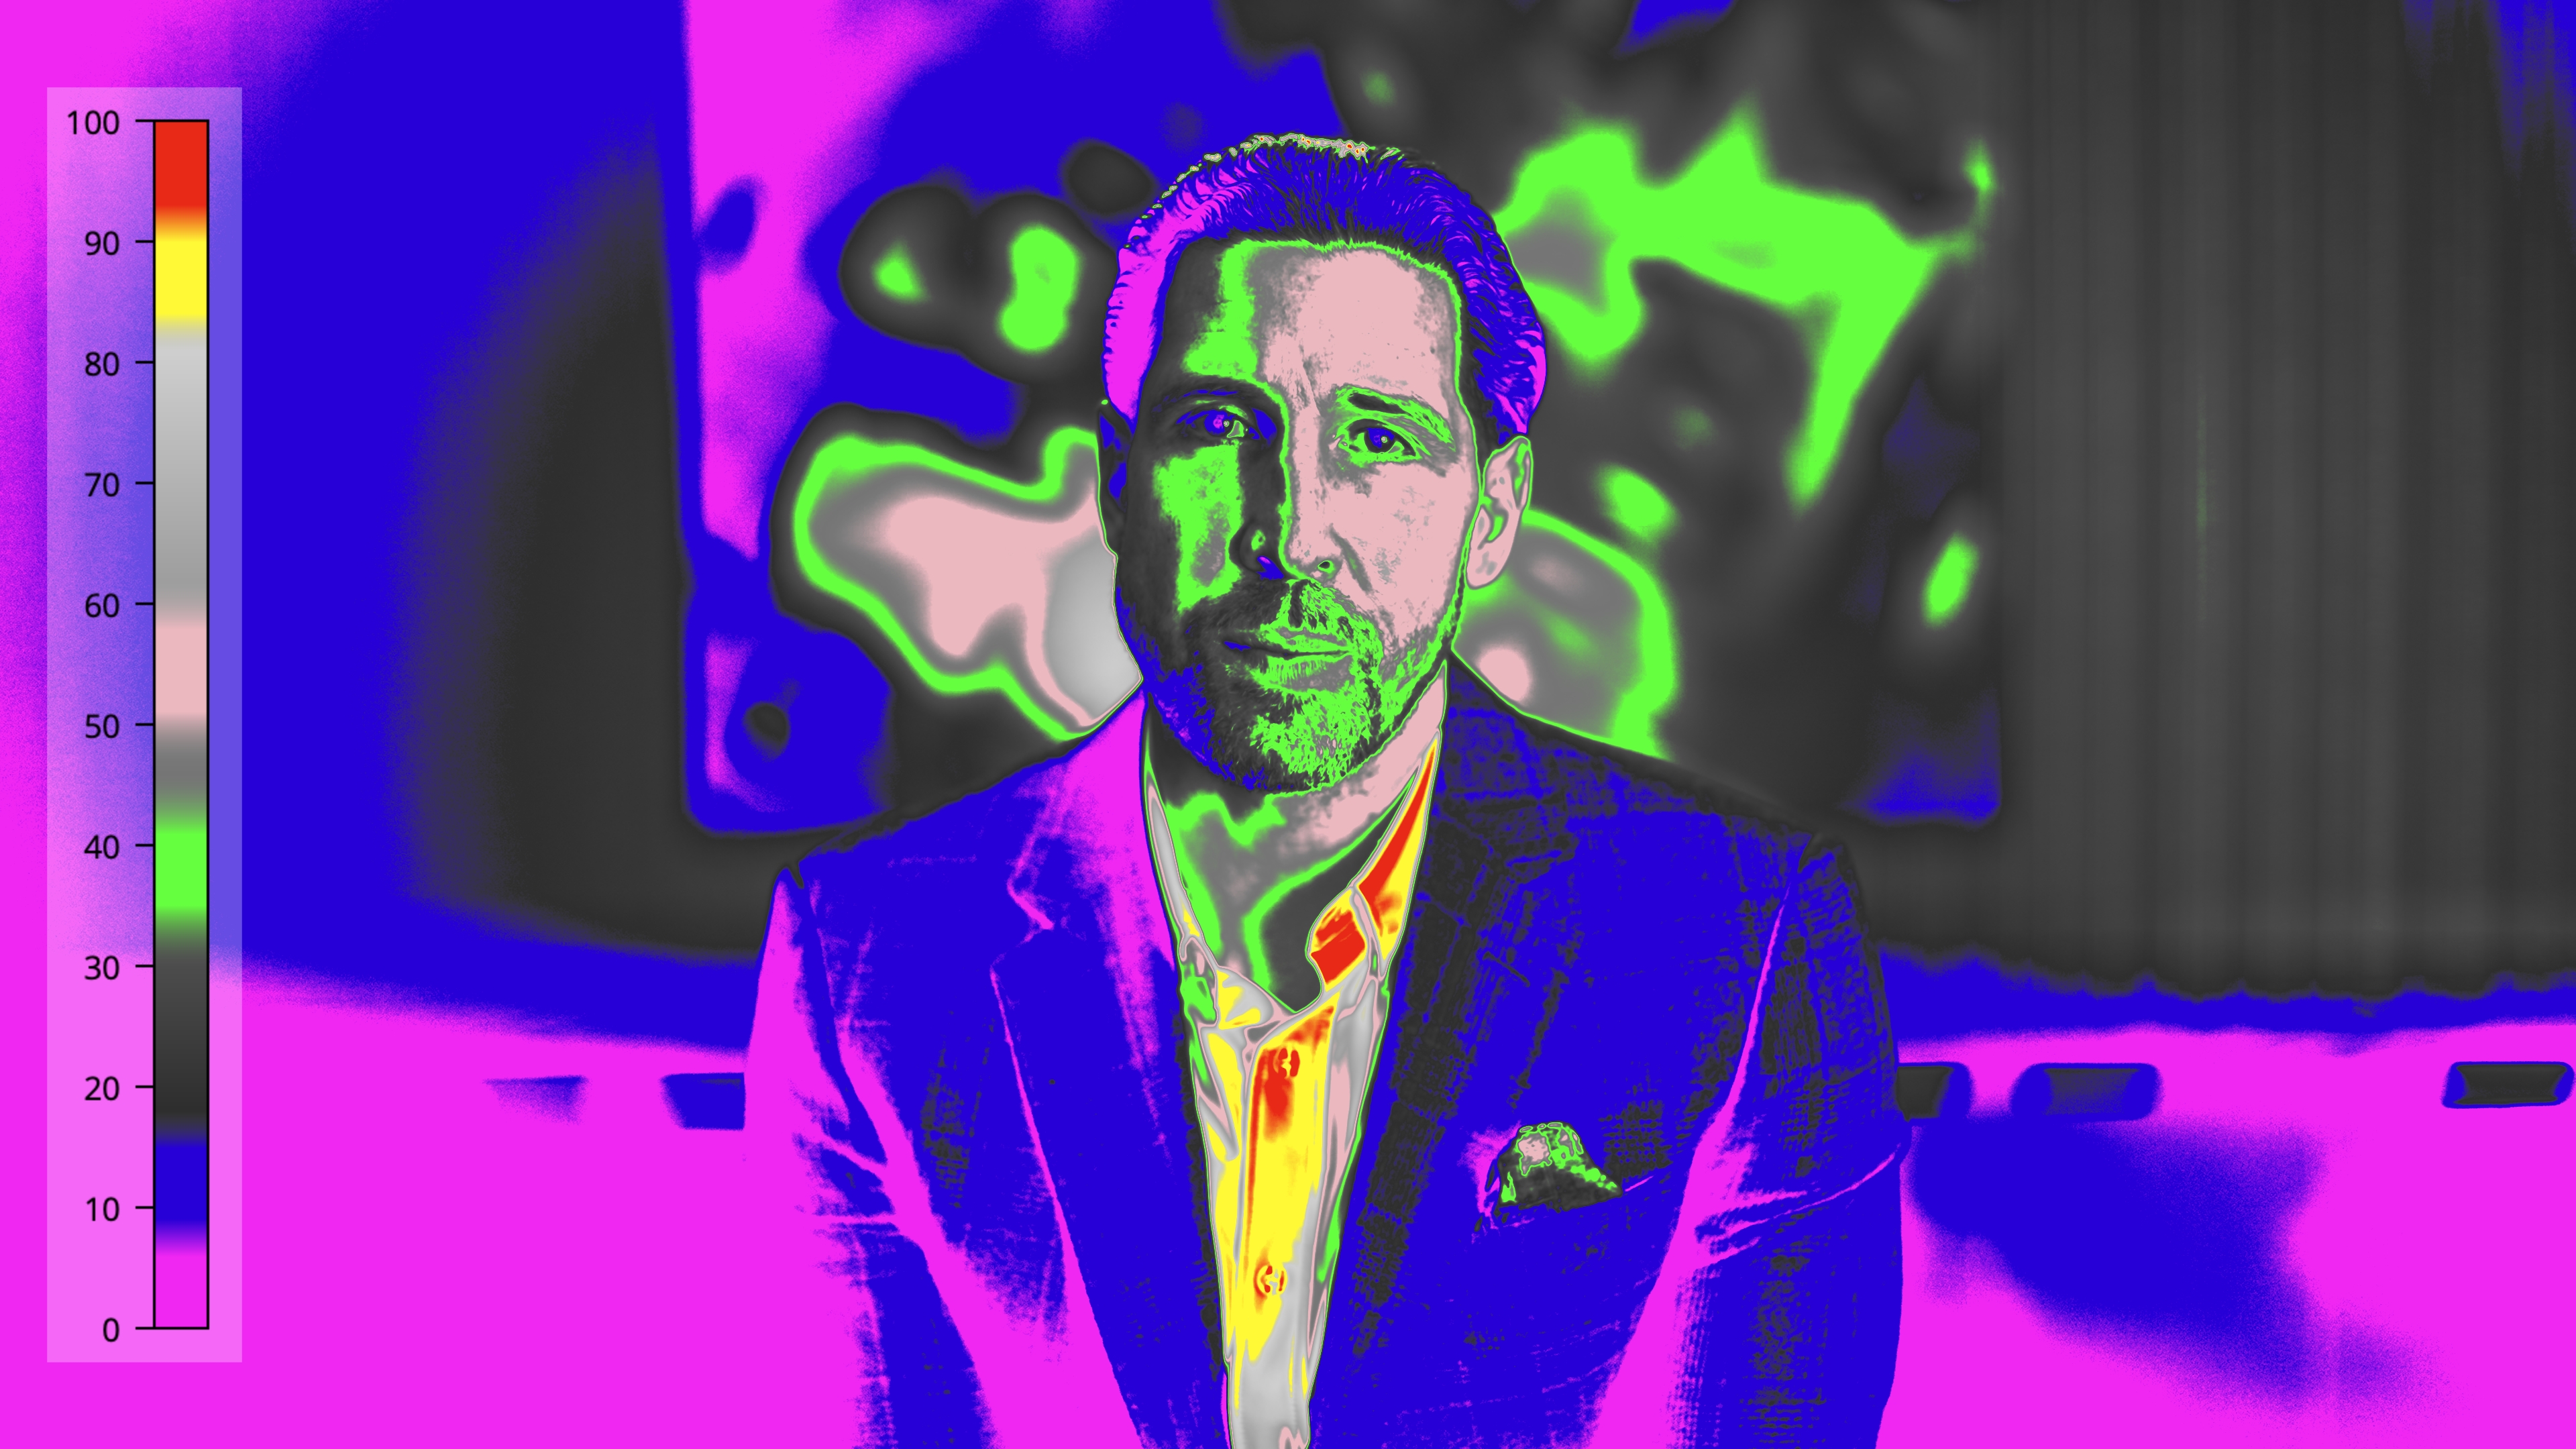
The subject's dark hair and shoulders could easily disappear into the darker areas of the background. A backlight created a controlled edge that separated those shapes without changing the overall direction of the key.
That edge was especially important because the background gradient already carried much of the image's depth. The backlight completed the separation between foreground and background and helped the subject remain dimensional after the image was color corrected.

A repeatable approach for bad interview locations
- Reduce uncontrolled ambient light. Give your fixtures enough exposure range to influence the frame.
- Shape the background first. A gradient or controlled pool of light can create depth before the subject is even lit.
- Build a large key source. Use distance, diffusion, and apparent size to control softness.
- Measure the relationships. Evaluate the key, fill, background, and wardrobe together rather than treating exposure as one number.
- Choose an intentional contrast ratio. Add or remove bounce and negative fill until the ratio fits the subject and the project.
- Add separation where it is needed. Use backlight to define dark hair and shoulders against a dark background.
- Accept the right compromise. When the location or equipment limits one variable, protect the decisions that matter most to the image.
Final thoughts
A bad location does not always need more equipment. It needs a clear order of operations.
Lower the light you cannot control. Decide where the viewer should look. Build the background, key, fill, and separation as individual layers. Then use exposure tools to judge how those layers work together.
This conference room never stopped being a conference room. But by controlling contrast and guiding attention, I could keep its weakest qualities from defining the image.
That is the real work of cinematography: solving the problem in front of you.
If you would like to learn more about exposure, camera control, lighting, composition, and creating more intentional images, be sure to check out my online course, Essential Camera Settings.
by Chris Tinard © cNOMADIC 2026
Learn more about cNOMADIC's cinematography philosophy and training at cNOMADIC.com.