
How I Shoot Interviews in Bad Locations
Jul 13, 2026How I Shoot Interviews in Bad Locations
You do not need a perfect location to create a professional interview. You need a process—and that process begins with the frame, not the lights.
As corporate filmmakers, we are rarely handed the perfect location.
More often, we walk into an office with plain white walls, fluorescent ceiling lights, generic furniture, and very little visual character. Nothing about the room feels cinematic, but the client still expects the interview to look polished, intentional, and professional.
That was exactly the situation on this shoot.
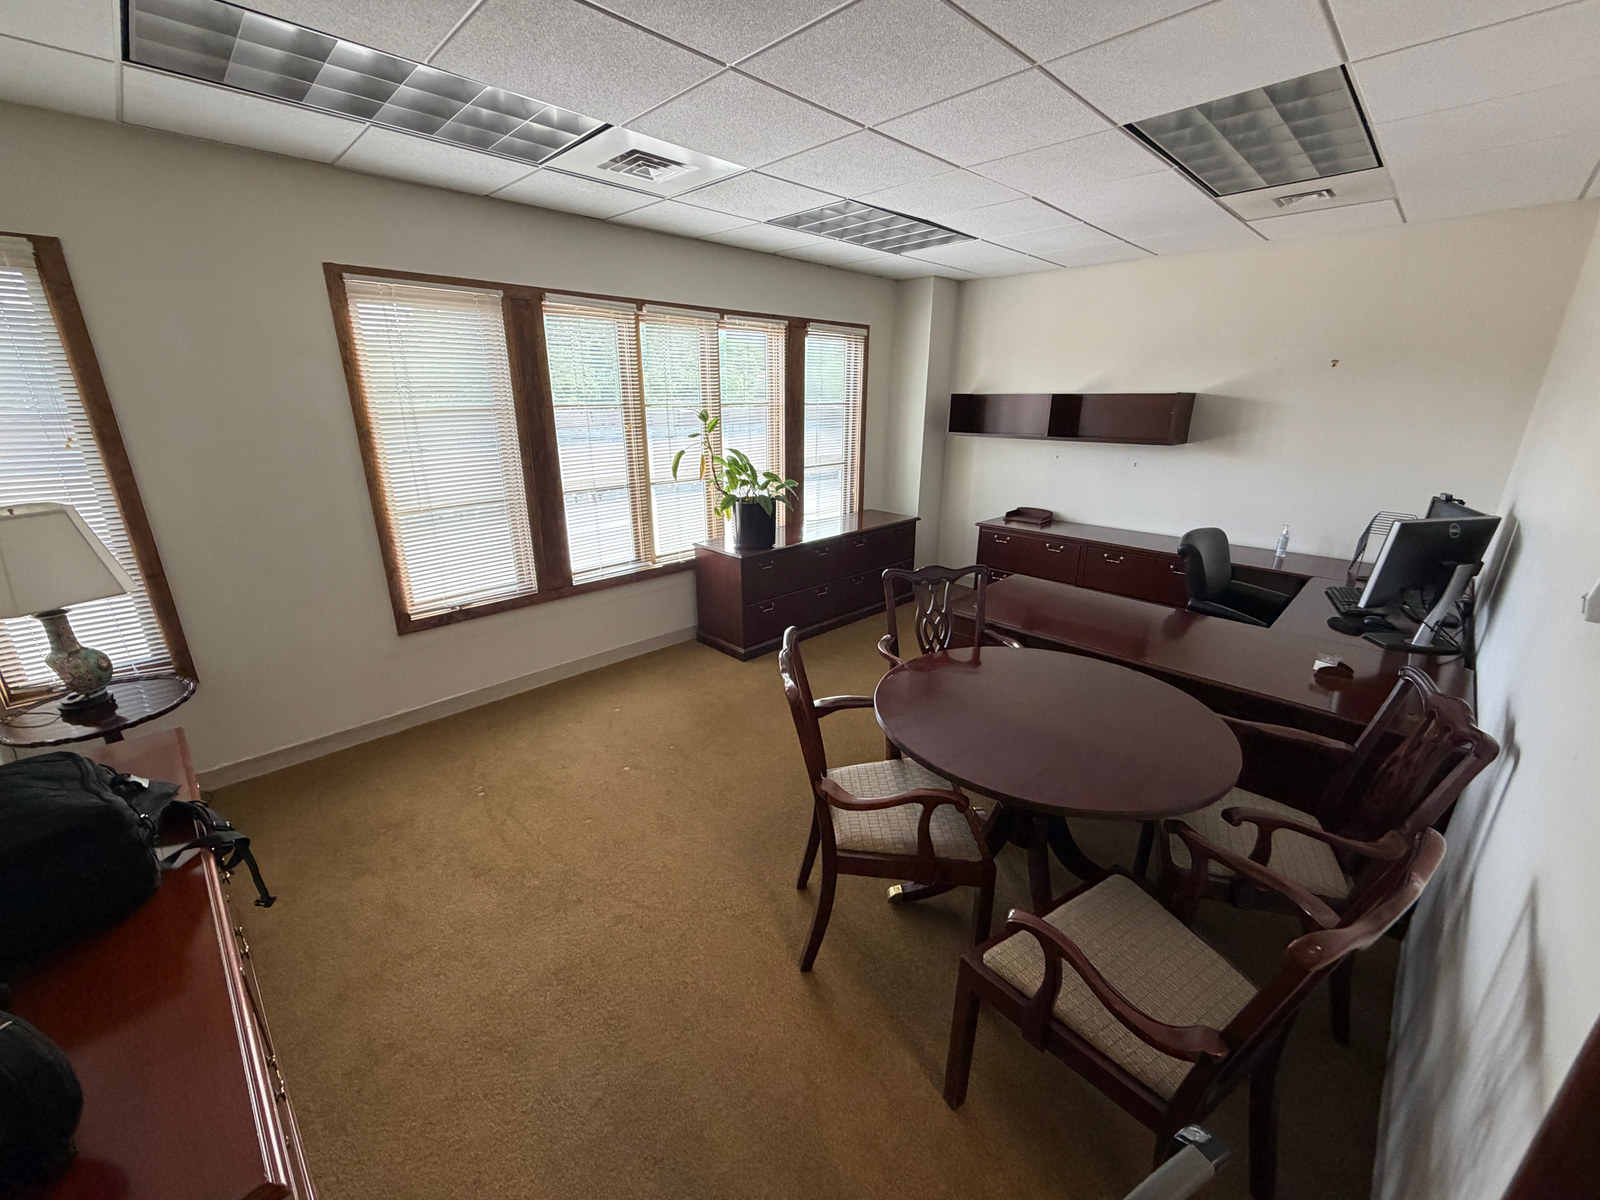
I arrived without photographs or detailed information about the location. The client led me to an office they thought would work, and I immediately knew it would be difficult.
This was not a beautiful room waiting to be photographed. It was the kind of ordinary corporate space we encounter all the time.
The goal was not to pretend that I could transform it into an extraordinary location. The goal was to make thoughtful decisions, control what I could, and create an interview the client would be proud to use.
Start with the camera, not the lighting
When I enter a difficult room, I do not begin by building lights.
Lighting has to support the frame. If I do not know where the camera will be, where the subject will sit, and what the background will contain, I cannot make an intelligent lighting decision.
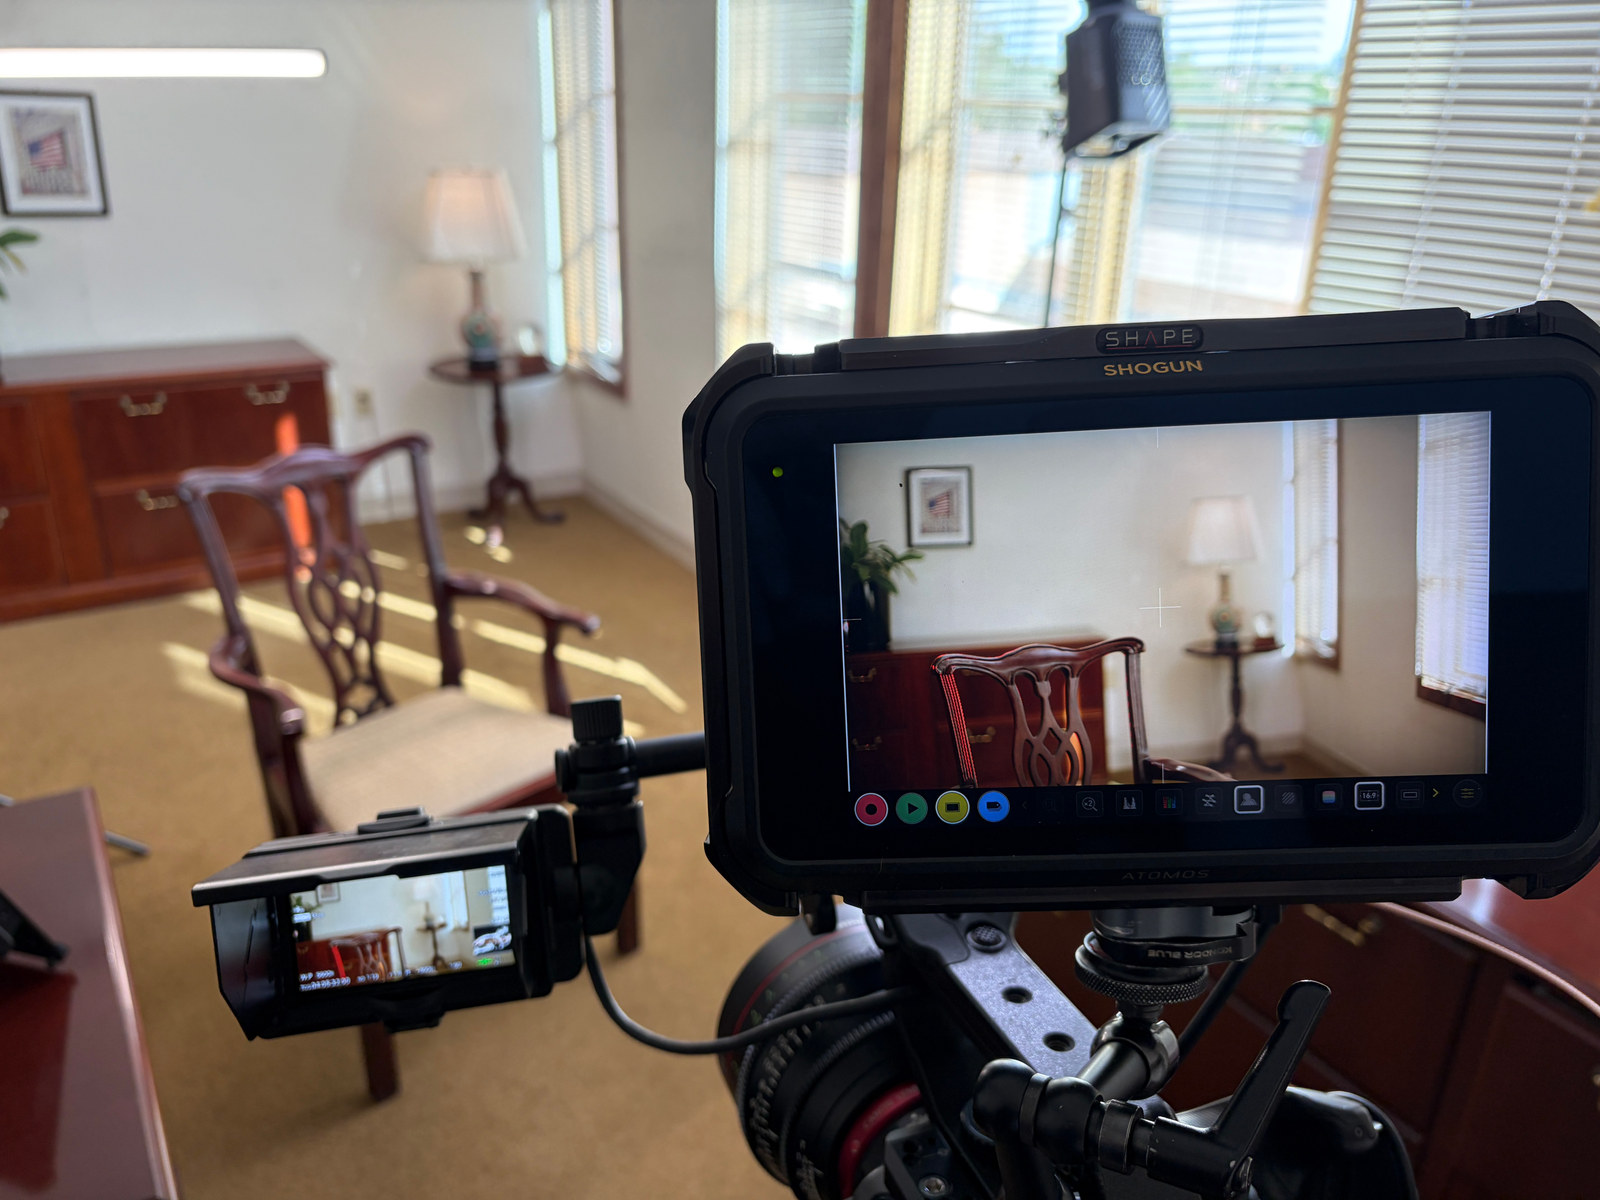
My first job is to walk through the room with the camera and monitor and test possible compositions.
In this office, shooting directly toward a flat white wall would have made everything feel even flatter. There would be no depth, no layers, and no visual reason for the viewer to explore the frame.
Shooting toward a corner was the better option.
A corner immediately creates separation between foreground and background. Objects can exist at different distances from the lens, and the walls naturally recede instead of appearing as one flat surface behind the subject.
I was still limited. A large desk occupied much of the room, another wall contained the door, and I did not want the office furniture to dominate the shot. In practical terms, I had only two useful corners.
That limitation was helpful. It forced me to stop thinking about every theoretical possibility and focus on the two frames the room could realistically support.
Let the room tell you where the subject belongs
Once I found the most promising camera angle, the windows became the next major consideration.
Before committing to a frame, I needed to understand where the sun was and how it would move during the shoot. Direct sunlight entering the windows could create a large exposure change, introduce hard patches of light, or force me to rebuild the setup later.
In this case, the sun’s path would eventually place it behind the building, and the overcast conditions kept the daylight relatively stable. That made the windows an asset instead of a liability.
Including part of the window gave the background more visual interest than a blank white wall. It also established a believable source of light inside the scene.
That source influenced the placement of the subject.
If the window is visible, viewers instinctively understand that light should be coming from that direction. I could have fought the window by adding negative fill beside the subject and creating a key from the opposite side, but that would have required more equipment and more control than the room justified.
Instead, I let the natural light guide the setup.
The subject was positioned so the window created the key side of the face. The camera looked into the room from the opposite direction, allowing the side facing the lens to retain some shadow and contrast.
This is motivated lighting in its most practical form: use the source that already makes sense inside the frame, then shape and support it.
Control the room before adding more light
The room was bright, white, and filled with uncontrolled ambient light.
If I exposed for the office exactly as it appeared, I would have been trapped by those existing levels. The small practical lamp would barely register, the white walls would feel flat, and any fixtures I added would have less influence over the final image.
My first step was to lower the overall exposure with the camera’s internal ND.
Reducing the ambient level gave me control. It also made the practical lamp appear brighter relative to the room, even though the lamp itself had not changed.
We partially closed the blinds as well. That reduced some of the daylight and introduced lines and texture into what would otherwise have been a large area of plain brightness.
After lowering the natural ambience, I aimed a separate fixture into the ceiling and used the ceiling as a large bounce source. Instead of accepting the office’s existing overhead illumination, I could now raise or lower the room level until it supported the interview.
The important principle is not the specific fixture.
The principle is that reducing the uncontrolled light first makes every controlled source more effective.
Use the window as the key
The window provided the primary light on the subject.
I placed a 7-by-3-foot diffusion frame beside him to soften that daylight before it reached his face. There was enough light passing through the window and diffusion to create a natural, soft key without adding another large fixture.
This saved space and kept the lighting direction believable.
The light still came from the side suggested by the windows in the frame, but the diffusion made the transition between highlight and shadow more flattering.
The result did not feel like a window on one side and a film light on the other. It felt as though the room itself was providing the key.
Add fill only after the key is working
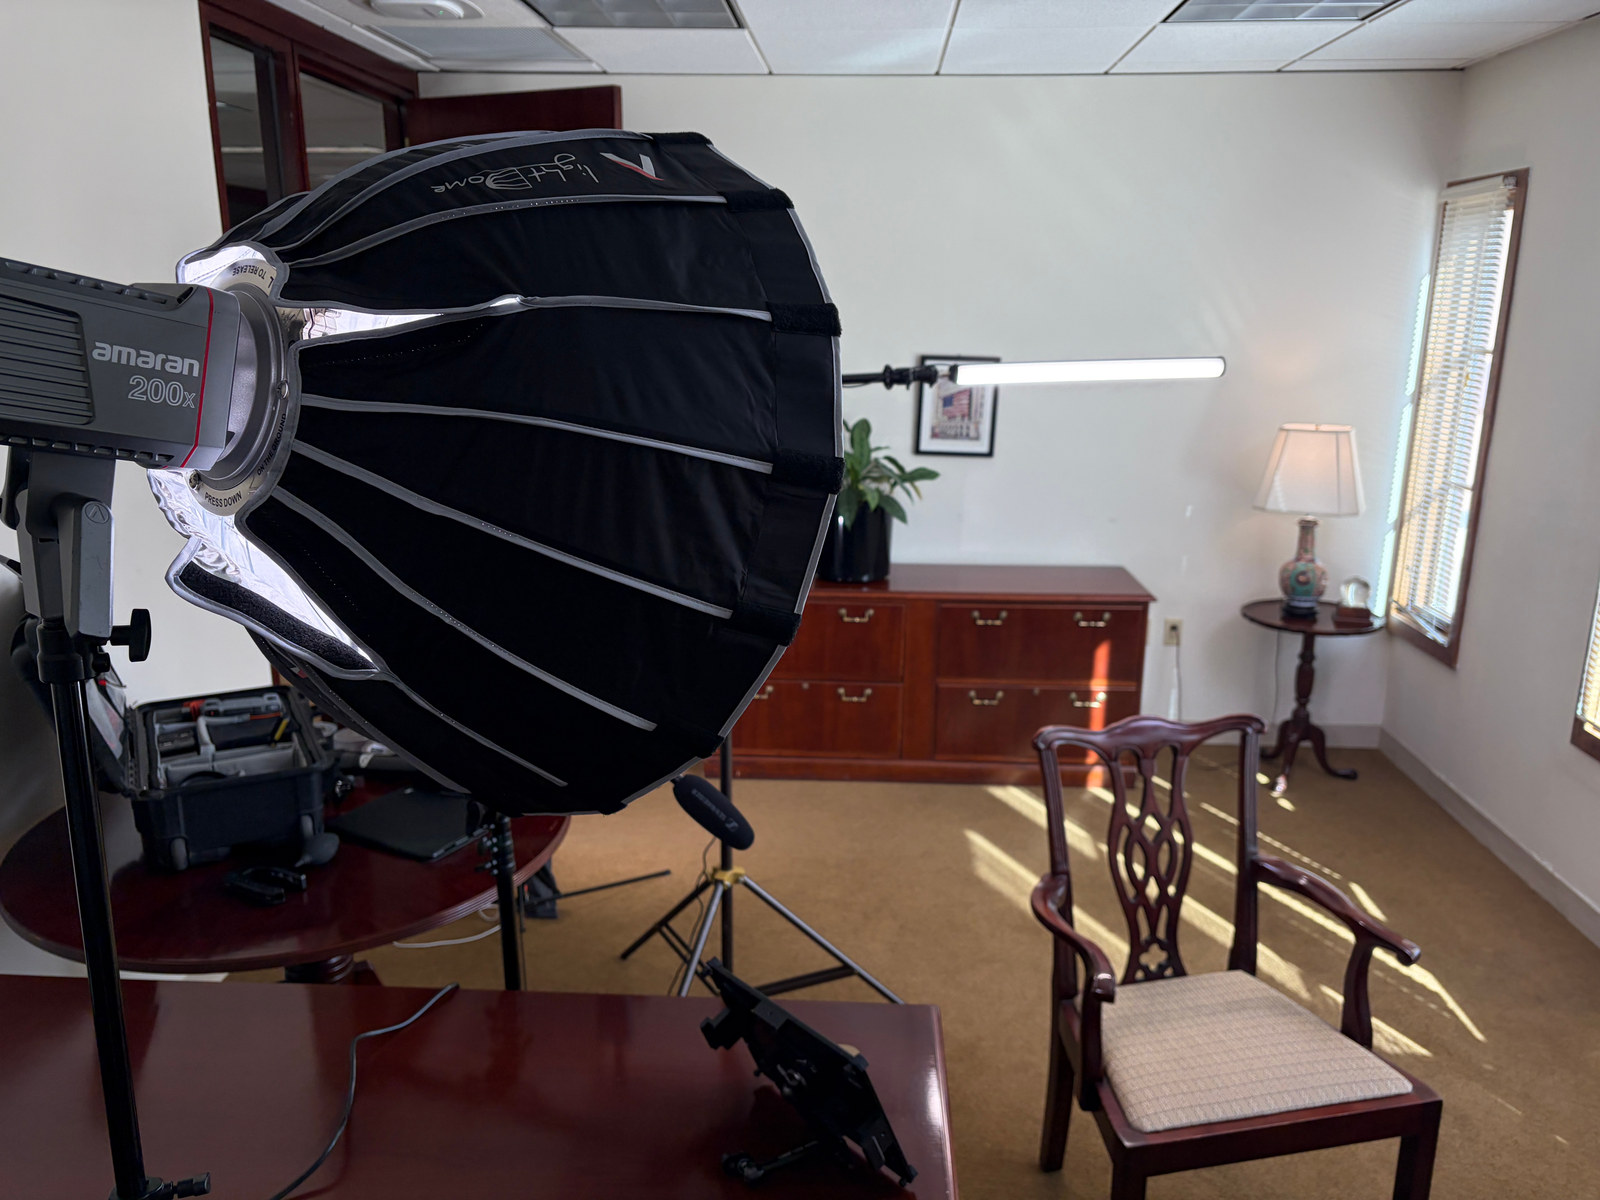
Once the window key was established, I used an amaran 200x with a softbox as fill.
The fill had a simple job: control how deep the shadows became on the camera-facing side of the subject.
I did not want to eliminate those shadows. Removing all contrast would have returned the image to the same flat quality I was trying to escape.
I raised the fill only until the face retained enough detail while still having a clear key side and fill side.
This is why I prefer to build an interview one source at a time.
If the key, fill, background, and backlight are all turned on immediately, it becomes difficult to understand what each fixture is contributing. Starting with the existing light and adding one controlled source at a time makes the decisions much clearer.
Create separation with a warmer backlight
The room still needed separation.
White hair against a pale wall can disappear quickly, especially when both receive similar neutral-colored light. I placed a tube fixture above and behind the subject, later adding a grid to keep the beam focused on his hair and shoulders.
I also warmed the color temperature of that source.
At daylight balance, the light could have made his hair appear even whiter. A warmer backlight created a more pleasing edge, added color contrast, and helped separate him from the background.
The direction remained consistent with the rest of the scene. The overall gradient moved from the brighter window side toward the darker side of the frame, so the backlight felt like part of the environment rather than a disconnected effect.
Dress only what the camera can see
A difficult location does not always need a complete makeover.
It only needs enough detail inside the frame to feel intentional.
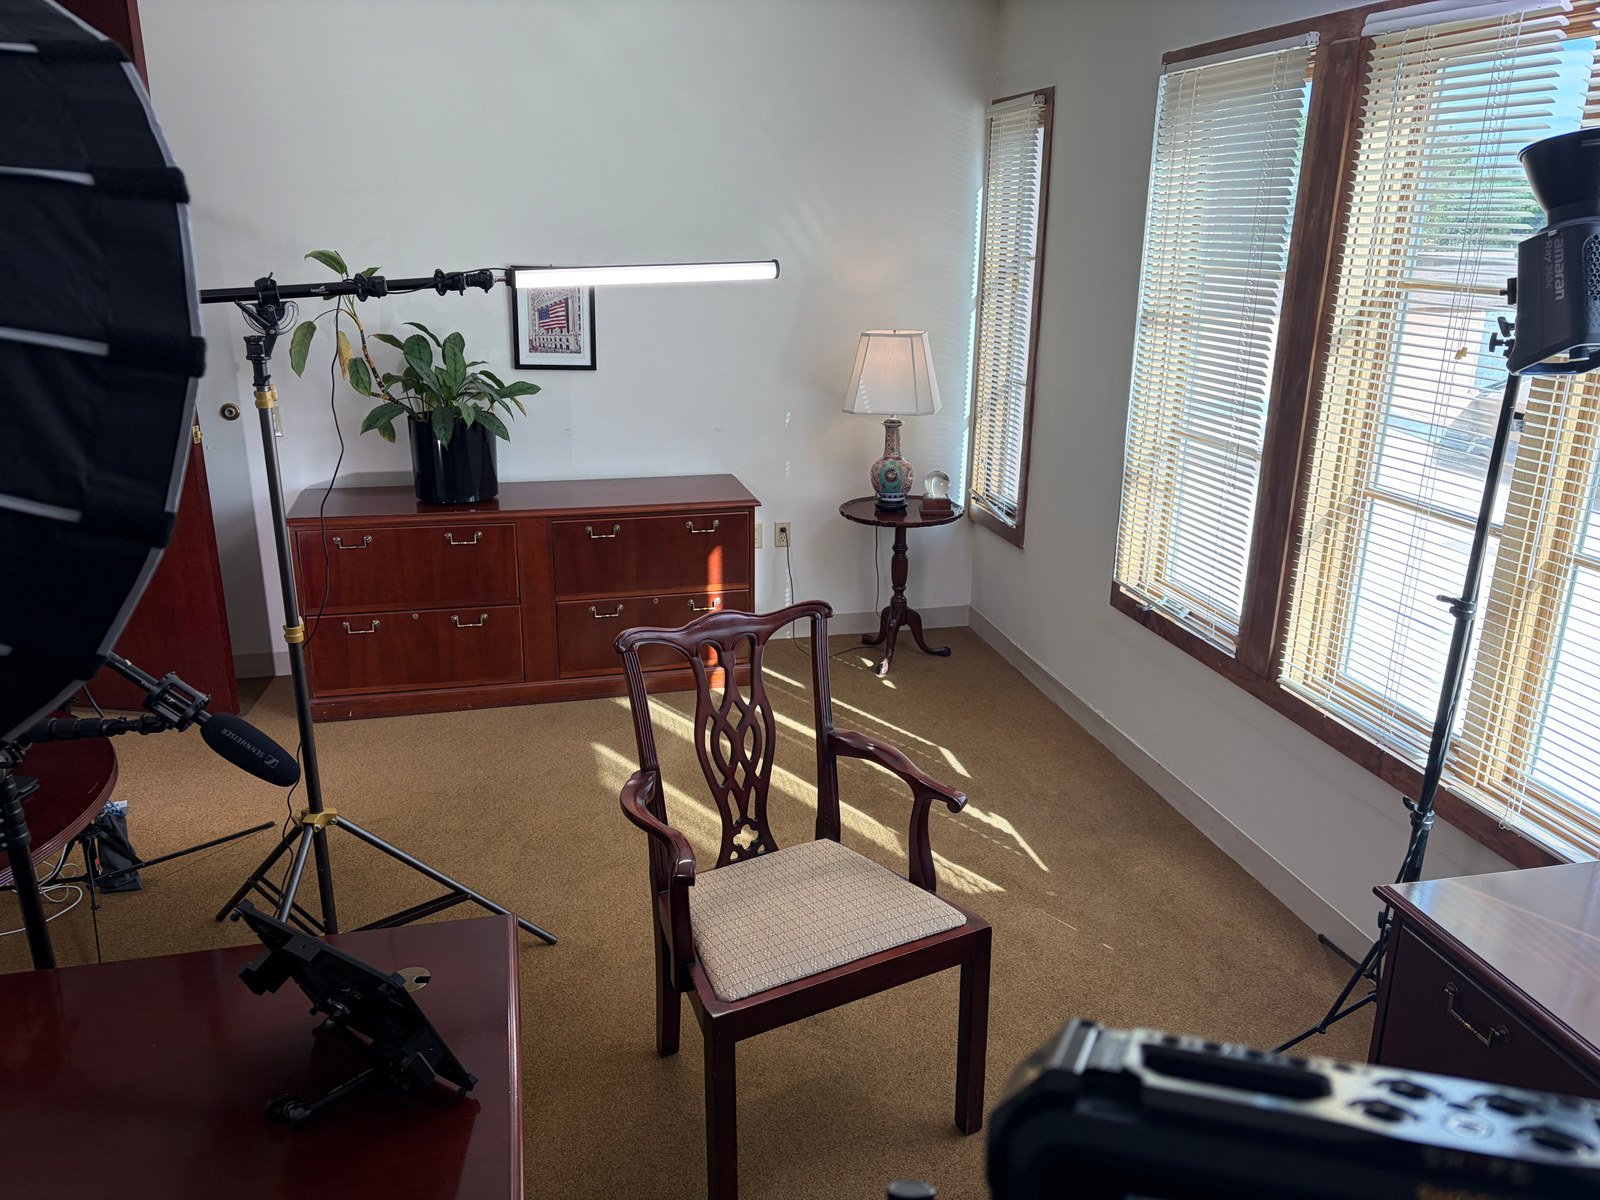
The plant was already in the room, so we moved it into the background. We found a framed picture elsewhere in the building and placed it on the wall. A practical lamp and a few small objects helped create visual layers and break up the empty surfaces.
The frame produced glare at first. Rather than removing it, we placed a little gaffer tape behind the bottom edge so the picture tilted upward. That small angle redirected the reflection away from the camera.
These are minor adjustments, but they matter.
The plant gives one side of the frame color and shape. The picture breaks up the white wall. The practical lamp creates a warm point of interest. The furniture establishes depth.
None of those elements needed to be remarkable on their own. Together, they made the background feel deliberate.
Use exposure tools to confirm the image
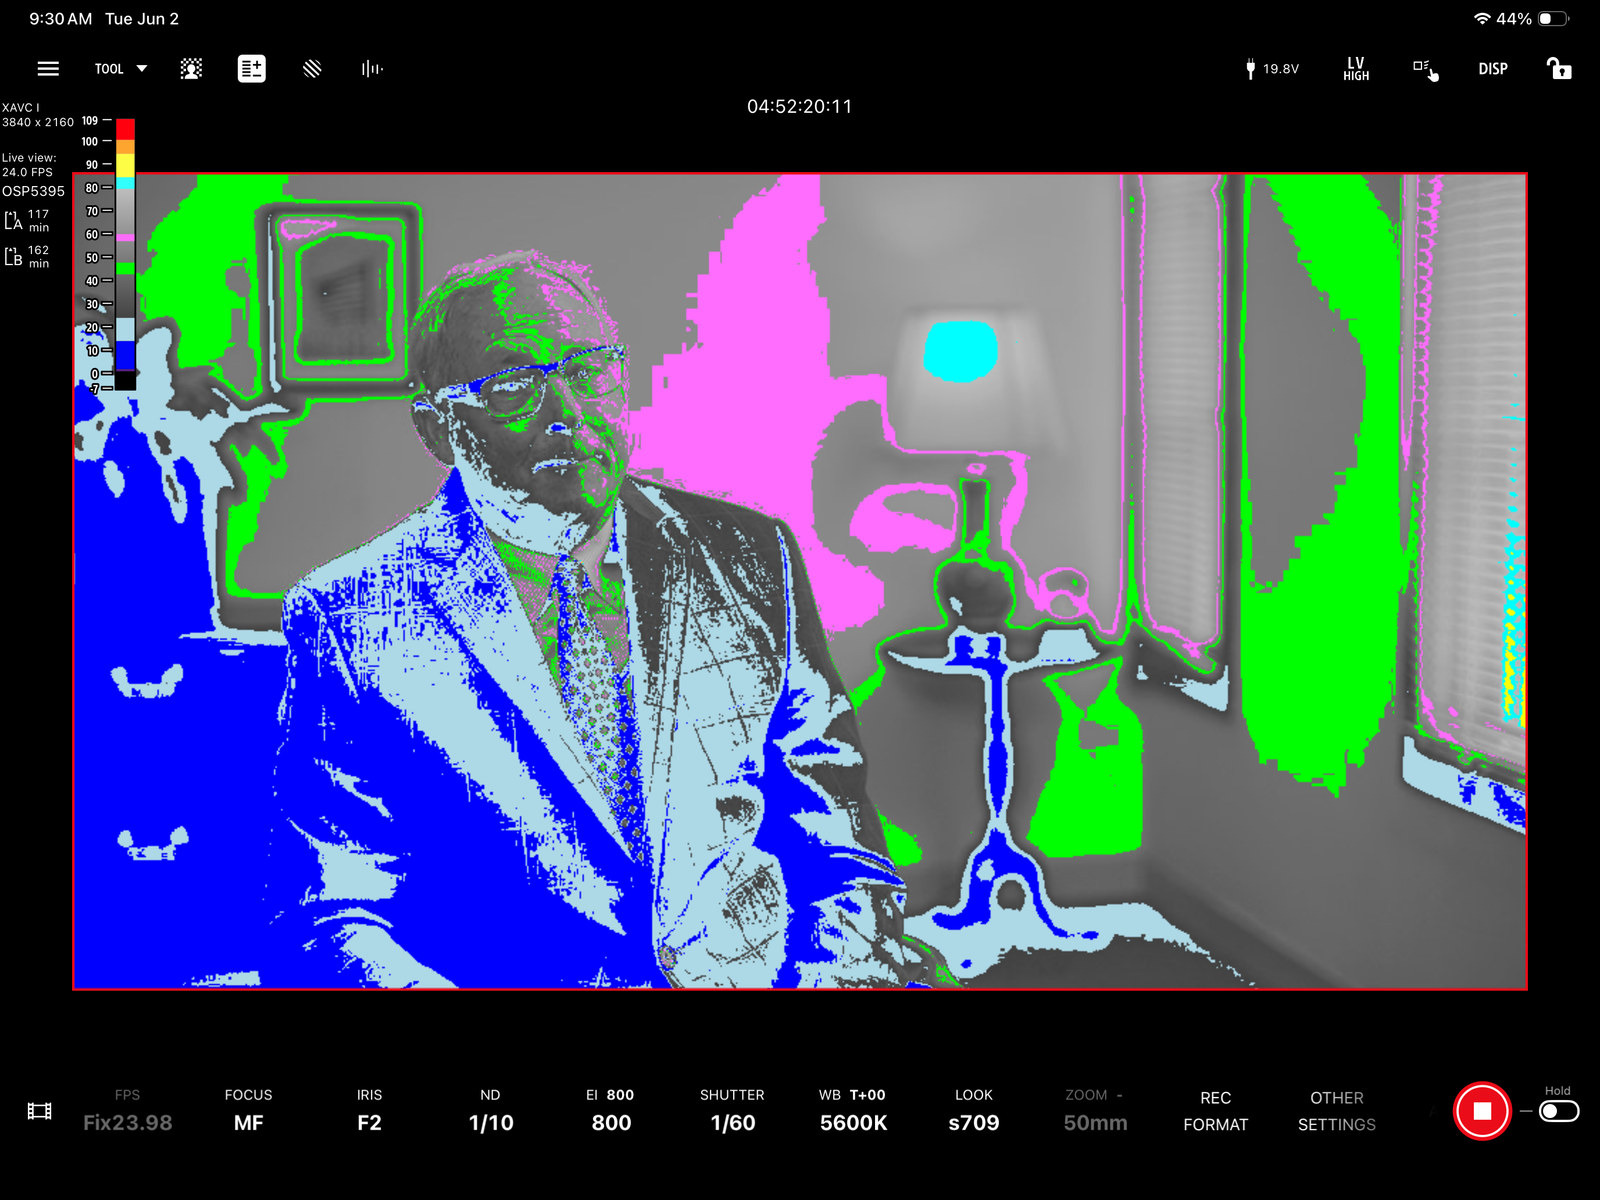
Once the frame and lighting were close, I used false color to evaluate exposure.
False color removes some of the guesswork created by a bright monitor, changing room conditions, or a misleading viewing environment. It gave me a clear reference for the subject’s skin, the windows, the practical lamp, and the darker areas of the room.
The goal was not to make every part of the image land at the same level.
The subject needed to remain the visual priority. The window could stay brighter, the background could fall away, and the practical could glow. What mattered was keeping the important tones controlled and preserving enough information for the final grade.
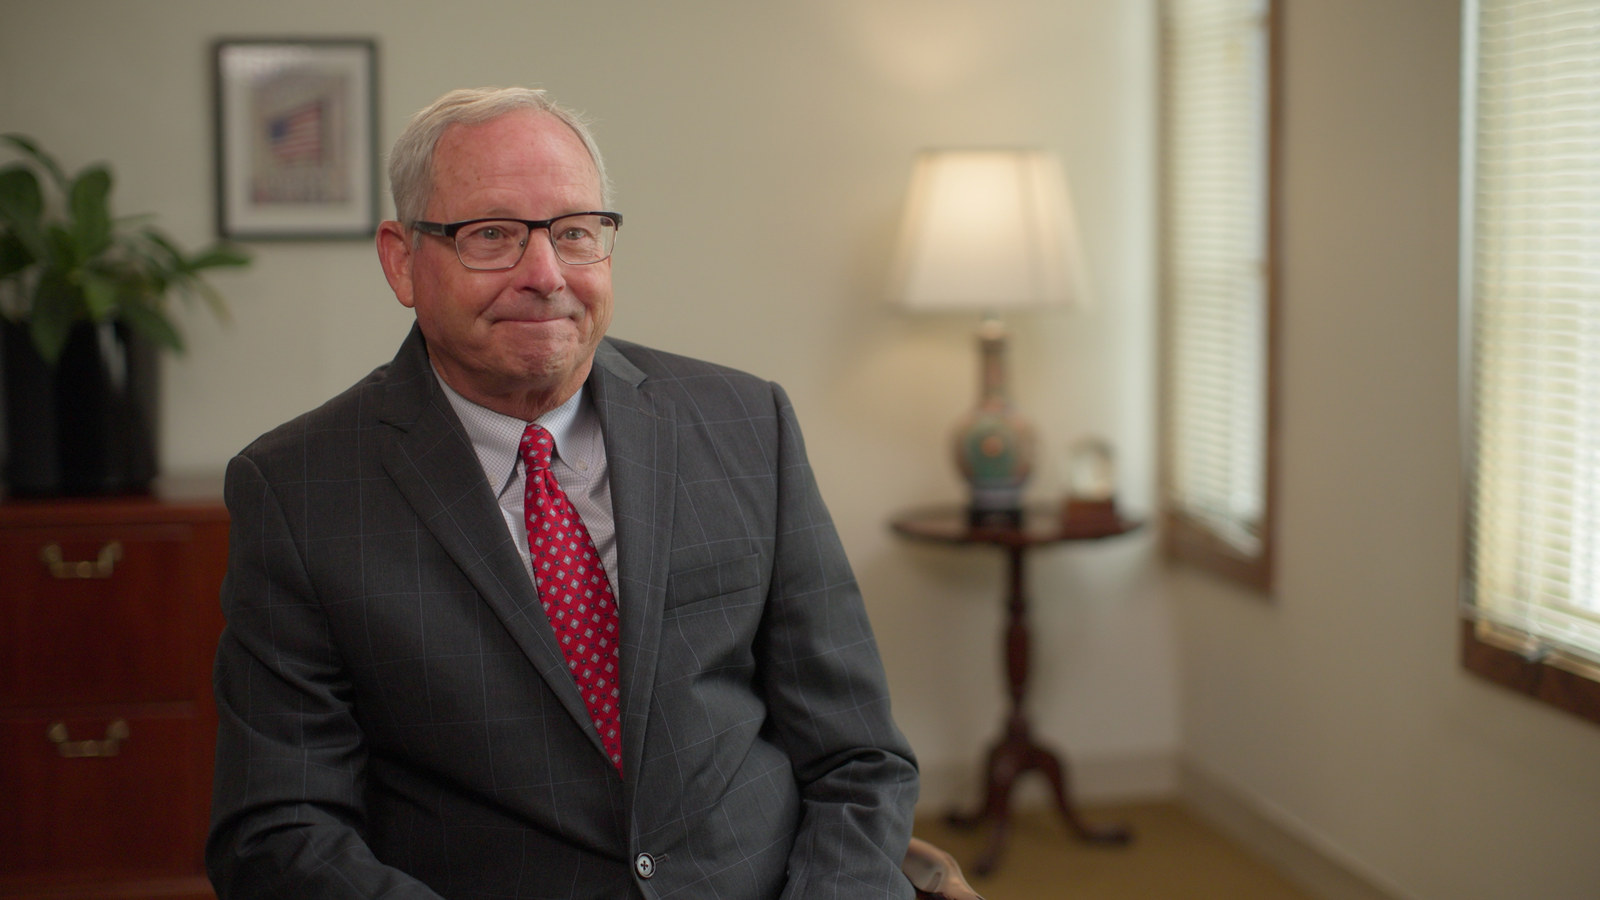
The finished frame
The final image does not hide the fact that we filmed in an office.
It does something more useful: it makes the office feel controlled.
The corner creates depth. The window motivates the key. The warmer practical and backlight add color separation. The plant, picture, lamp, and furniture give the background structure. The fill protects detail without erasing contrast.
Most importantly, each decision supports the same idea.
Nothing feels as though it was added simply because a piece of equipment was available.
A repeatable process for difficult interview locations
When I am forced to work in a bad location, I follow the same general order:
- Walk the room with the camera. Do not build lighting until you know the frame.
- Look for depth. Corners, doorways, windows, furniture, and multiple planes are more useful than a flat wall.
- Study the available light. Determine where the sun is, how it will move, and whether the daylight will remain consistent.
- Choose a believable lighting direction. Let visible windows and practical sources motivate the key whenever that approach serves the shot.
- Reduce uncontrolled ambience. ND, blinds, diffusion, flags, and turning off overhead fixtures give controlled sources more influence.
- Build one light at a time. Establish the key first, then fill, separation, and background accents.
- Dress only the frame. Move existing objects and add a few purposeful elements instead of trying to redesign the entire room.
- Confirm exposure. Use false color, waveform, or another objective tool rather than relying only on how the monitor appears.
This process will not turn every office into a portfolio location.
It will help you make the best possible image with the room, time, and equipment you actually have.
Final thoughts
You do not need a perfect location to create a professional image.
You need a process.
Start with the camera. Find the frame. Let the room guide the placement of the subject and the direction of the light. Reduce what you cannot control, then add only what the image needs.
That order matters.
If you begin with equipment, you may spend valuable time solving the wrong problem. If you begin with the frame, every lighting and production decision has a clear purpose.
If you would like to learn more about exposure, camera control, lighting, composition, and creating more intentional images, be sure to check out my online course, Essential Camera Settings.
by Chris Tinard © cNOMADIC 2026 Learn more about cNOMADIC’s cinematography philosophy and training at cNOMADIC.com.