How to Light Interviews in a Glass Conference Room
Jul 27, 2026How to Light Interviews in a Glass Conference Room
Glass conference rooms give you plenty of natural light—but without control, all that light can flatten the subject, erase contrast, and make every interview look the same.
It is difficult to complain about having too much natural light.
I would usually choose a room with large windows over a room with no windows at all. But a glass conference room creates a very specific problem: almost everything that normally gives us control is missing.
There may be no solid wall for negative fill. Light enters from several directions. The exterior can be dramatically brighter than the subject, and the sun can change the entire room while we are working.
If I simply place someone in the room and expose the camera, every part of the image begins to sit at a similar level. The face receives light from both sides, the room feels bright everywhere, and the subject loses separation from the background.
On this shoot, I also needed several interviews to feel visually consistent while still giving the client multiple looks.
The solution was not to overpower the windows. It was to control the natural light first, establish a repeatable exposure, and then add artificial light only where the image needed shape.
Evaluate the daylight before committing to the room
Before I decide to shoot in a glass room, I need to understand what the daylight is going to do.
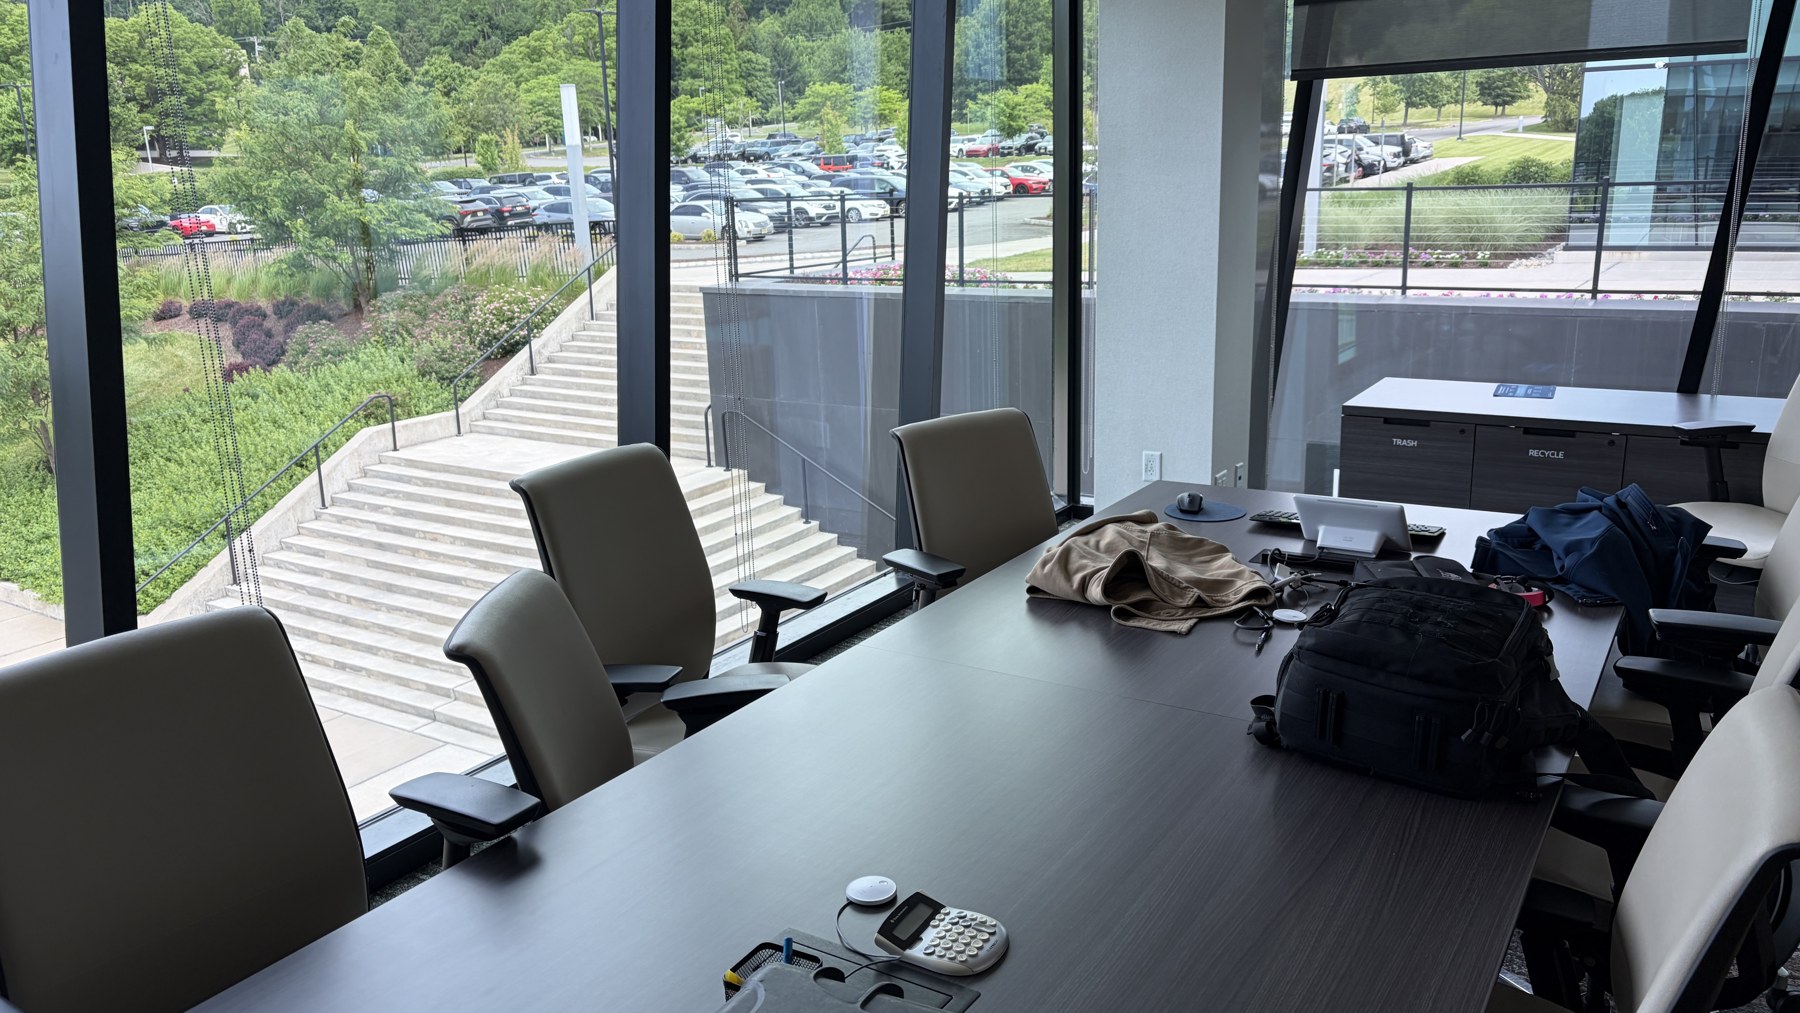
On this particular day, the sun was positioned high on one side of the building, and its path meant that we would be dealing with it for the entire shoot. It was not going to disappear behind the building and solve the problem for us.
The cloud coverage made the room usable.
Those clouds acted like an enormous softbox. Instead of direct sunlight creating hard, rapidly moving patches across the room, the exterior light remained relatively soft and even. The parking lot, trees, and buildings outside still had different values, but I did not have to fight a sharp beam moving across the subject.
The room also had two sets of blinds: a translucent layer that reduced daylight while preserving some visibility, and a full blackout layer. That gave me a way to lower individual windows and control how much light entered from different directions.
Those two conditions—the cloud coverage and the blinds—were what made me comfortable committing to the space.
Build an exposure blueprint
Once the framing is established, I think about where every important element should sit within the camera’s dynamic range.
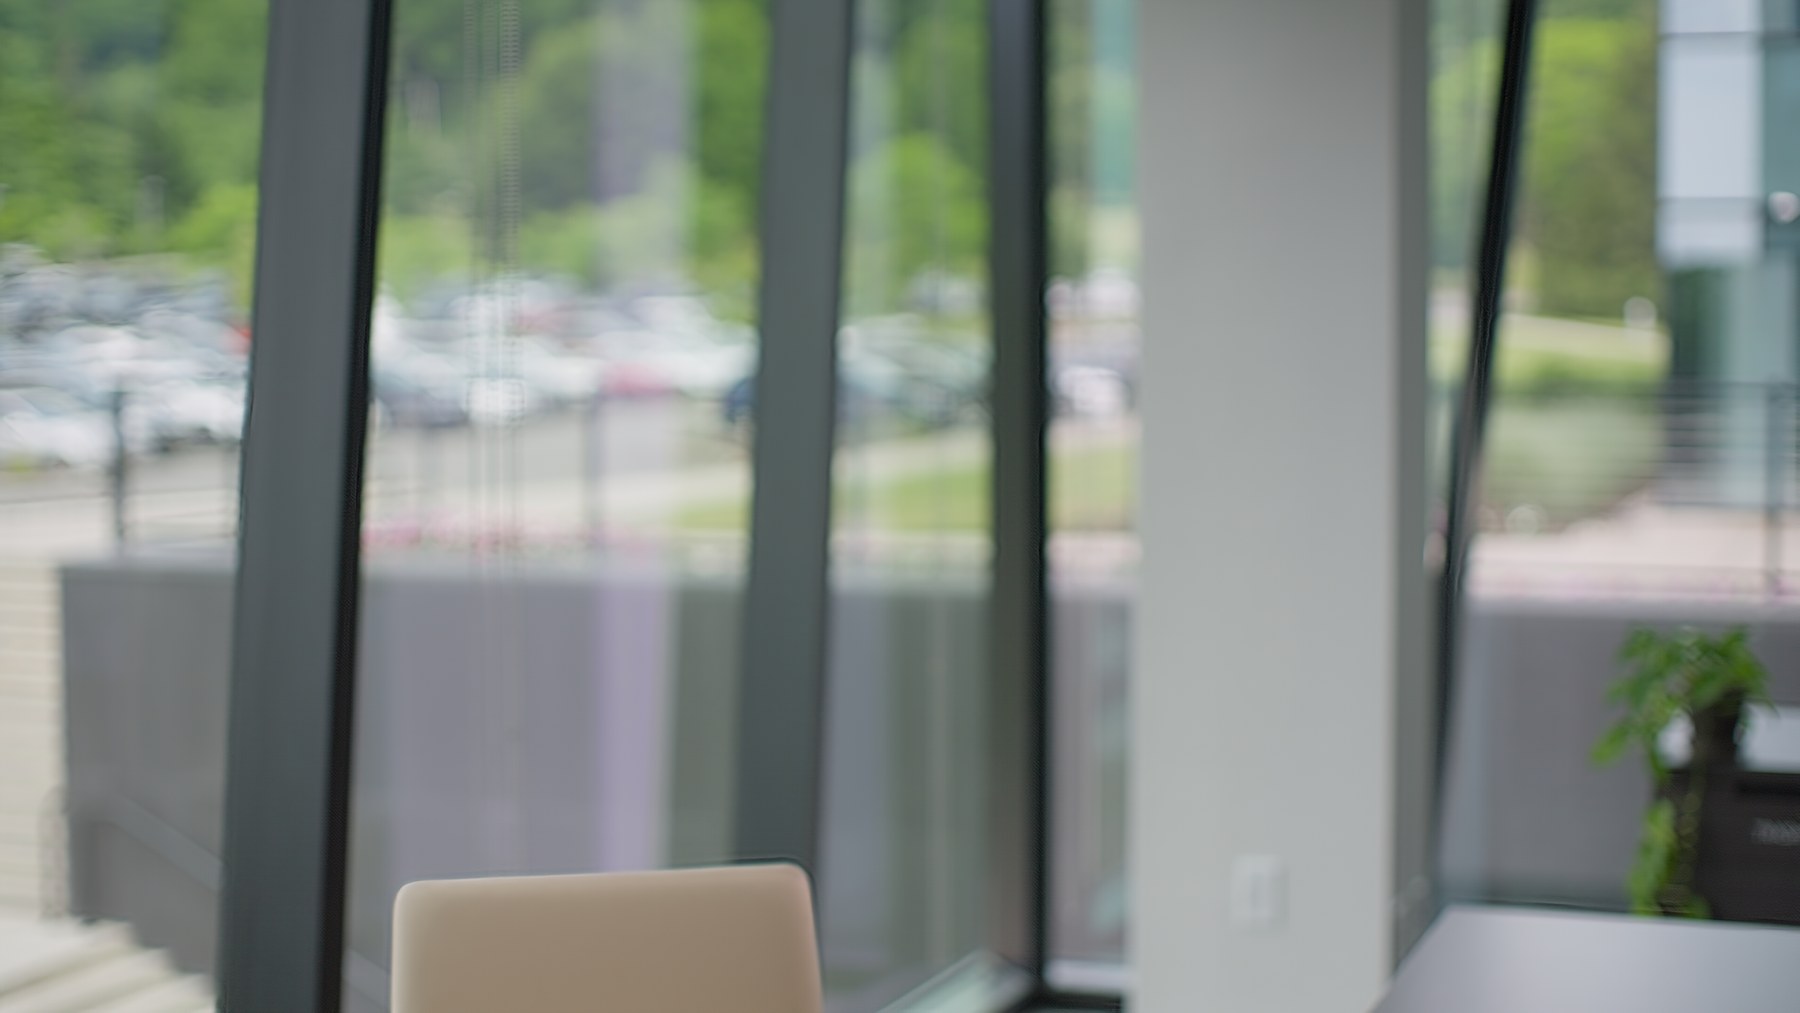
The brightest objects in this frame were the cars in the parking lot. I could not walk outside and independently adjust the cars, trees, columns, and neighboring building. Their relationship was fixed by the weather and the time of day.
What I could control was where that entire exterior landed in the exposure.
I used the camera’s ND filters to lower the room until the brightest exterior elements were close to clipping without losing more information than I was comfortable sacrificing. Once that exterior level was set, it became the foundation for every interview.
This is an important order of operations. If I expose the subject first and then discover that the windows are far beyond the sensor’s usable range, I have built the image backward.
I begin with the part of the scene I cannot light—the exterior—and then bring the subject into the exposure relationship I want.
Control natural light before adding fixtures
With the camera settings locked, the next step was to shape the daylight reaching the subject.
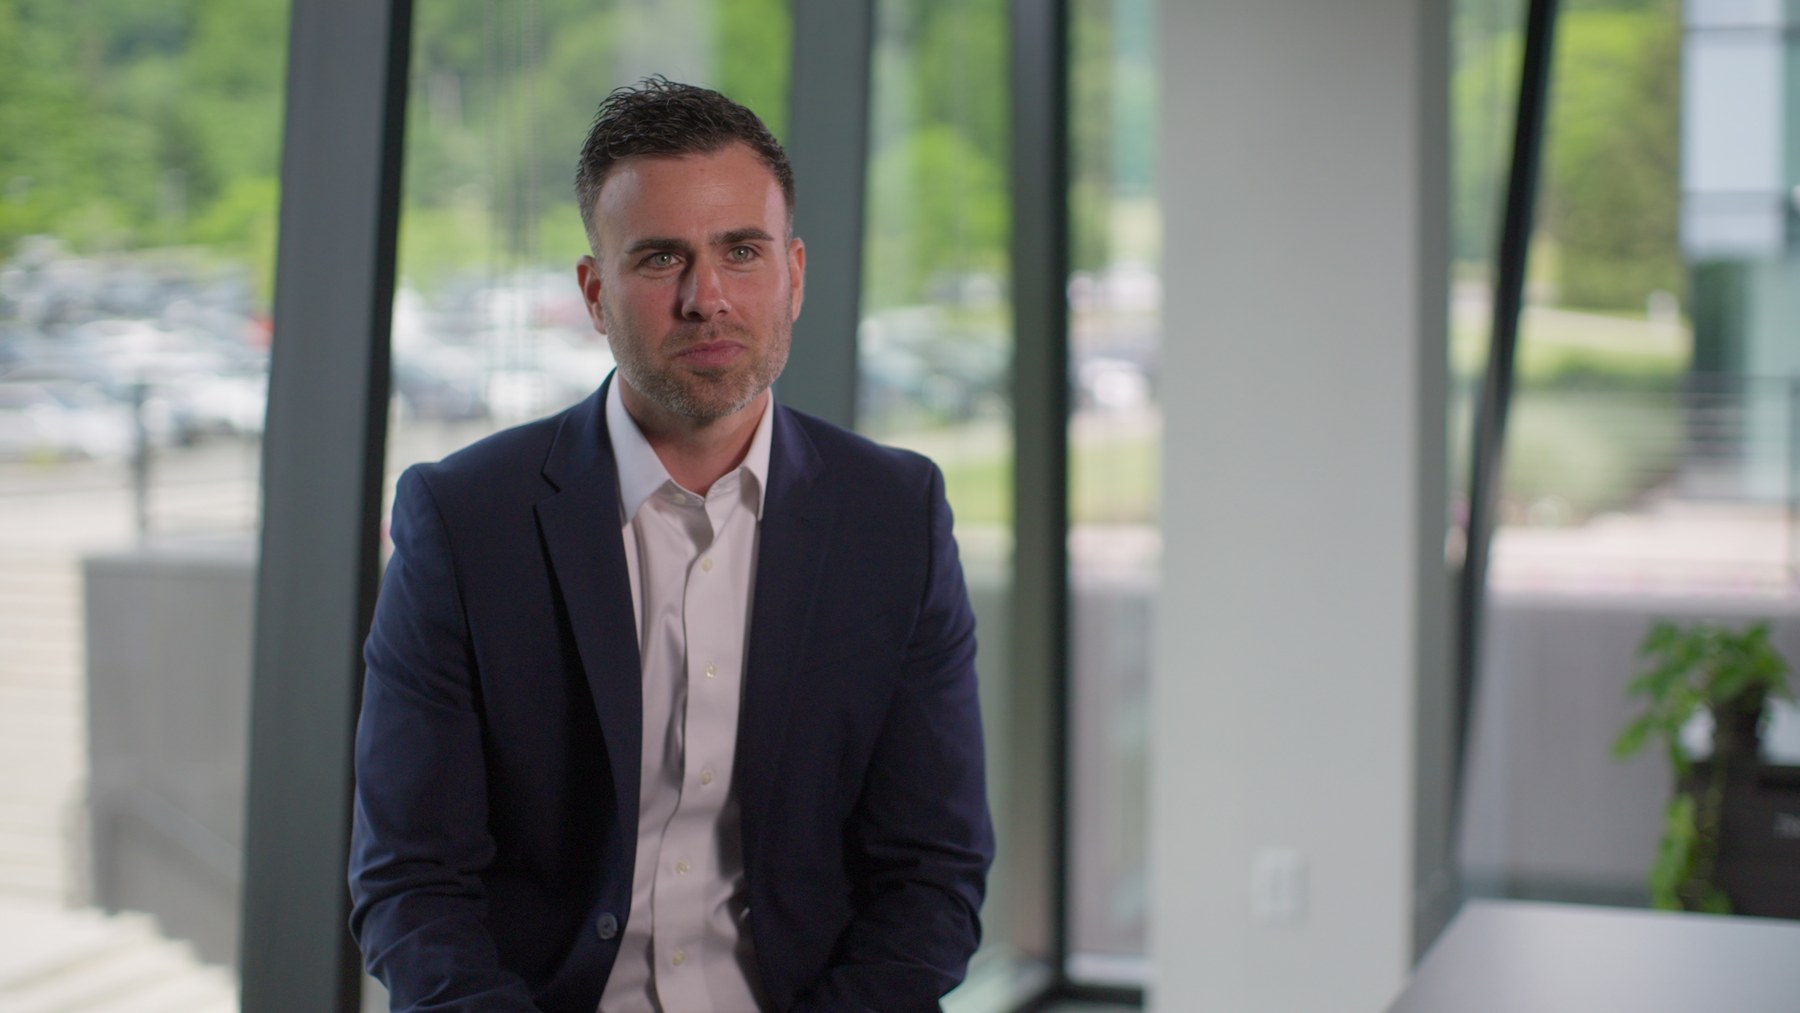
For the first orientation, the subject looked toward the windows. That daylight became the key side of the face.
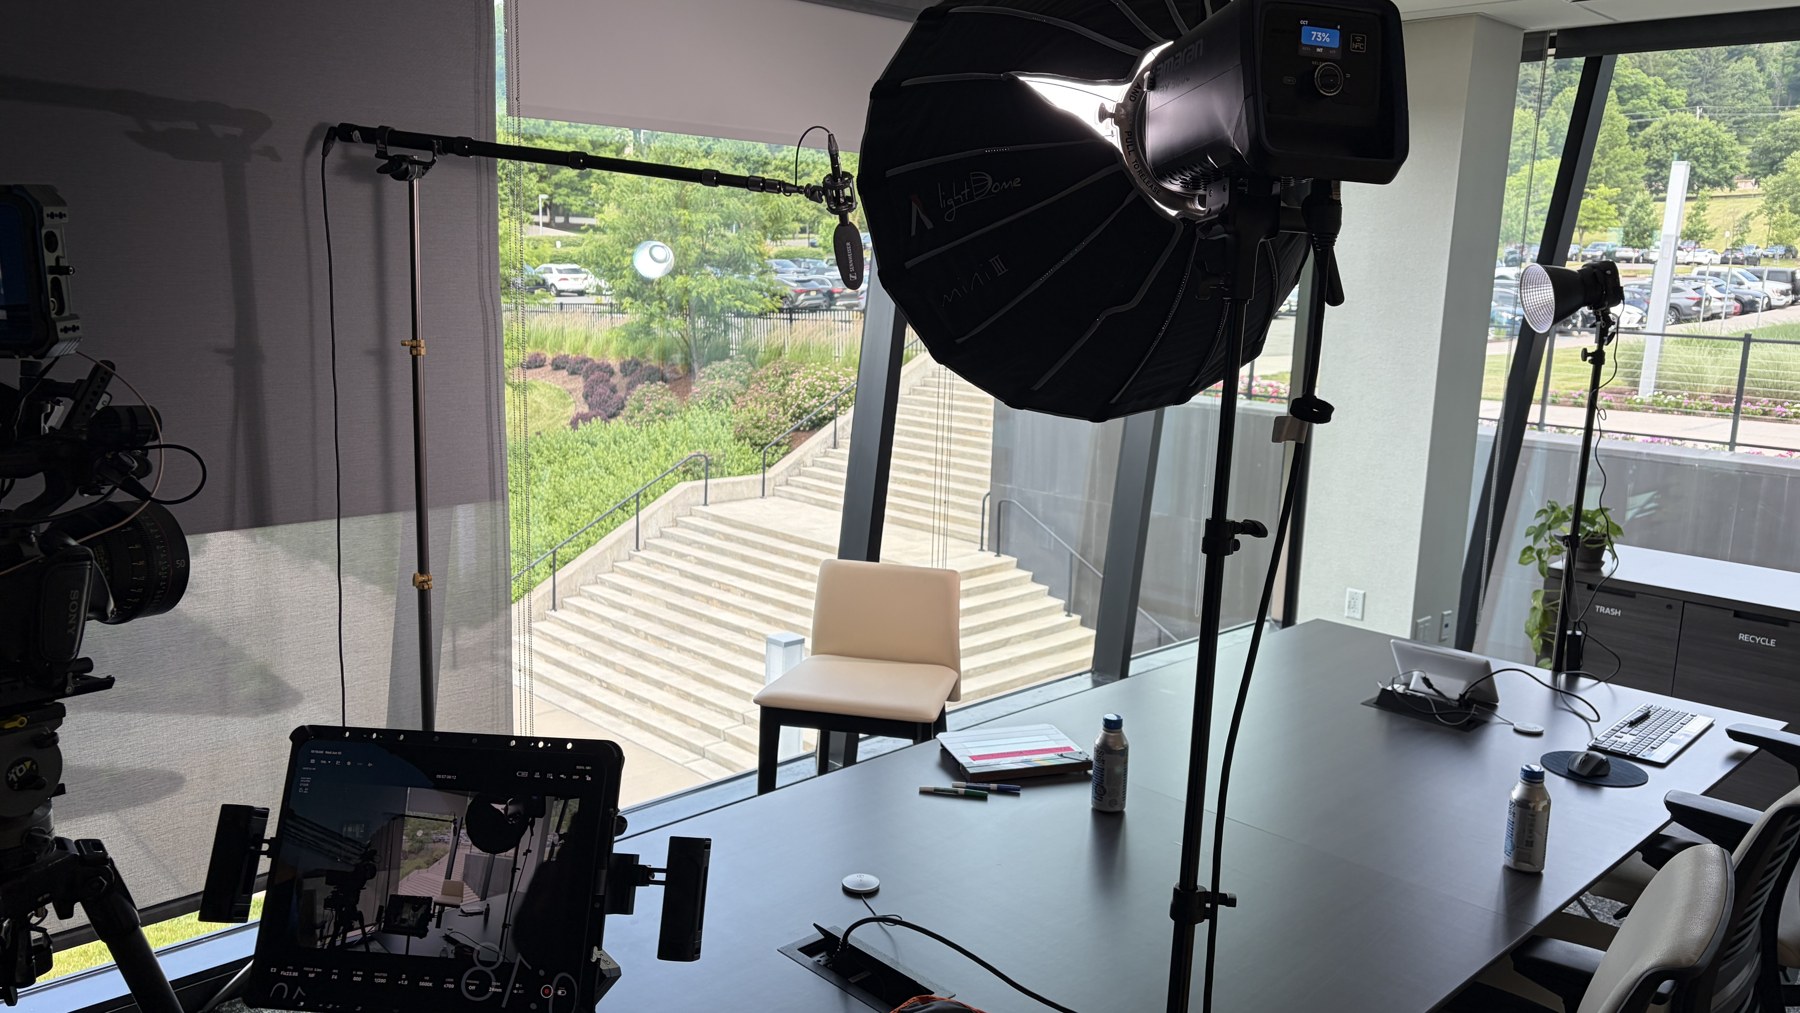
I placed diffusion between the windows and the subject to soften the natural light. Then I adjusted the blinds until the key side of the face reached the level I wanted—about one to one-and-a-half stops above middle gray.
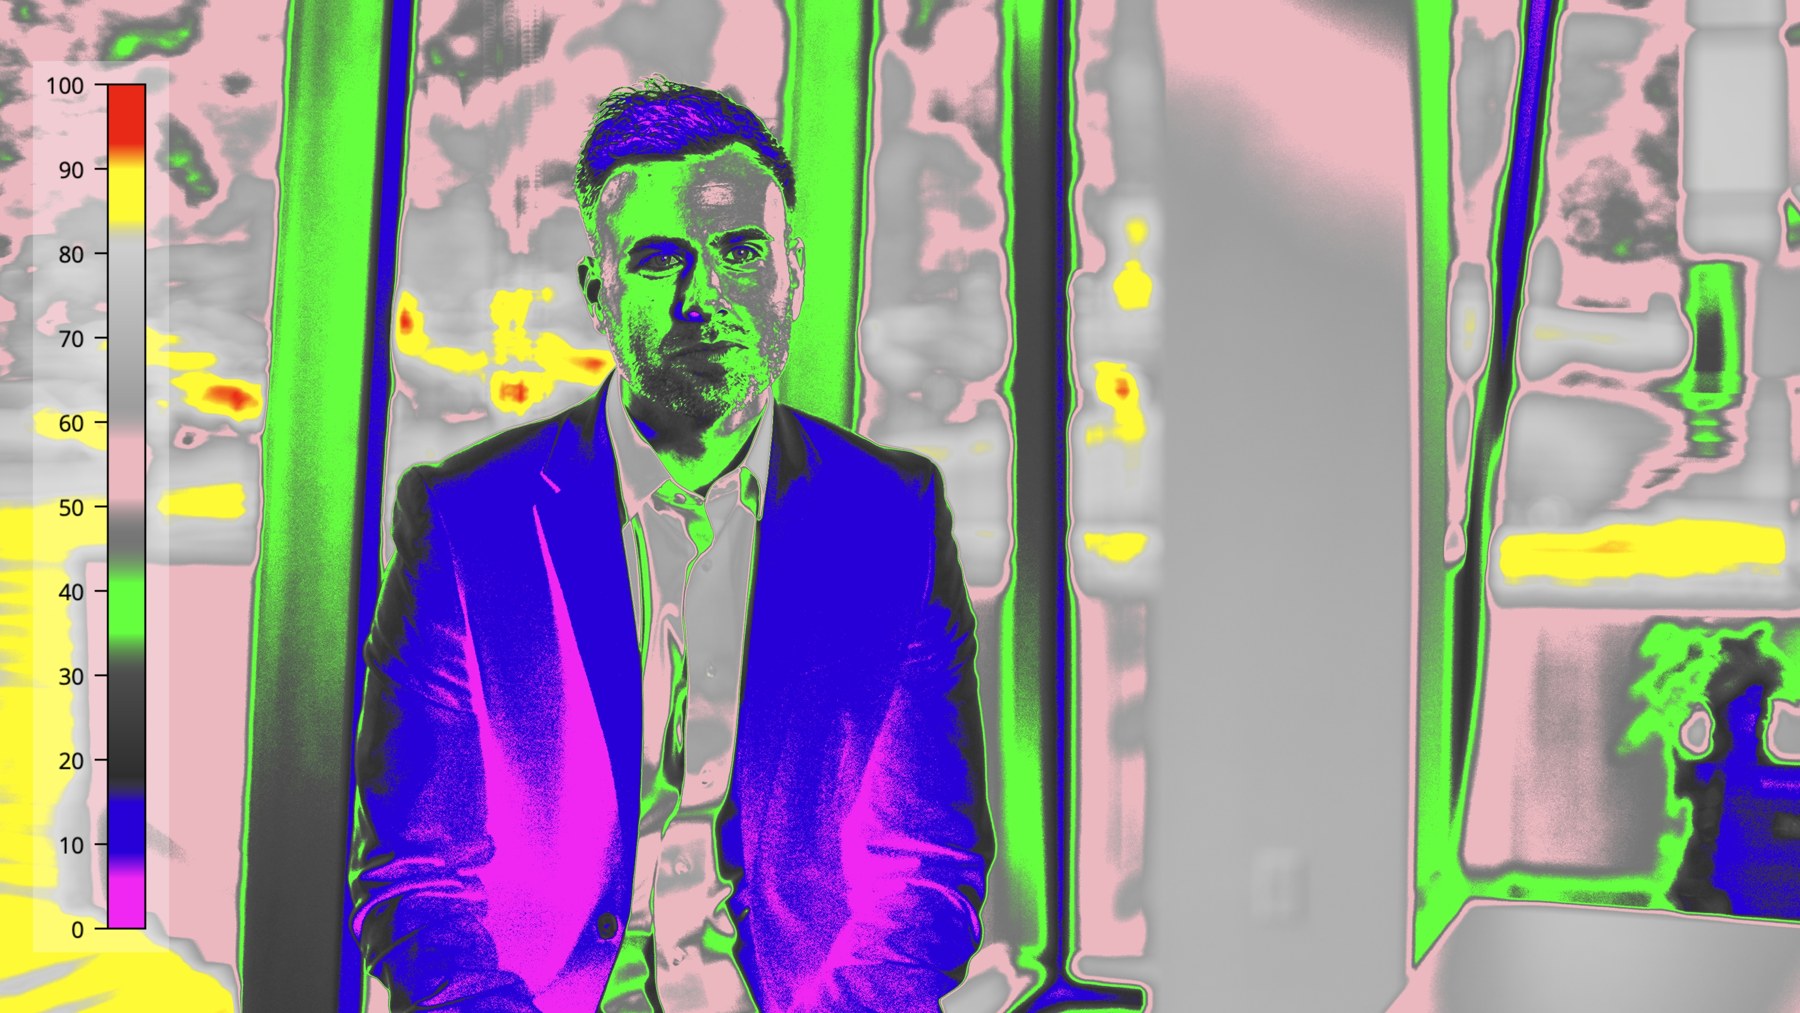
I could evaluate that with a light meter or false color. The exact tool matters less than having an objective reference and using it consistently.
In this setup, I did not need to add another key light. The window was already giving me the direction, output, and natural motivation I wanted. The job was simply to soften and reduce it.
That distinction saves time and equipment. A large source does not always need to be created from scratch. Sometimes the location already provides the key, and our role is to make it behave.
Create contrast instead of eliminating it
Once the key side was established, I needed to decide how much detail to keep on the other side of the face.
The goal was not to make both sides equally bright. That would return the face to the same flat quality created by the uncontrolled room.
I used an amaran 360c with a softbox as fill and slowly adjusted its intensity while watching false color and the image itself. I raised the fill only until the shadow side retained the amount of detail I wanted.
The important value is the relationship between the two sides—not a single universal exposure number.
A softer corporate interview may need a gentler ratio. A more dramatic piece may allow the fill side to fall farther. Either way, the subject should have a clear key side and fill side so the face retains shape.
Add separation with an edge light
The glass and soft background can make the subject blend into the room even when the face has good contrast.
To create additional separation, I placed an amaran Halo 100x behind the subject in a three-quarter backlight position.
The edge was subtle in the finished image, but it helped define the shoulder and pull the subject forward from the background. It also gave the frame another controlled level: fill, key, and edge.
I do not add a backlight simply because an interview lighting diagram says it should be there. I add it when the subject needs separation, and I control it so it belongs to the lighting logic of the space.
Reverse the look without changing the exposure
The second orientation was more difficult because the subject was no longer looking toward the windows.
All that natural light was now entering from the side that could easily become uncontrolled fill. Without reducing it, the windows would erase contrast across the face before the key light had a chance to shape anything.
I used the blinds to lower the incoming daylight until the shadow side reached an appropriate level. The camera settings stayed exactly the same.
Then I moved the same amaran 360c that had served as fill in the first setup and used it as the key for the reverse angle. I placed it farther to the side so it wrapped less around the front of the face, and I adjusted its output until the skin reached the same general exposure range as the first interview.
This made the lighting package work twice.
Instead of rebuilding the room or changing the camera for every person, I changed the role of the fixture. The daylight, blinds, and locked exposure remained the foundation; the 360c became fill in one direction and key in the other.
Use a harder edge to create another level
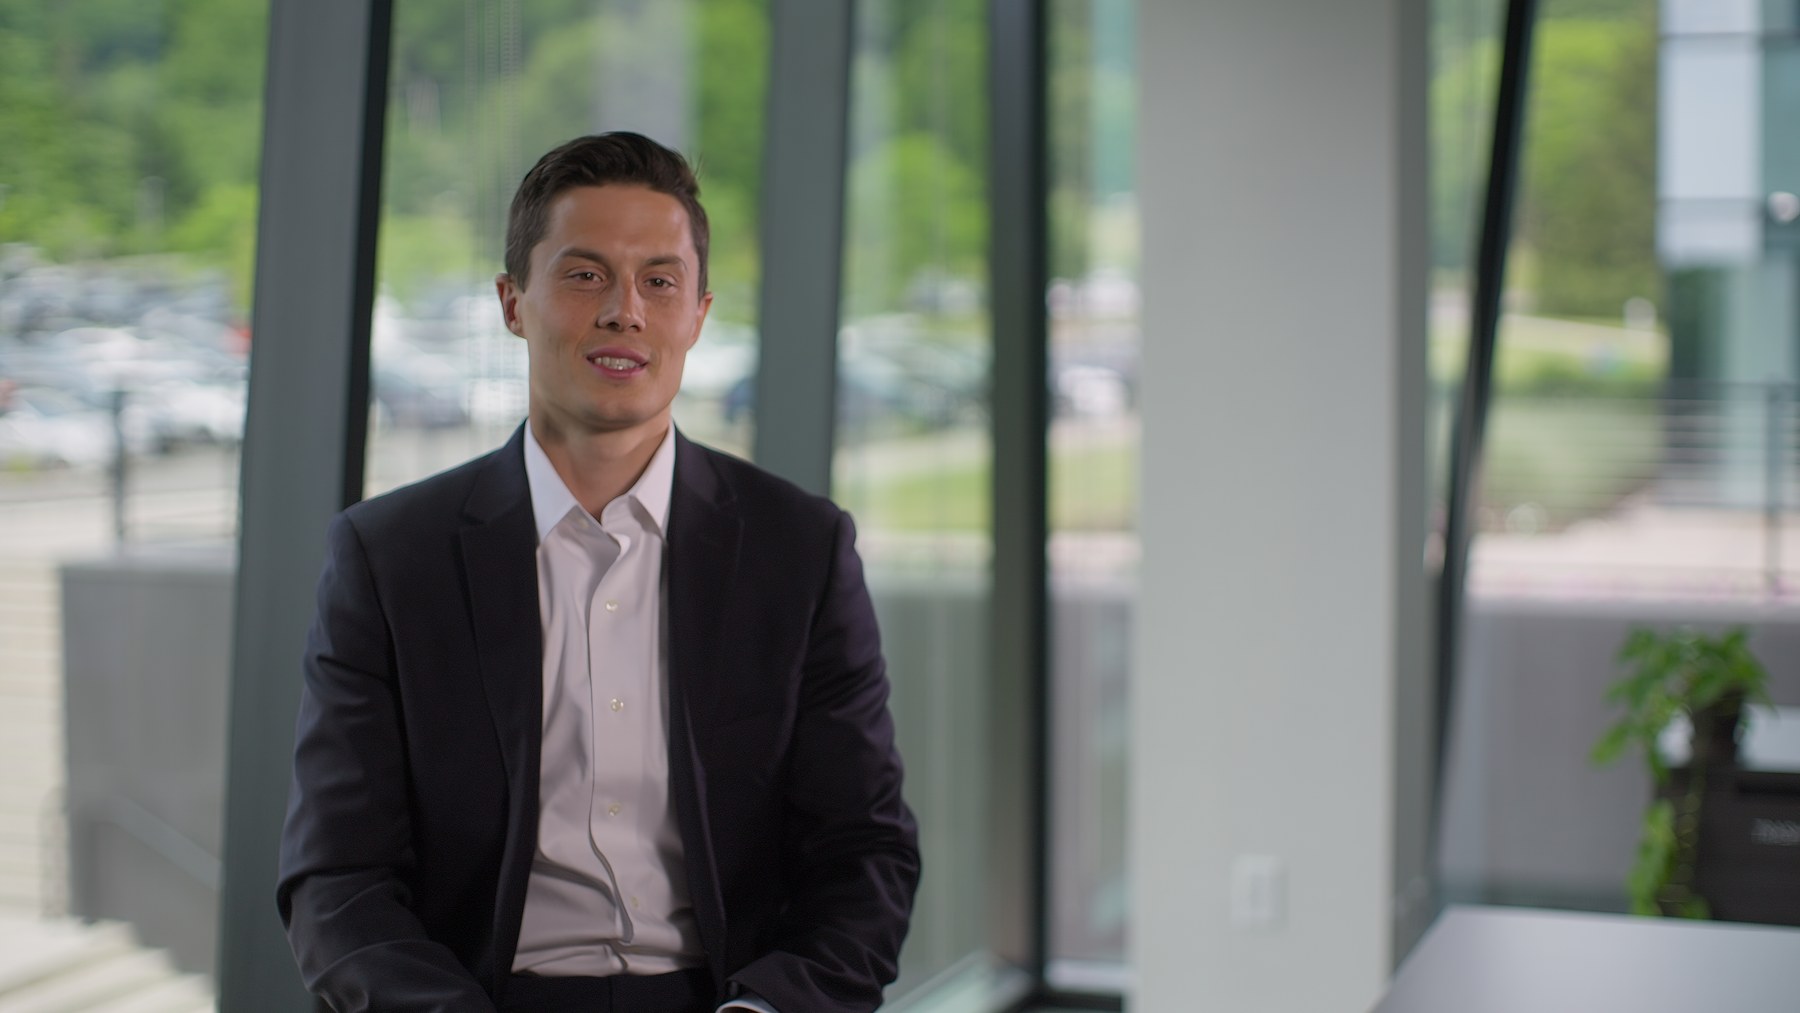
For the reverse setup, I used the Halo 100x with a smaller modifier as a more defined edge.
I could have allowed the key to spread evenly across that entire side of the face. Instead, the additional edge created a brighter accent and a little more texture.
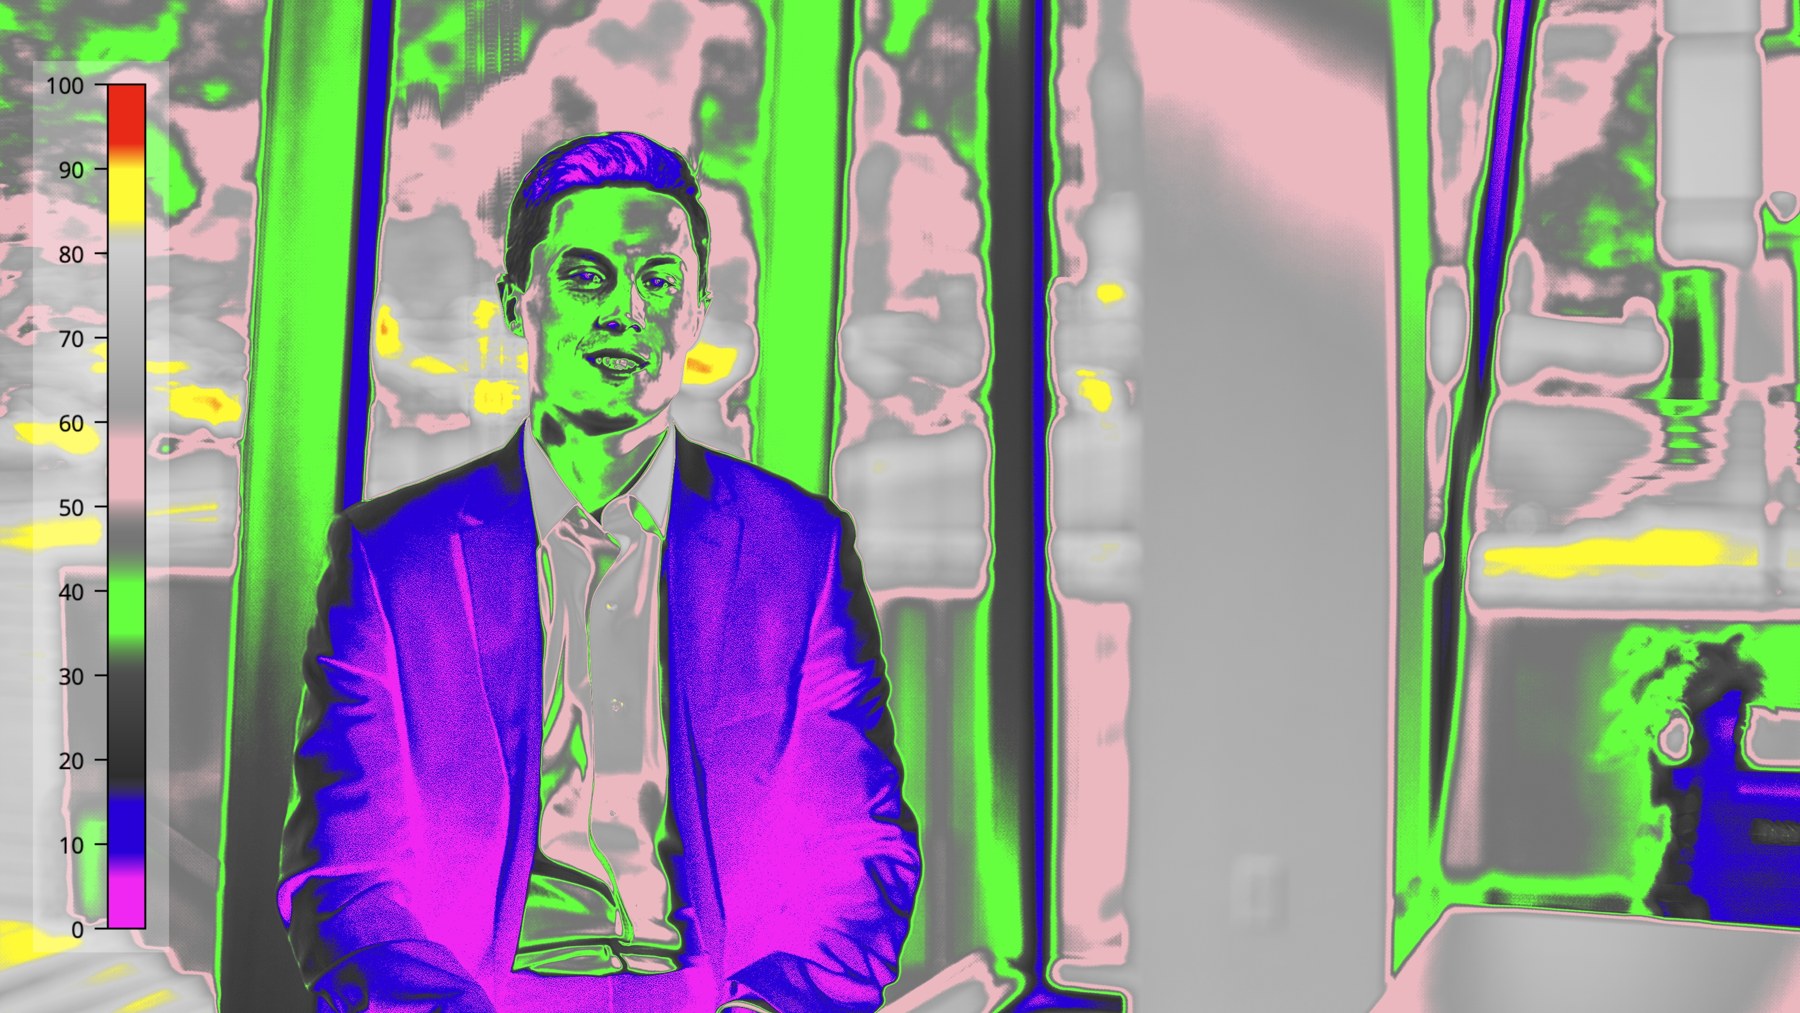
False color makes the choice easy to see. There is the lower fill level, the key level, and then a small brighter area created by the edge.
That is what separation really means. It is not simply making the subject brighter. It is giving important parts of the image distinct values so they do not collapse into one another.
Keep multiple interviews visually consistent
Consistency does not require every person to be photographed in exactly the same position.
It requires the images to share the same visual rules.
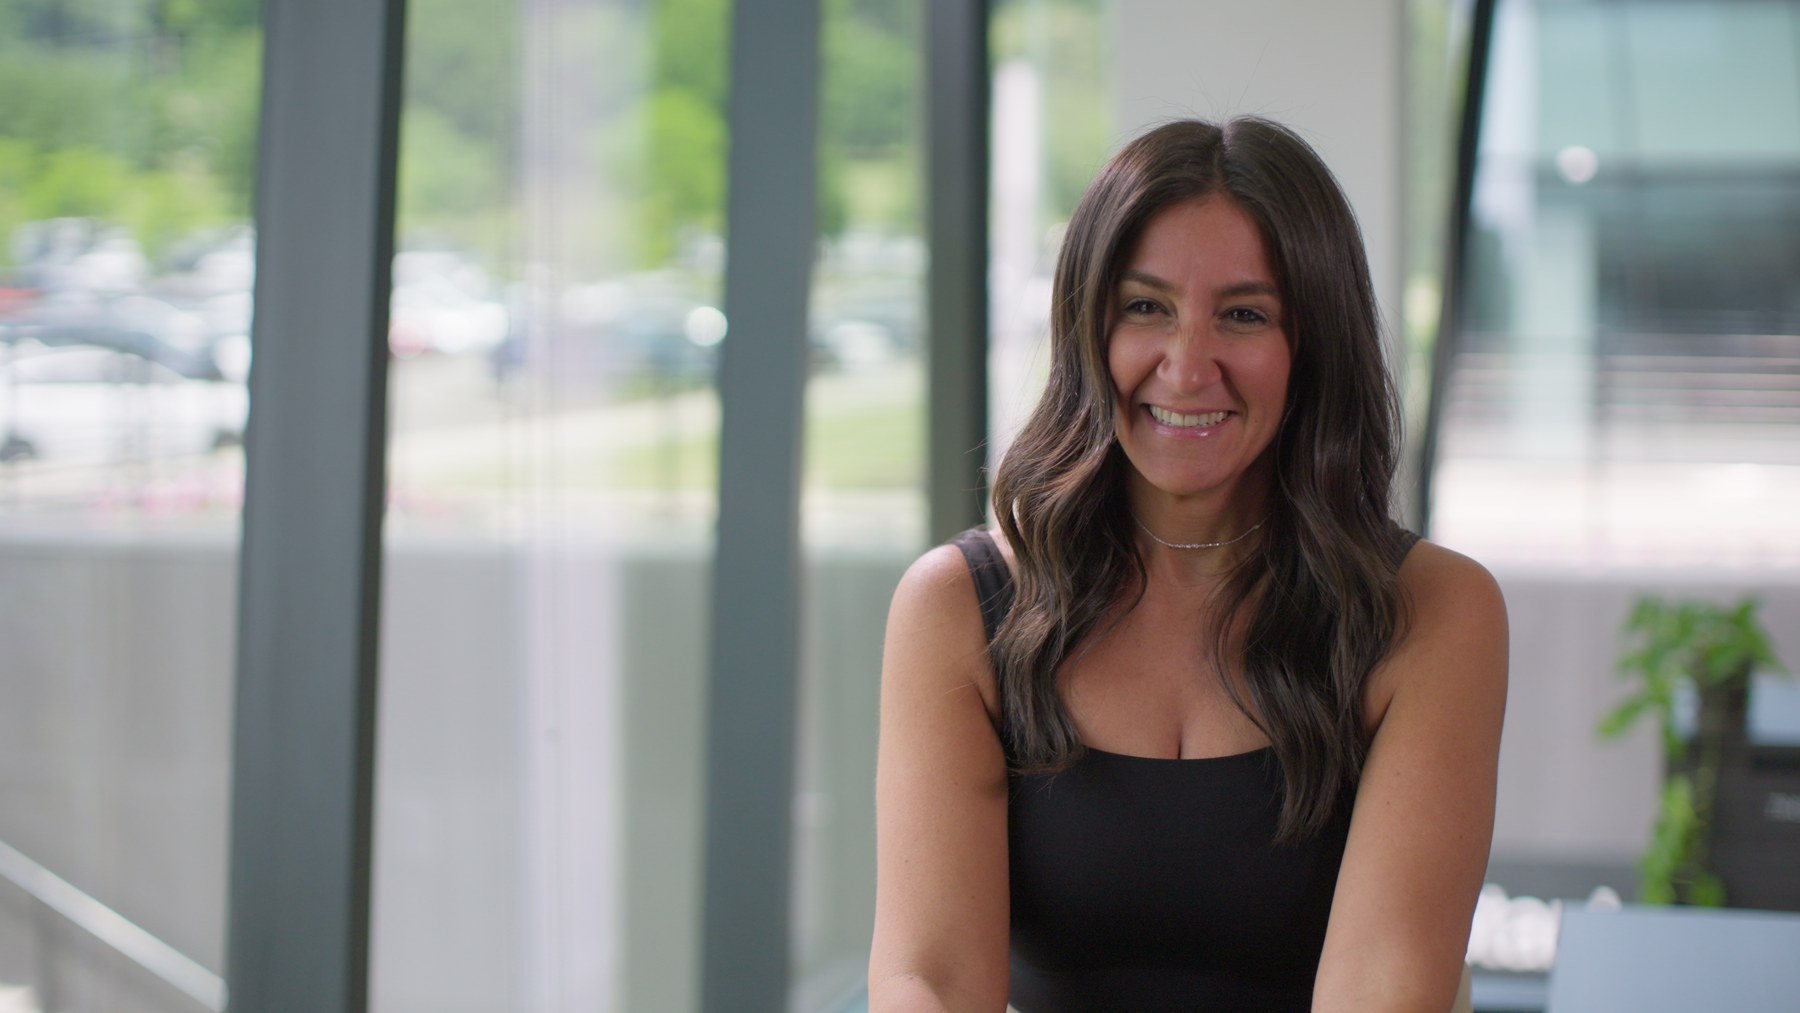
Across these interviews, the camera exposure remained locked. The exterior occupied a consistent range. Skin tones landed in a similar place. Each face had a defined key side and fill side, and the edge light provided separation when the background needed it.
The direction of the key changed, and the role of the 360c changed, but the contrast, exposure priorities, and overall softness remained connected.
That allowed the client to have multiple interview looks without the project feeling as though it had been filmed on different days by different crews.
A repeatable process for glass conference rooms
When I need to film interviews in a space dominated by windows, I follow this order:
- Study the sun and weather. Know whether direct light will enter the room and how the conditions may change during the shoot.
- Look for built-in control. Blinds, shades, diffusion, flags, and solid walls determine how much shape the room can support.
- Choose the frame and place the exterior. Use ND and exposure tools to decide where the brightest uncontrollable elements should sit.
- Lock the camera settings. A stable exposure makes it much easier to match several interviews.
- Shape the daylight first. Reduce or diffuse the windows before adding fixtures.
- Place skin tones intentionally. Use a meter, false color, or waveform to establish a consistent key level.
- Build contrast with fill. Add only enough light to retain the desired shadow detail.
- Add an edge when the subject needs separation. Let the image determine whether the accent should be subtle or defined.
- Reuse fixtures by changing their roles. A light can serve as fill for one orientation and key for another without rebuilding the entire setup.
Final thoughts
The abundance of natural light in a glass conference room can be an advantage, but only after it is controlled.
If every window is allowed to contribute equally, the room becomes one large source and the subject loses shape. By lowering the exterior, adjusting the blinds, diffusing the daylight, and then adding artificial light strategically, we can create separation without fighting the location.
The most important decision is the order.
Control the natural light first. Establish the exposure relationship. Then use fixtures to create the key, fill, and edge levels the image still needs.
That approach makes it possible to create several interview looks in the same challenging space while keeping the entire project visually consistent.
If you would like to learn more about exposure, camera control, lighting, composition, and creating more intentional images, be sure to check out my online course, Essential Camera Settings.
by Chris Tinard © cNOMADIC 2026
Learn more about cNOMADIC’s cinematography philosophy and training at cNOMADIC.com.