
Dynamic Range Is a Budget, Not a Score
Oct 27, 2026
A camera's dynamic-range number tells you how much brightness information the sensor can contain. It does not tell you which information deserves to survive.
That second question is the cinematographer's job. A scene may contain a bright window, a face, dark hair, a practical lamp, and a shadowed wall. If those values span more stops than the camera can record cleanly, something has to change. You can protect the window, preserve the shadows, or reshape the scene so both fit—but the camera cannot make that creative decision for you.
This is why I think of dynamic range as a budget rather than a score. The specification defines the limits. Exposure and lighting determine how those limited stops are spent.
If you want the technical foundation first, start with Dynamic Range Explained. This article takes the next step: turning that information into a decision process on set.
The total number is only the beginning
Manufacturers often describe a camera as having 14, 15, or 16 stops of dynamic range. That total is useful, but it is incomplete. What matters on set is how those stops are distributed around middle gray.
Middle gray is the reference point. Stops above it describe the room available for highlights; stops below it describe the room available for shadows. Two cameras can claim a similar total range while distributing that range differently—and the same camera can encourage a different exposure placement when you change Exposure Index.
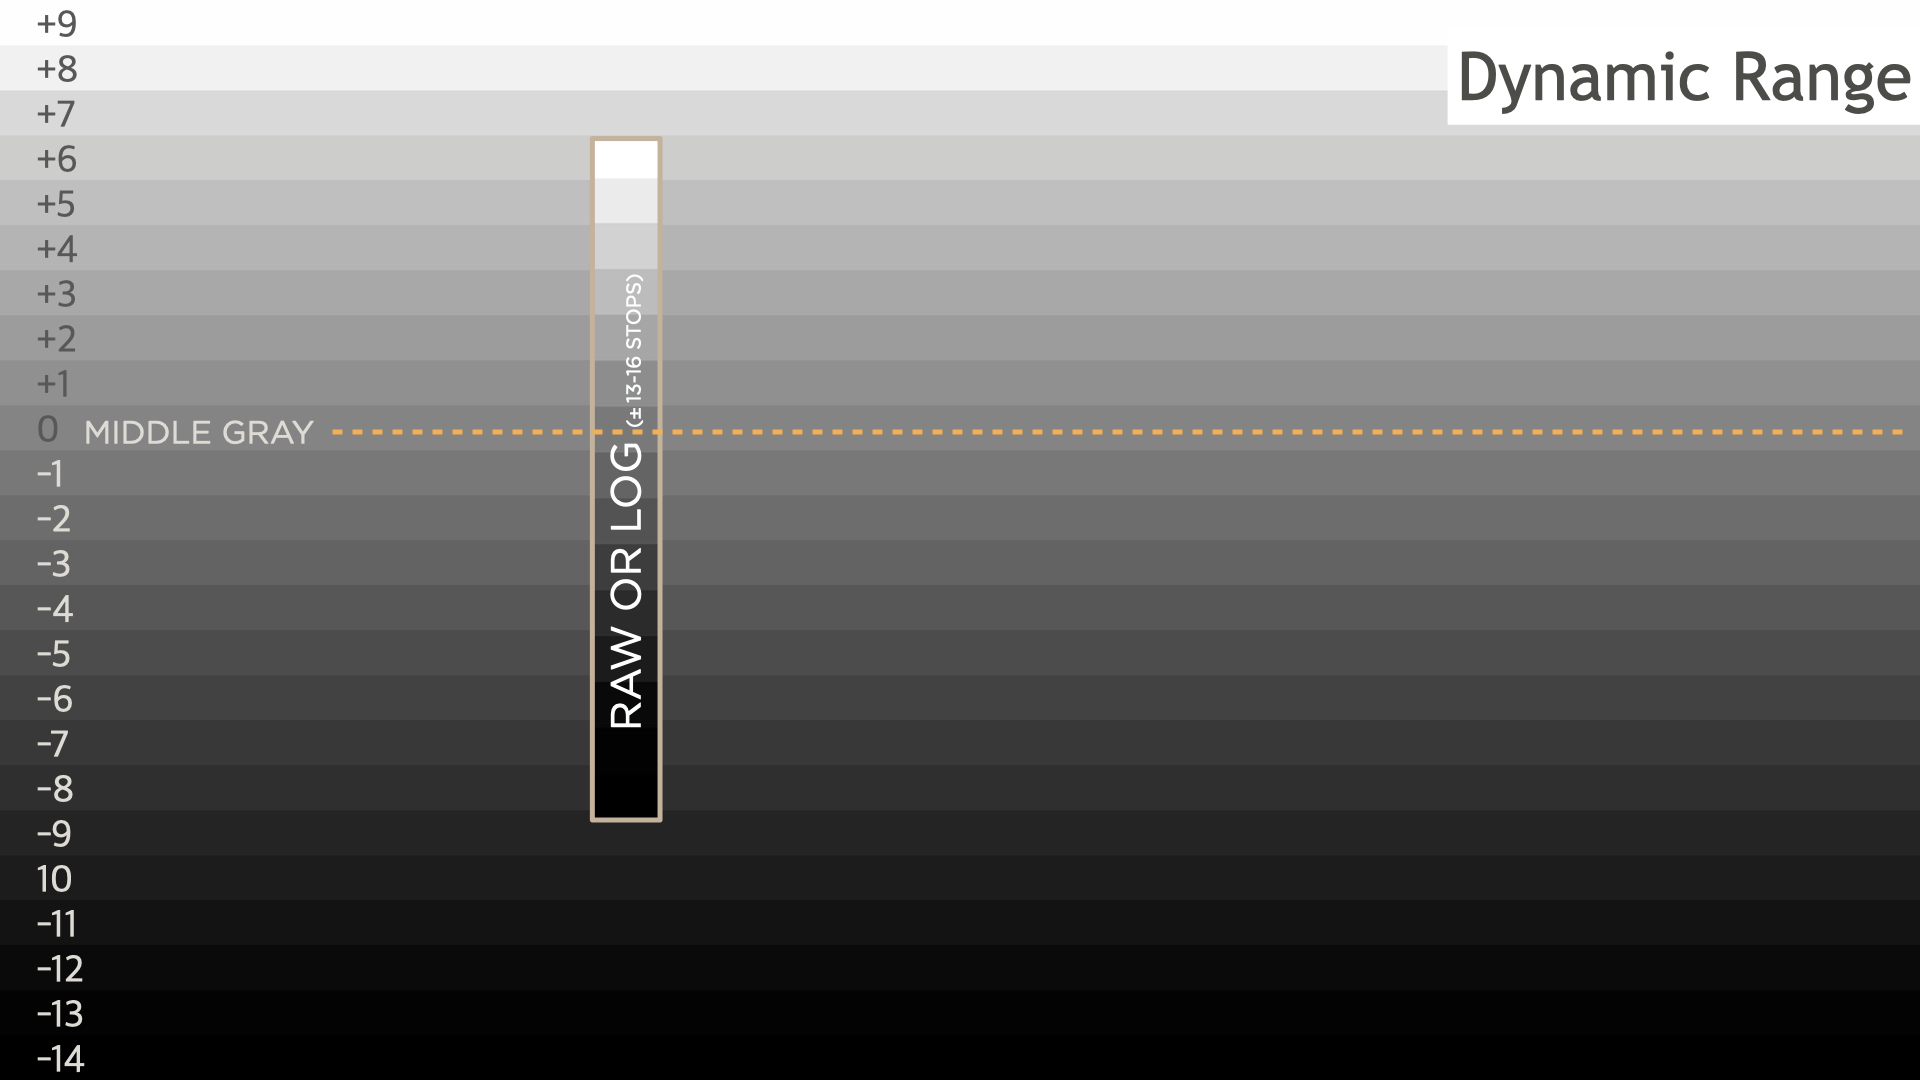
This is also why a stop is more useful than a vague description such as “a little brighter.” A stop describes a measurable relationship to the exposure anchor. If this language is new to you, Stops vs IRE: The Language of Cinematographers explains how stop relationships and monitor values work together.
Advertised range is not the same as usable range
The darkest stops on a chart may technically contain picture information, but that information can be noisy, muddy, or difficult to separate in the grade. A camera might record a value without recording it at a quality you would choose for the finished image.
That distinction changes how I evaluate a camera. I am less interested in the largest number printed in a brochure than in how much clean highlight and shadow information I can rely on for the kind of work I shoot.
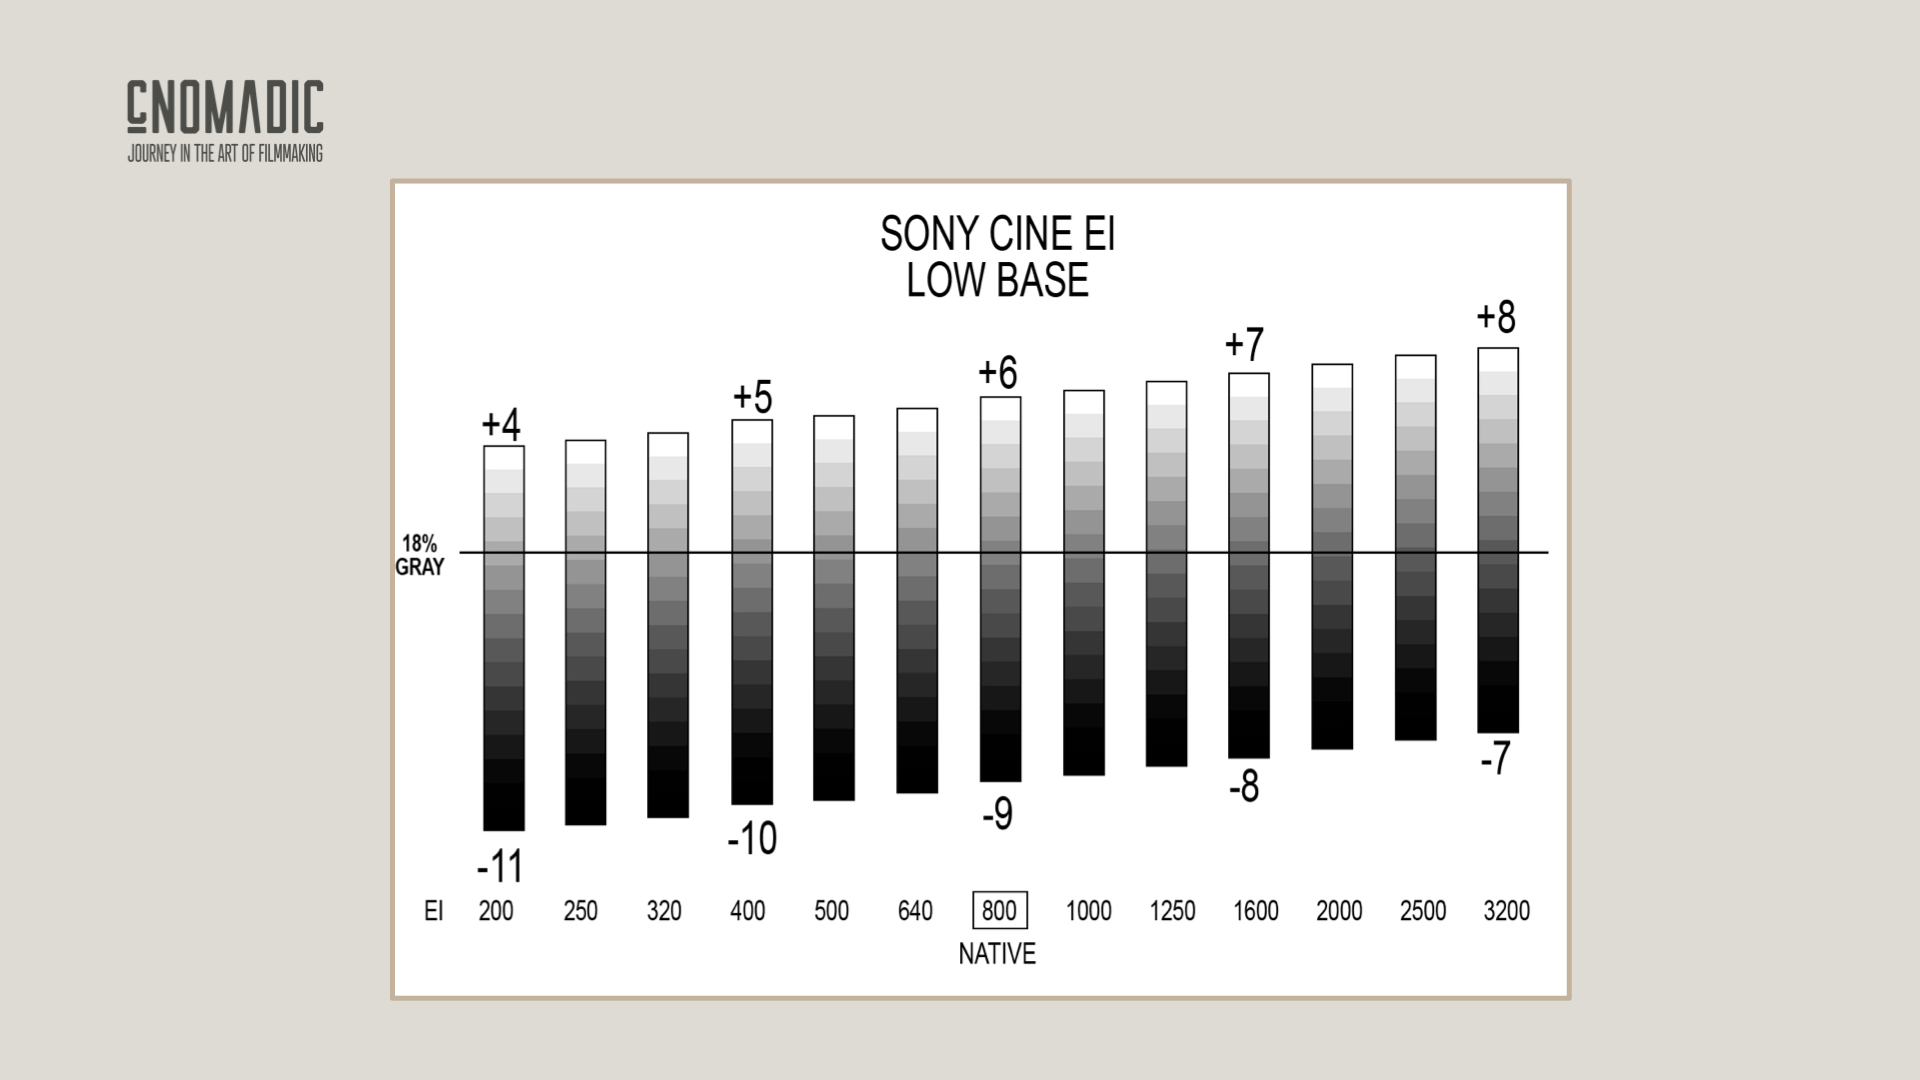
Changing EI does not create additional sensor latitude. It changes the exposure decision and therefore where scene values land within the range. Lowering EI can encourage you to give the sensor more light, improving shadow quality while spending highlight headroom. Raising EI moves the compromise in the other direction. Exposure Index Explained explores that trade-off in detail.
Measure the scene before deciding how to expose it
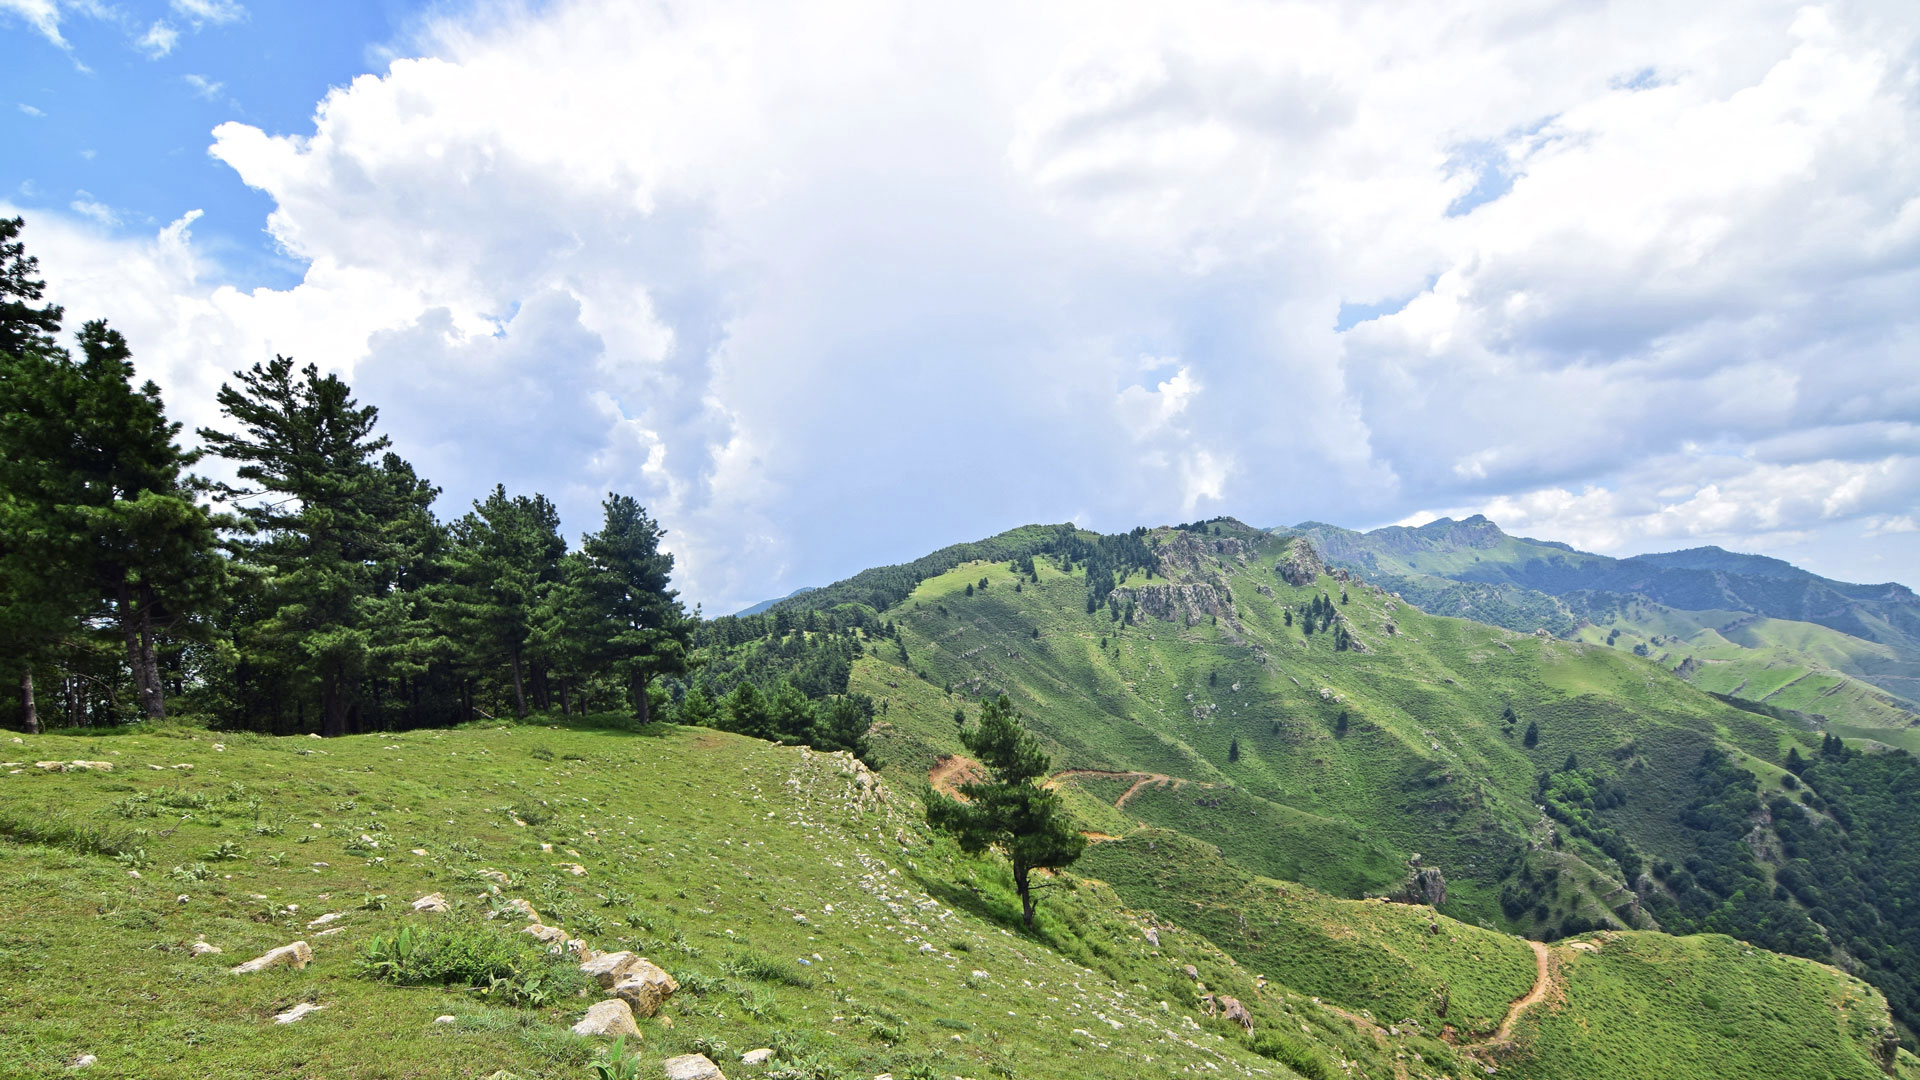
Every scene has its own dynamic range. The camera's range is fixed by the recording mode; the room's range is created by the light, surfaces, wardrobe, composition, and time of day.
Imagine a subject sitting near a bright window. The window may be many stops above middle gray while dark hair or wardrobe falls several stops below it. Measuring those important areas gives you the span the camera is being asked to hold.
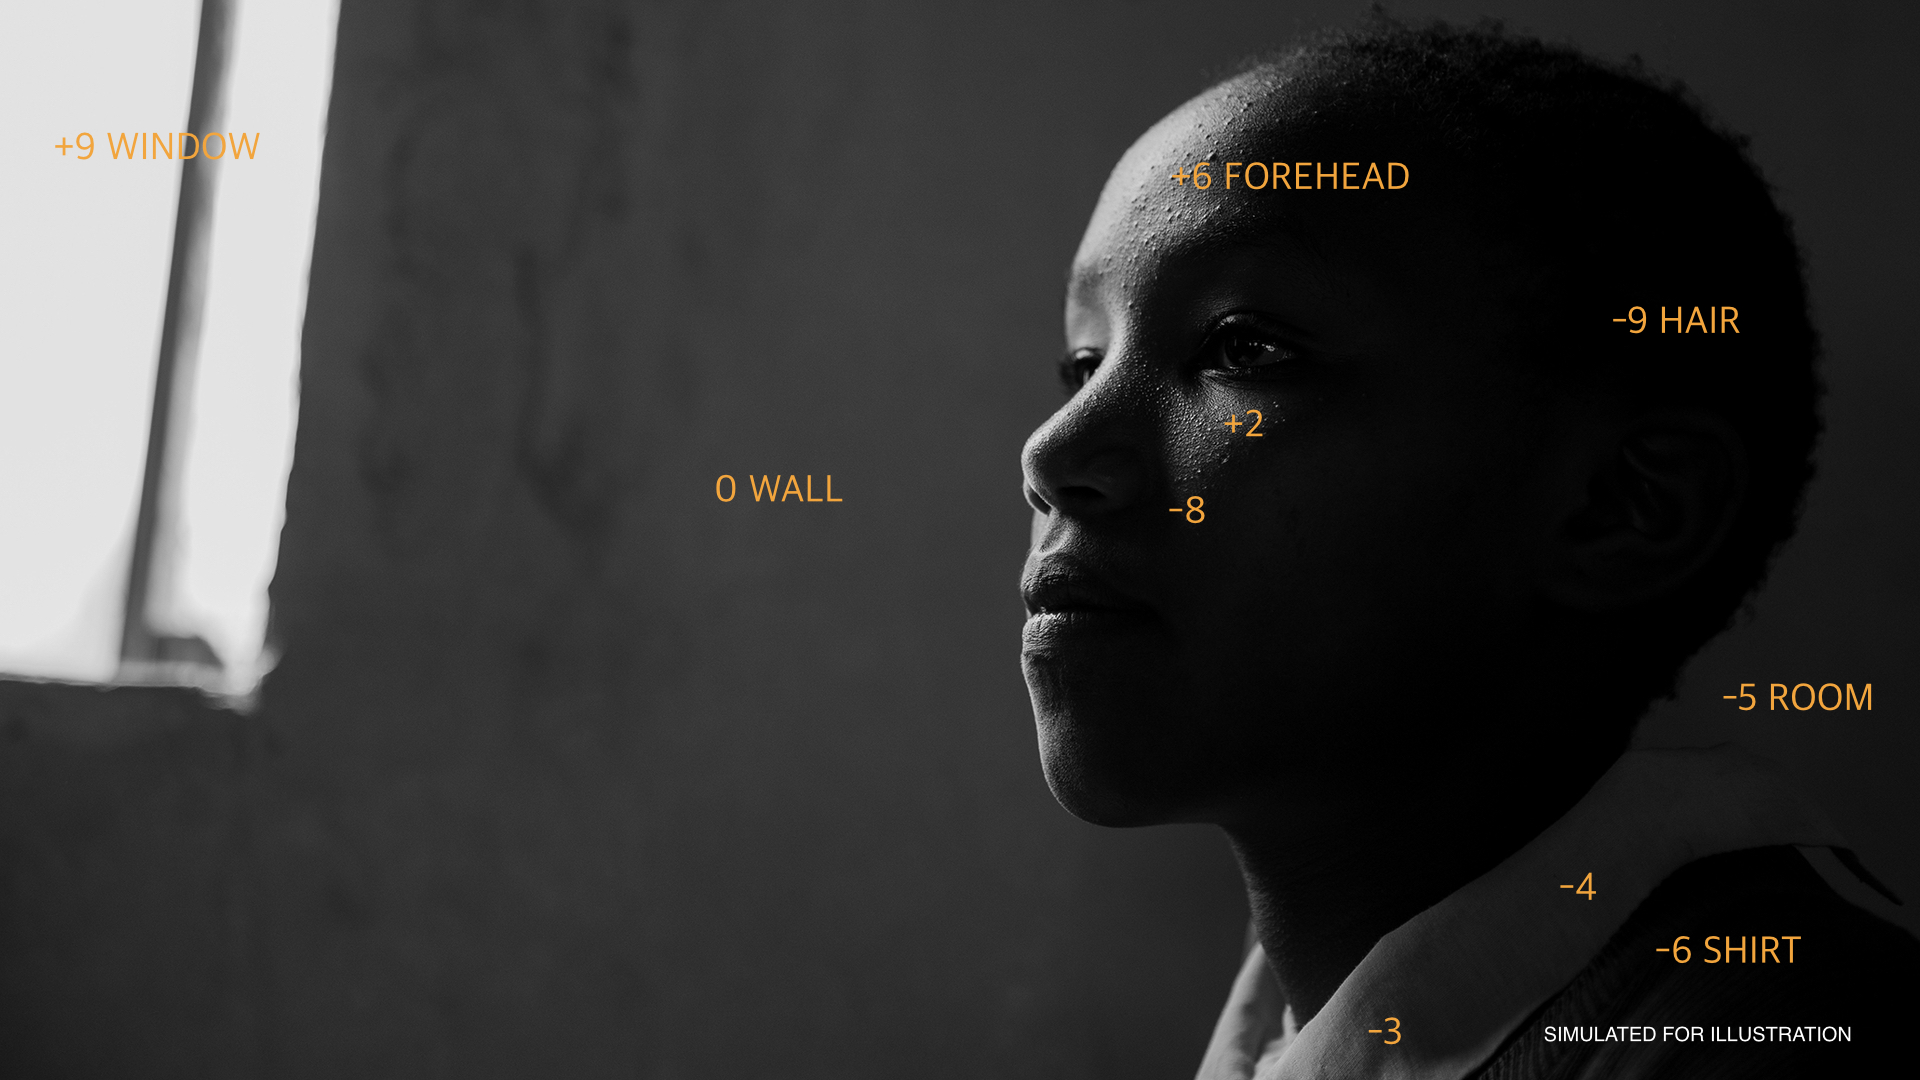
The point is not to memorize the labels in this example. It is to identify the brightest and darkest details that matter to the story. A specular reflection that can disappear is not the same as a window view that establishes the location. A black corner that can fall away is not the same as dark hair that needs texture and separation.
Once those priorities are clear, the numbers become a map instead of a rule.
When the scene exceeds the sensor, choose what survives
If the important values in the scene span more stops than the camera can hold, there is no exposure setting that preserves all of them. Moving exposure does not compress the range; it slides the scene up or down inside the same container.
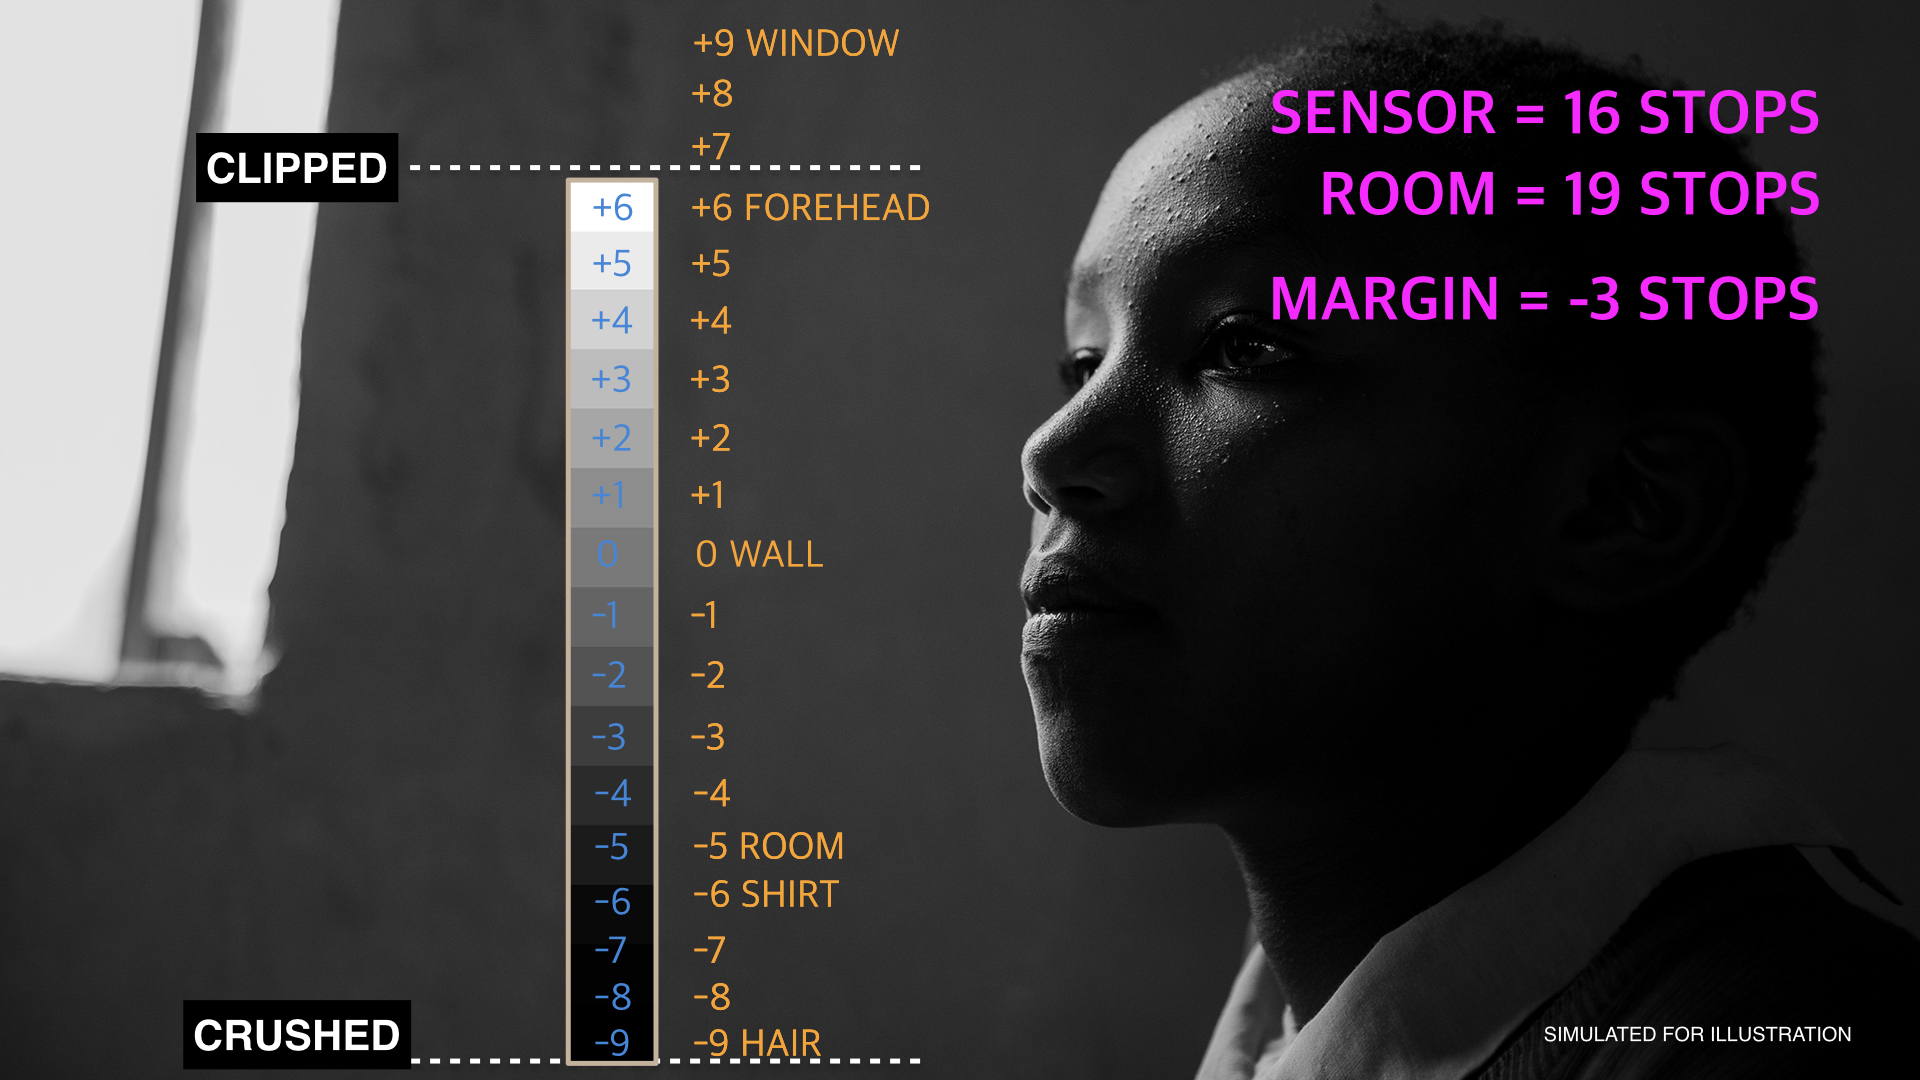
You then have three practical choices:
- Protect the highlights. Lower the exposure so the bright window or practical retains detail, knowing that the deepest shadows may become noisy or disappear.
- Protect the shadows. Raise the exposure so faces, hair, or dark wardrobe remain clean, accepting that the brightest areas may clip.
- Change the scene's relationships. Add level to the subject, reduce the window, introduce negative fill, change the composition, or wait for the ambient light to move until the important values fit.
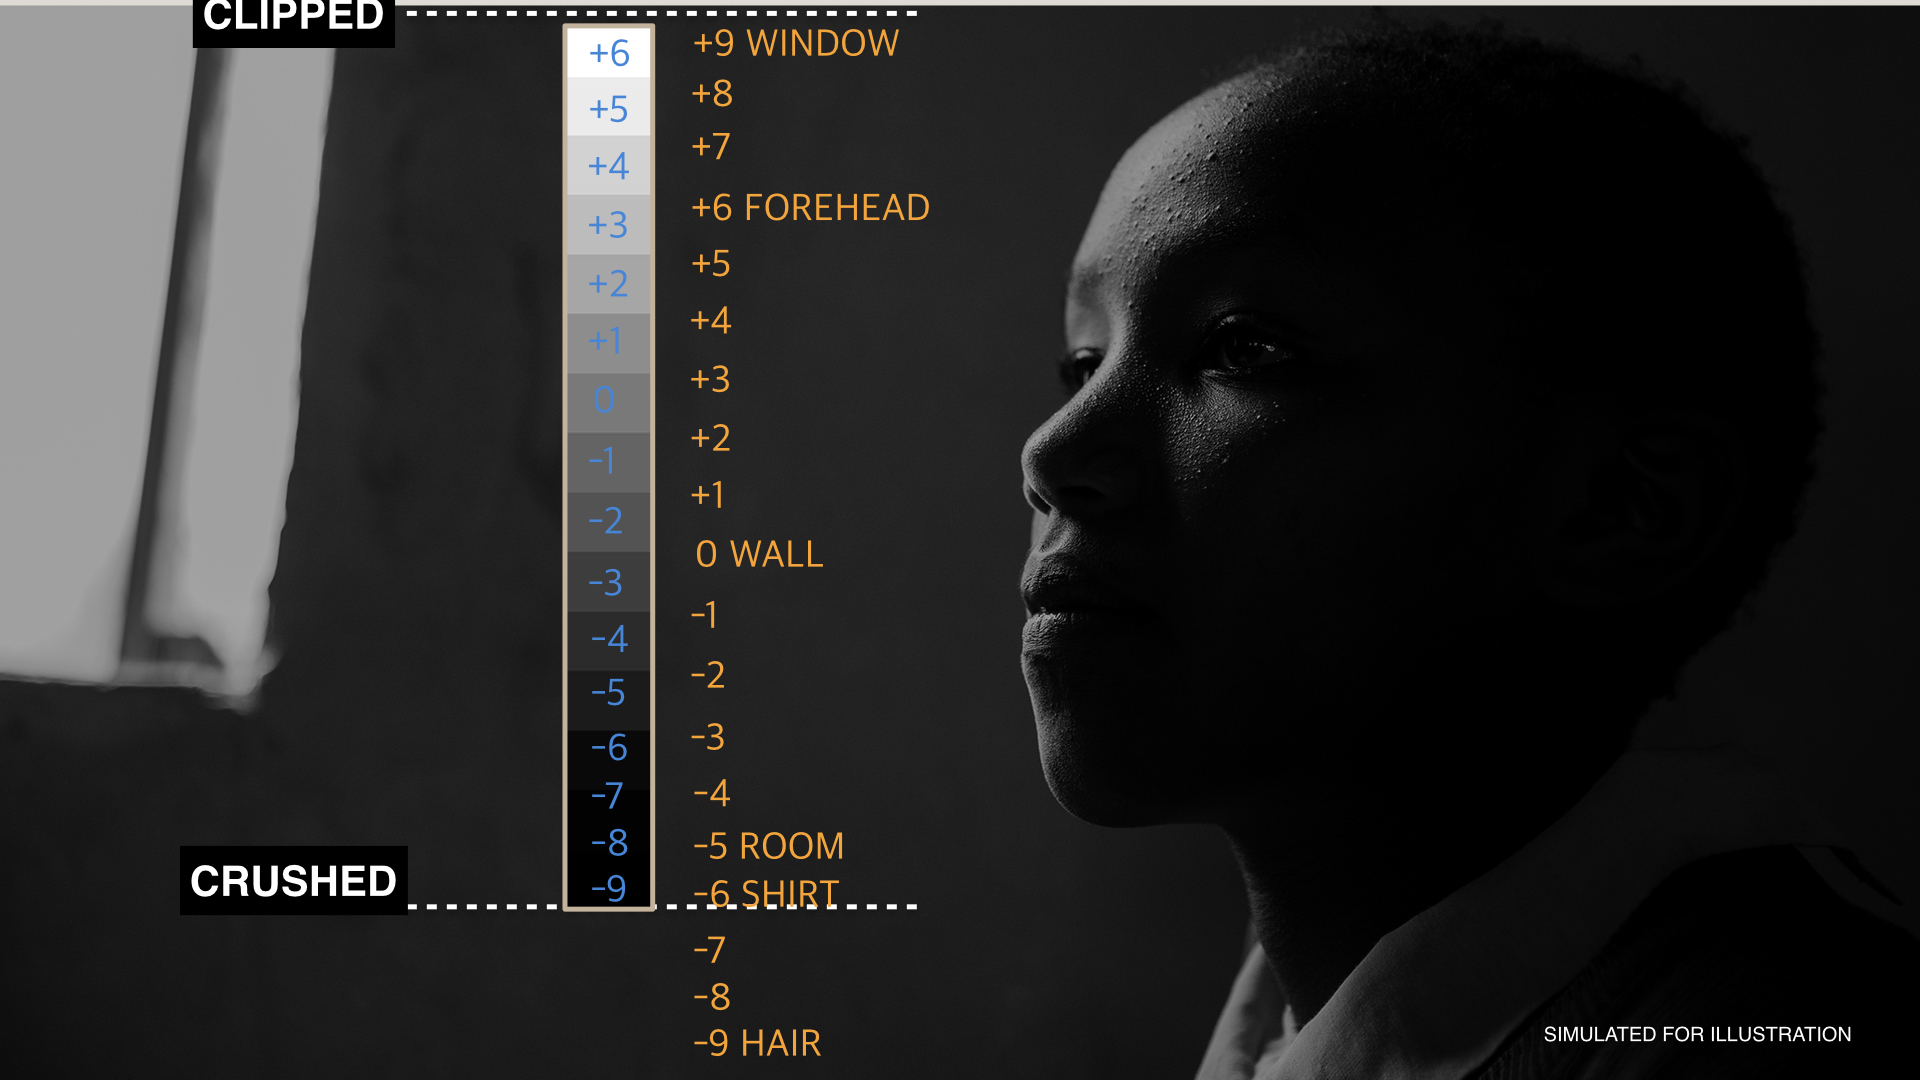
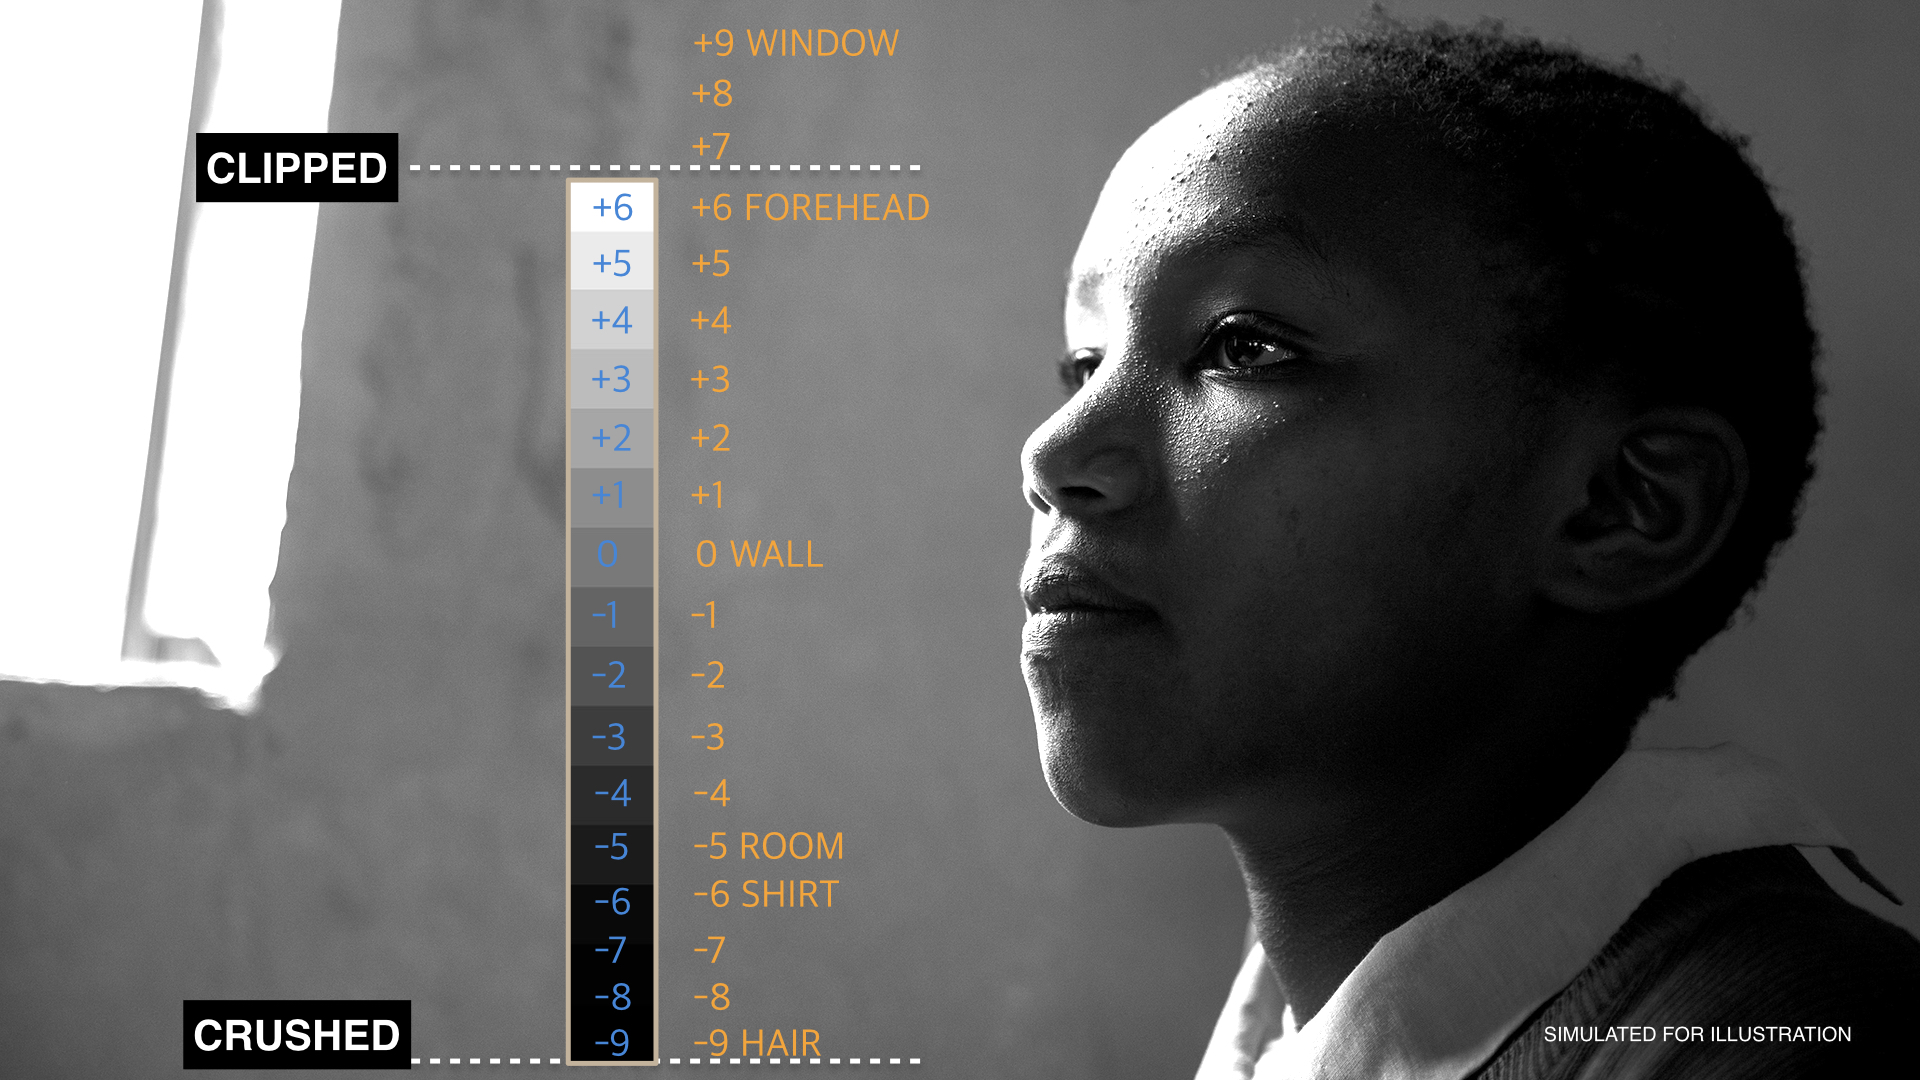
Neither exposure is automatically correct. The correct placement is the one that protects the visual information the audience needs.
Exposure is placement, not correction
It is tempting to speak about exposure as if the camera contains one mathematically correct answer. In practice, exposure is the act of placing the scene's tones within the sensor's limits.
If I want a window to feel luminous but still show the world outside, I place it below clipping and build the subject relative to it. If I want the exterior to disappear into white, clipping may be intentional. If a shadow contains nothing the audience needs, I may let it fall. If the shadow contains an important face, I change the lighting rather than hoping post-production will recover information that was never recorded cleanly.
This is the same thinking behind Redefining Brightness: the audience responds to relationships inside the frame, not to one isolated IRE value. Dynamic range protects the possible relationships. Cinematography decides which ones matter.
A practical dynamic-range workflow
- Lock the creative camera choices. Choose frame rate, shutter, aperture, recording profile, and the camera's native sensitivity or EI workflow.
- Identify the exposure anchor. Know where middle gray sits for the profile and monitoring transform you are using.
- Find the important extremes. Measure the brightest detail that must survive and the darkest detail that must remain usable.
- Compare the scene to the camera. Determine whether those values fit inside the camera's usable—not merely advertised—range.
- Choose the priority. Decide what the audience needs to see before moving the exposure.
- Place the scene. Use ND, aperture, light level, or EI-guided exposure to position the important values.
- Shape what does not fit. Reduce highlights, lift selected shadows, subtract spill, change the blocking, or reframe until the relationships serve the image.
- Verify the result. Check waveform, false color, and the image itself. Tools confirm the placement; they do not choose the intention.
Dynamic range becomes useful when it changes a decision
A bigger number can give you more options, but options are not the same as intention. The practical value of dynamic range is knowing where the boundaries are, recognizing when the scene crosses them, and making a deliberate choice before detail is lost.
The camera provides the container. You decide what belongs inside it.

If you want to practice placing exposure, reading scene relationships, and making those choices under real-world constraints, explore the Exposure Lab. The next six-week live cohort begins January 11, 2027 and is limited to 15 participants.
For a quick on-set reference, download the free Placing Your Exposure guide. If you want the broader camera workflow behind these decisions, explore Essential Camera Settings.
by Chris Tinard © cNOMADIC 2026
Learn more about cNOMADIC's cinematography philosophy and training at cNOMADIC.com.