How to Shape Light Through a Window
Oct 12, 2026The most important light in this interview was not aimed at the subject. It was placed outside the house and pushed through a window to give the room direction, contrast, and a reason for every other light in the setup.
I used to associate this technique with large Hollywood productions: powerful fixtures outside windows, big crews, and enough time to reshape an entire location. On this interview, the patio gave us an outlet, cover from the weather, and a useful angle through the middle window. That made it practical to test the idea with an Amaran 360c.
The result was better than simply making the room brighter. It created an image I would not have found by repeating my normal interior setup.
The safe setup worked—but it erased the shape
After turning off the overhead fixtures, the room was too dark for the interview. My familiar solution was to push a fixture into the ceiling or broadly fill the room. That raised the exposure and made the space usable, but it also brought the room toward one even level.
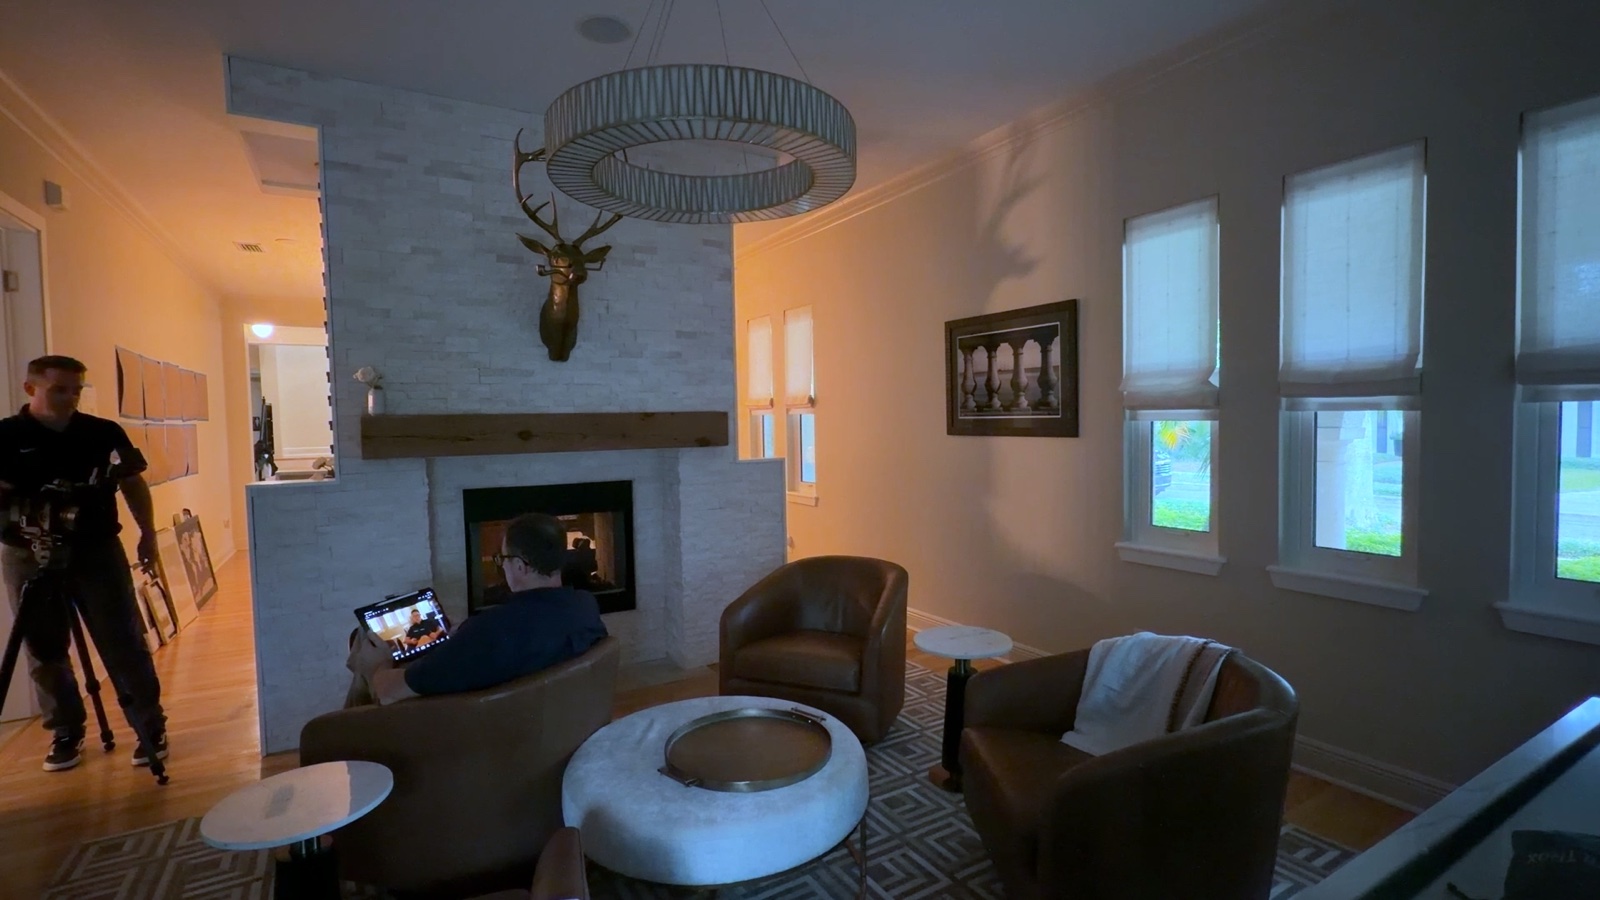
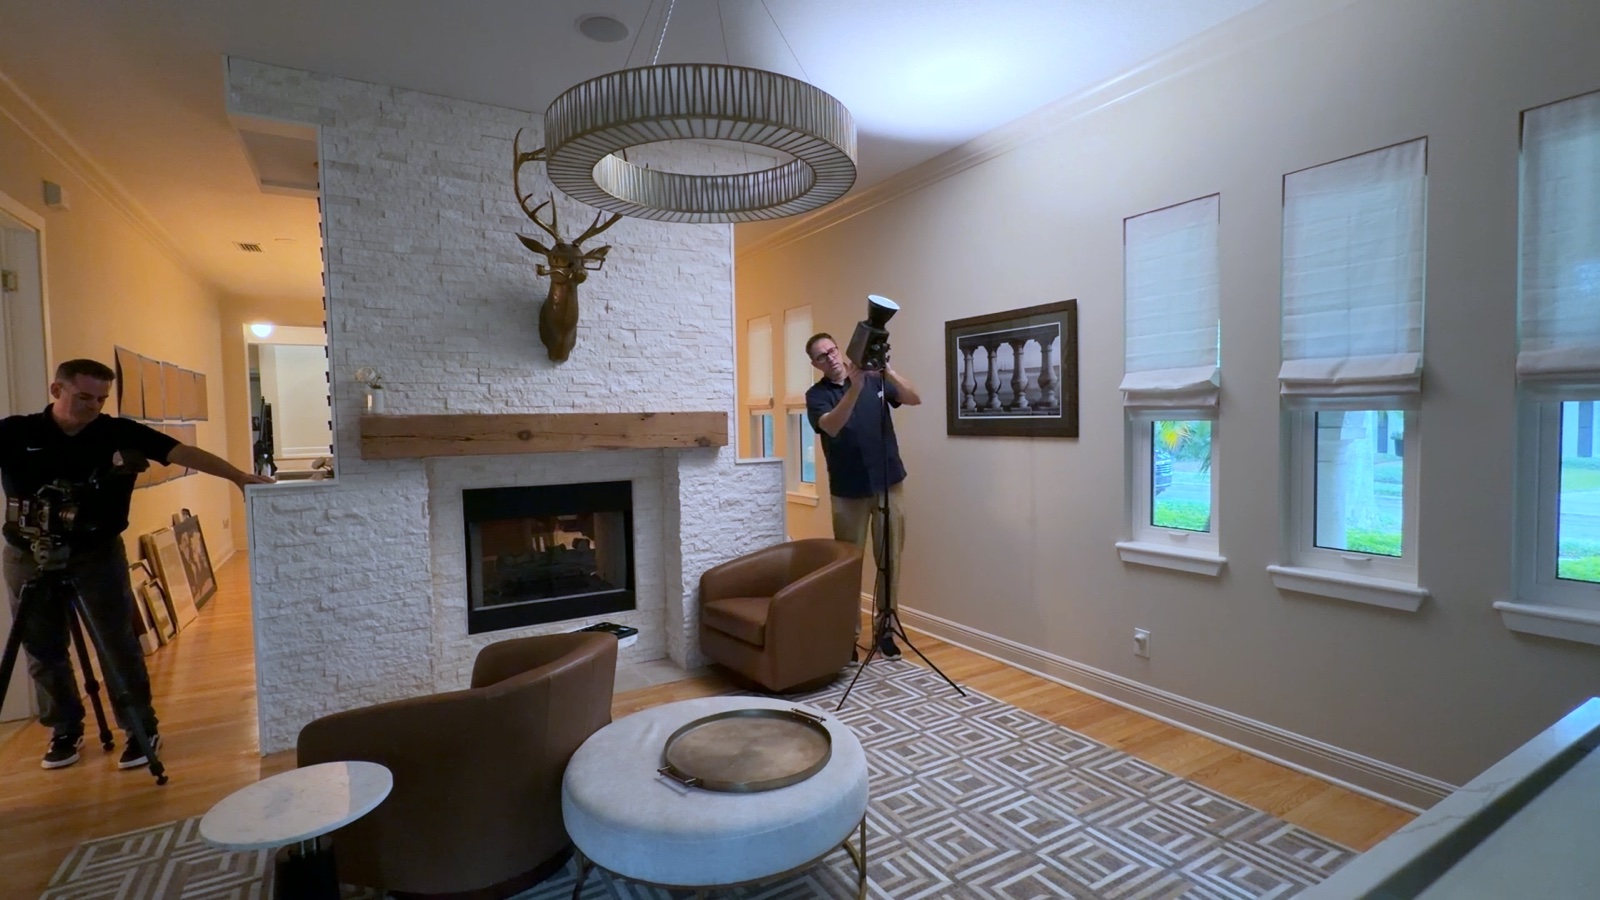
There was nothing technically wrong with that approach. It was fast, controllable, and could have produced a perfectly acceptable interview. The problem was that it did not use what made this particular location interesting.
Use the window to motivate the background light
The windows were already the strongest visual feature in the frame. Rather than treating them as bright rectangles to control, I asked what would happen if one of them became the source of the room's shape.
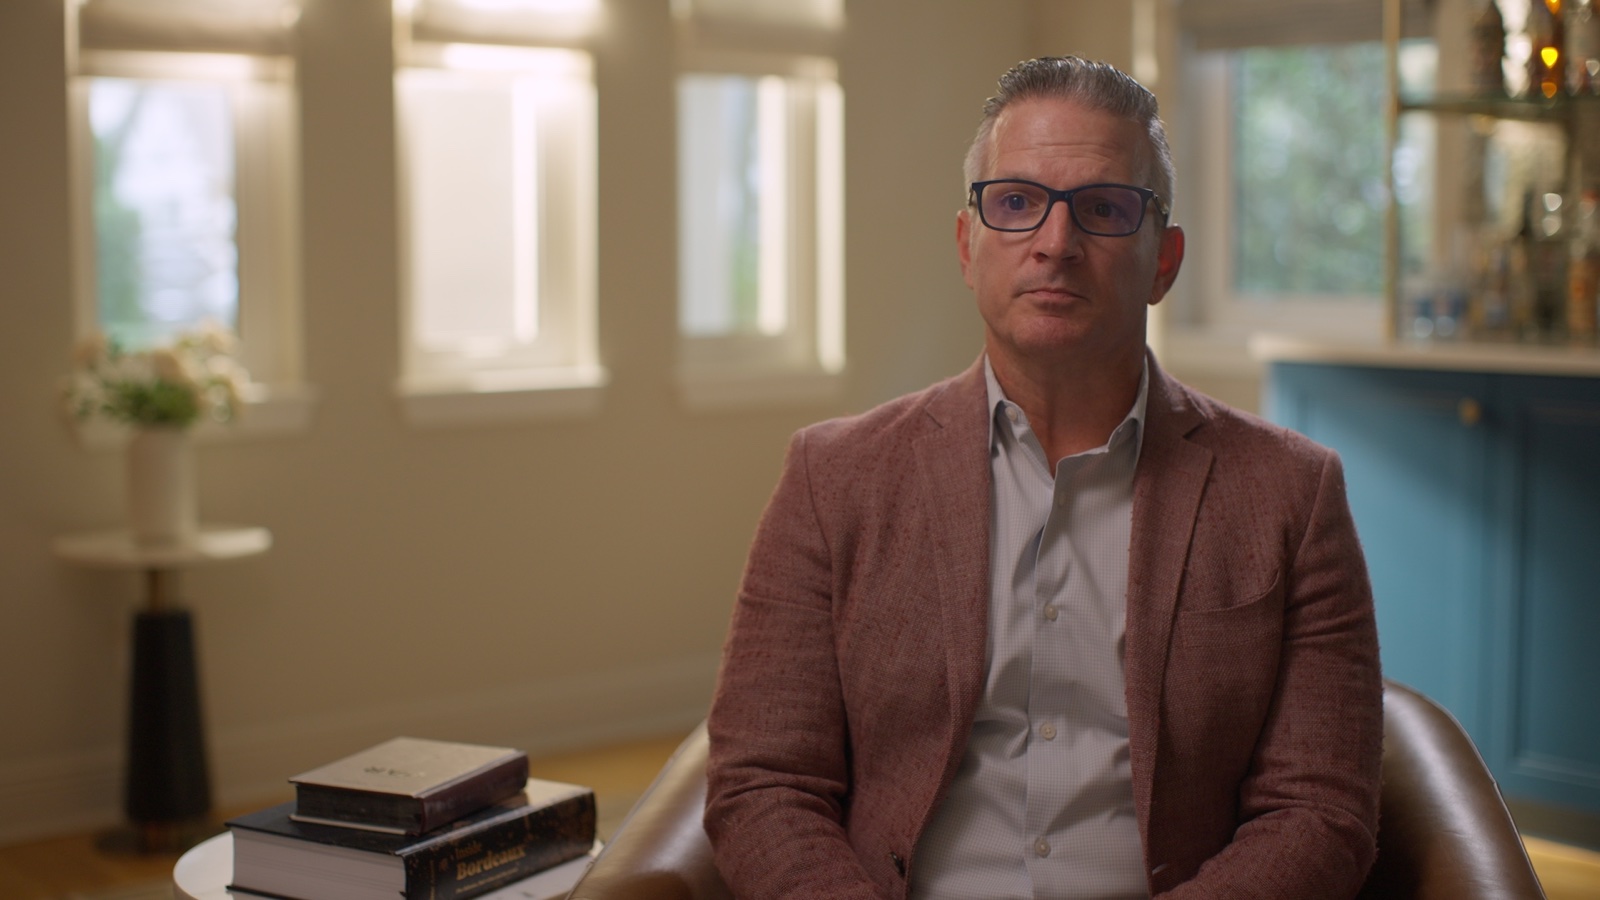
We placed the Amaran 360c outside and aimed it through the middle window. Instead of washing the entire room, the fixture produced a directional patch that traveled across the furniture and floor. The light felt connected to the architecture because it entered from a believable place.
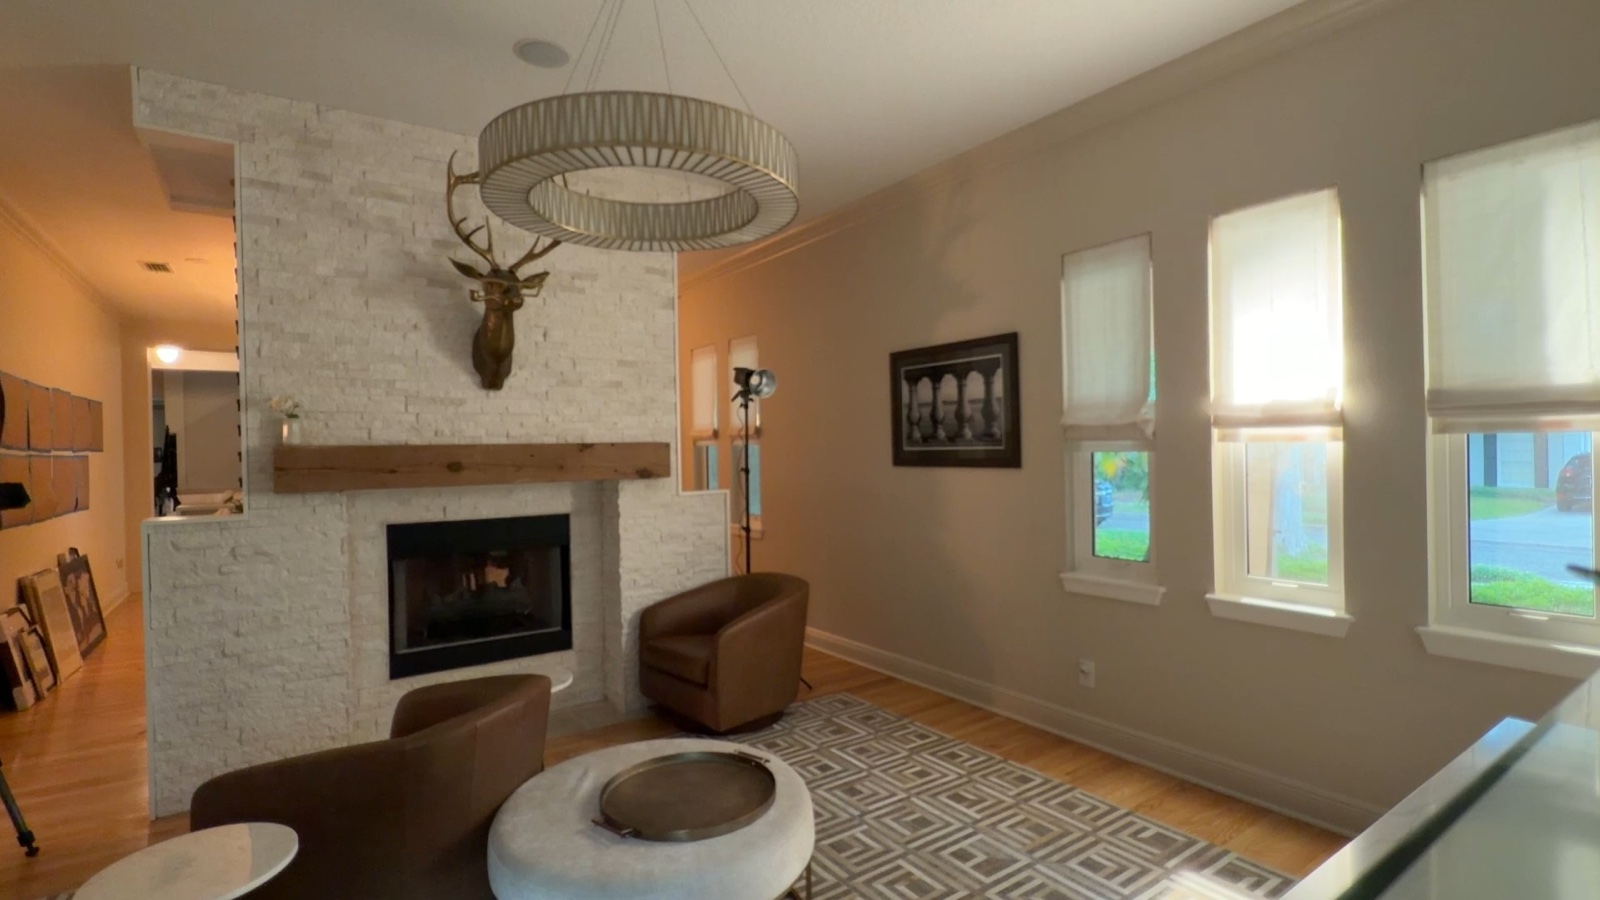
This is the same reason I do not define brightness only by how much light is on the subject. In Redefining Brightness, I explain how surrounding values and contrast determine whether an image feels bright. Here, the harder window source allowed some areas to lift while others stayed dark enough to preserve depth.
A harder source made more sense than a soft wash
Soft light is often the default for interviews, but softness was not the goal for the room. A soft source outside the window would have spread more evenly and weakened the defined shapes that made the experiment useful.
The harder source suggested morning sunlight. It created brighter and darker zones, revealed texture, and made the room feel illuminated by something beyond the frame. The source was artificial, but its direction made it feel motivated.
That distinction matters: natural-looking light does not have to be available light. It needs a believable direction, quality, and relationship to the location.
Build the subject after the room has direction
Once the window light established the background, I built the subject into that environment instead of asking one large source to solve the entire frame.
I added a Neewer HB80c in a three-quarter back position for separation. A Halo 100x became the key, squeezed into the limited space beside the fireplace and pushed through diffusion. That gave the face a soft, controlled source without destroying the harder quality in the background.
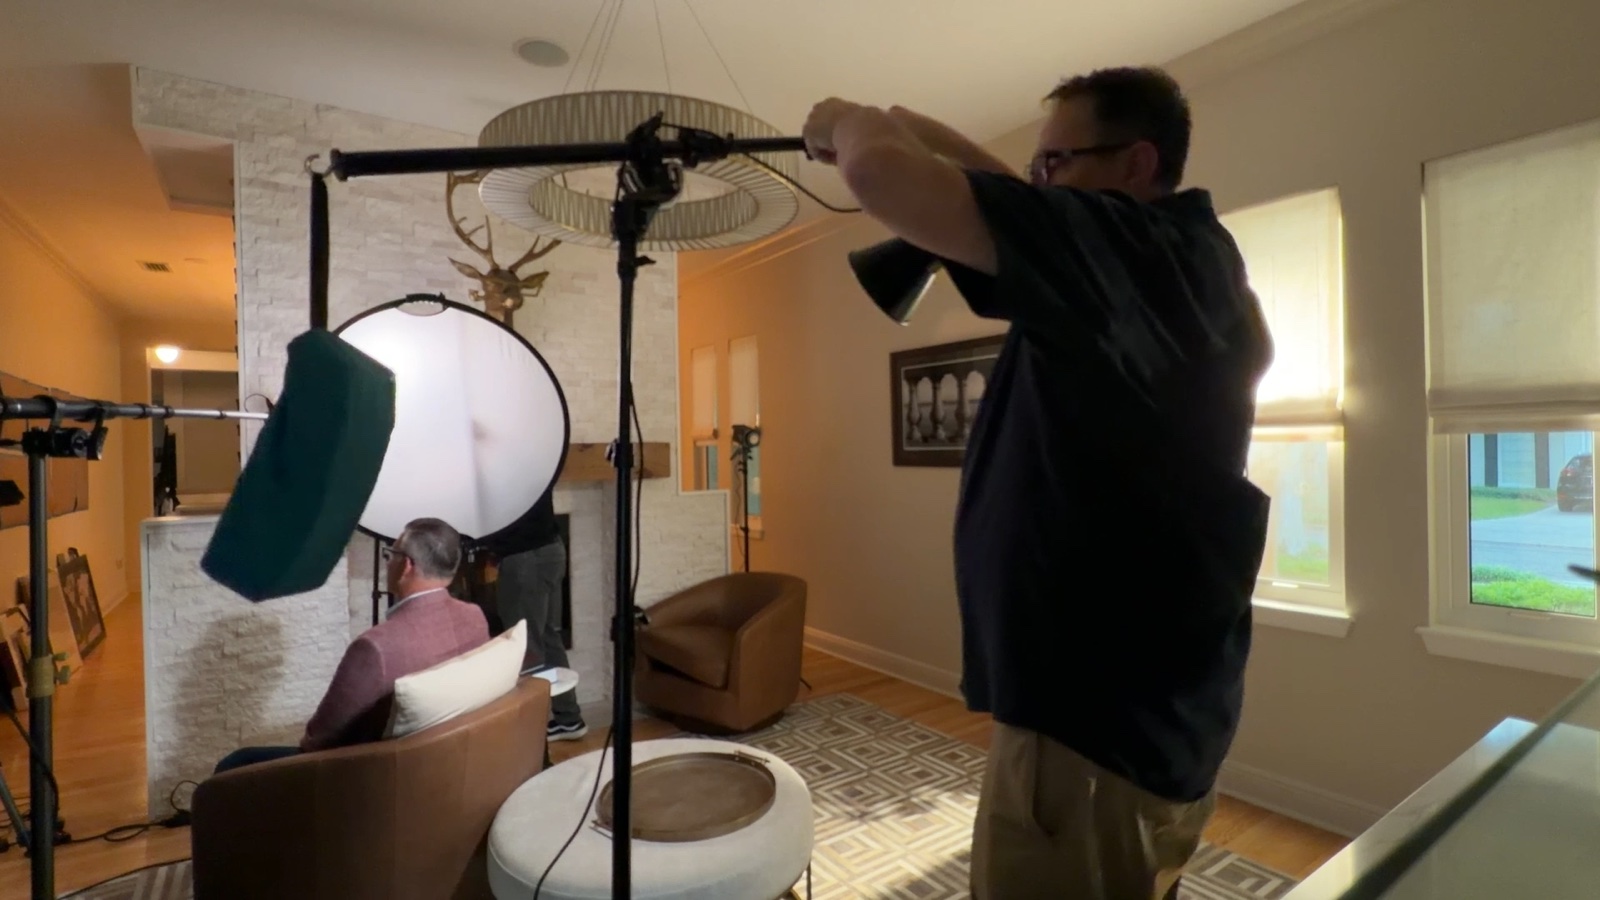
The room still produced a great deal of ambient return, so I used negative fill on the shadow side. Subtracting that uncontrolled light restored the key-to-fill difference and prevented the face from becoming as even as the original room-lighting approach.
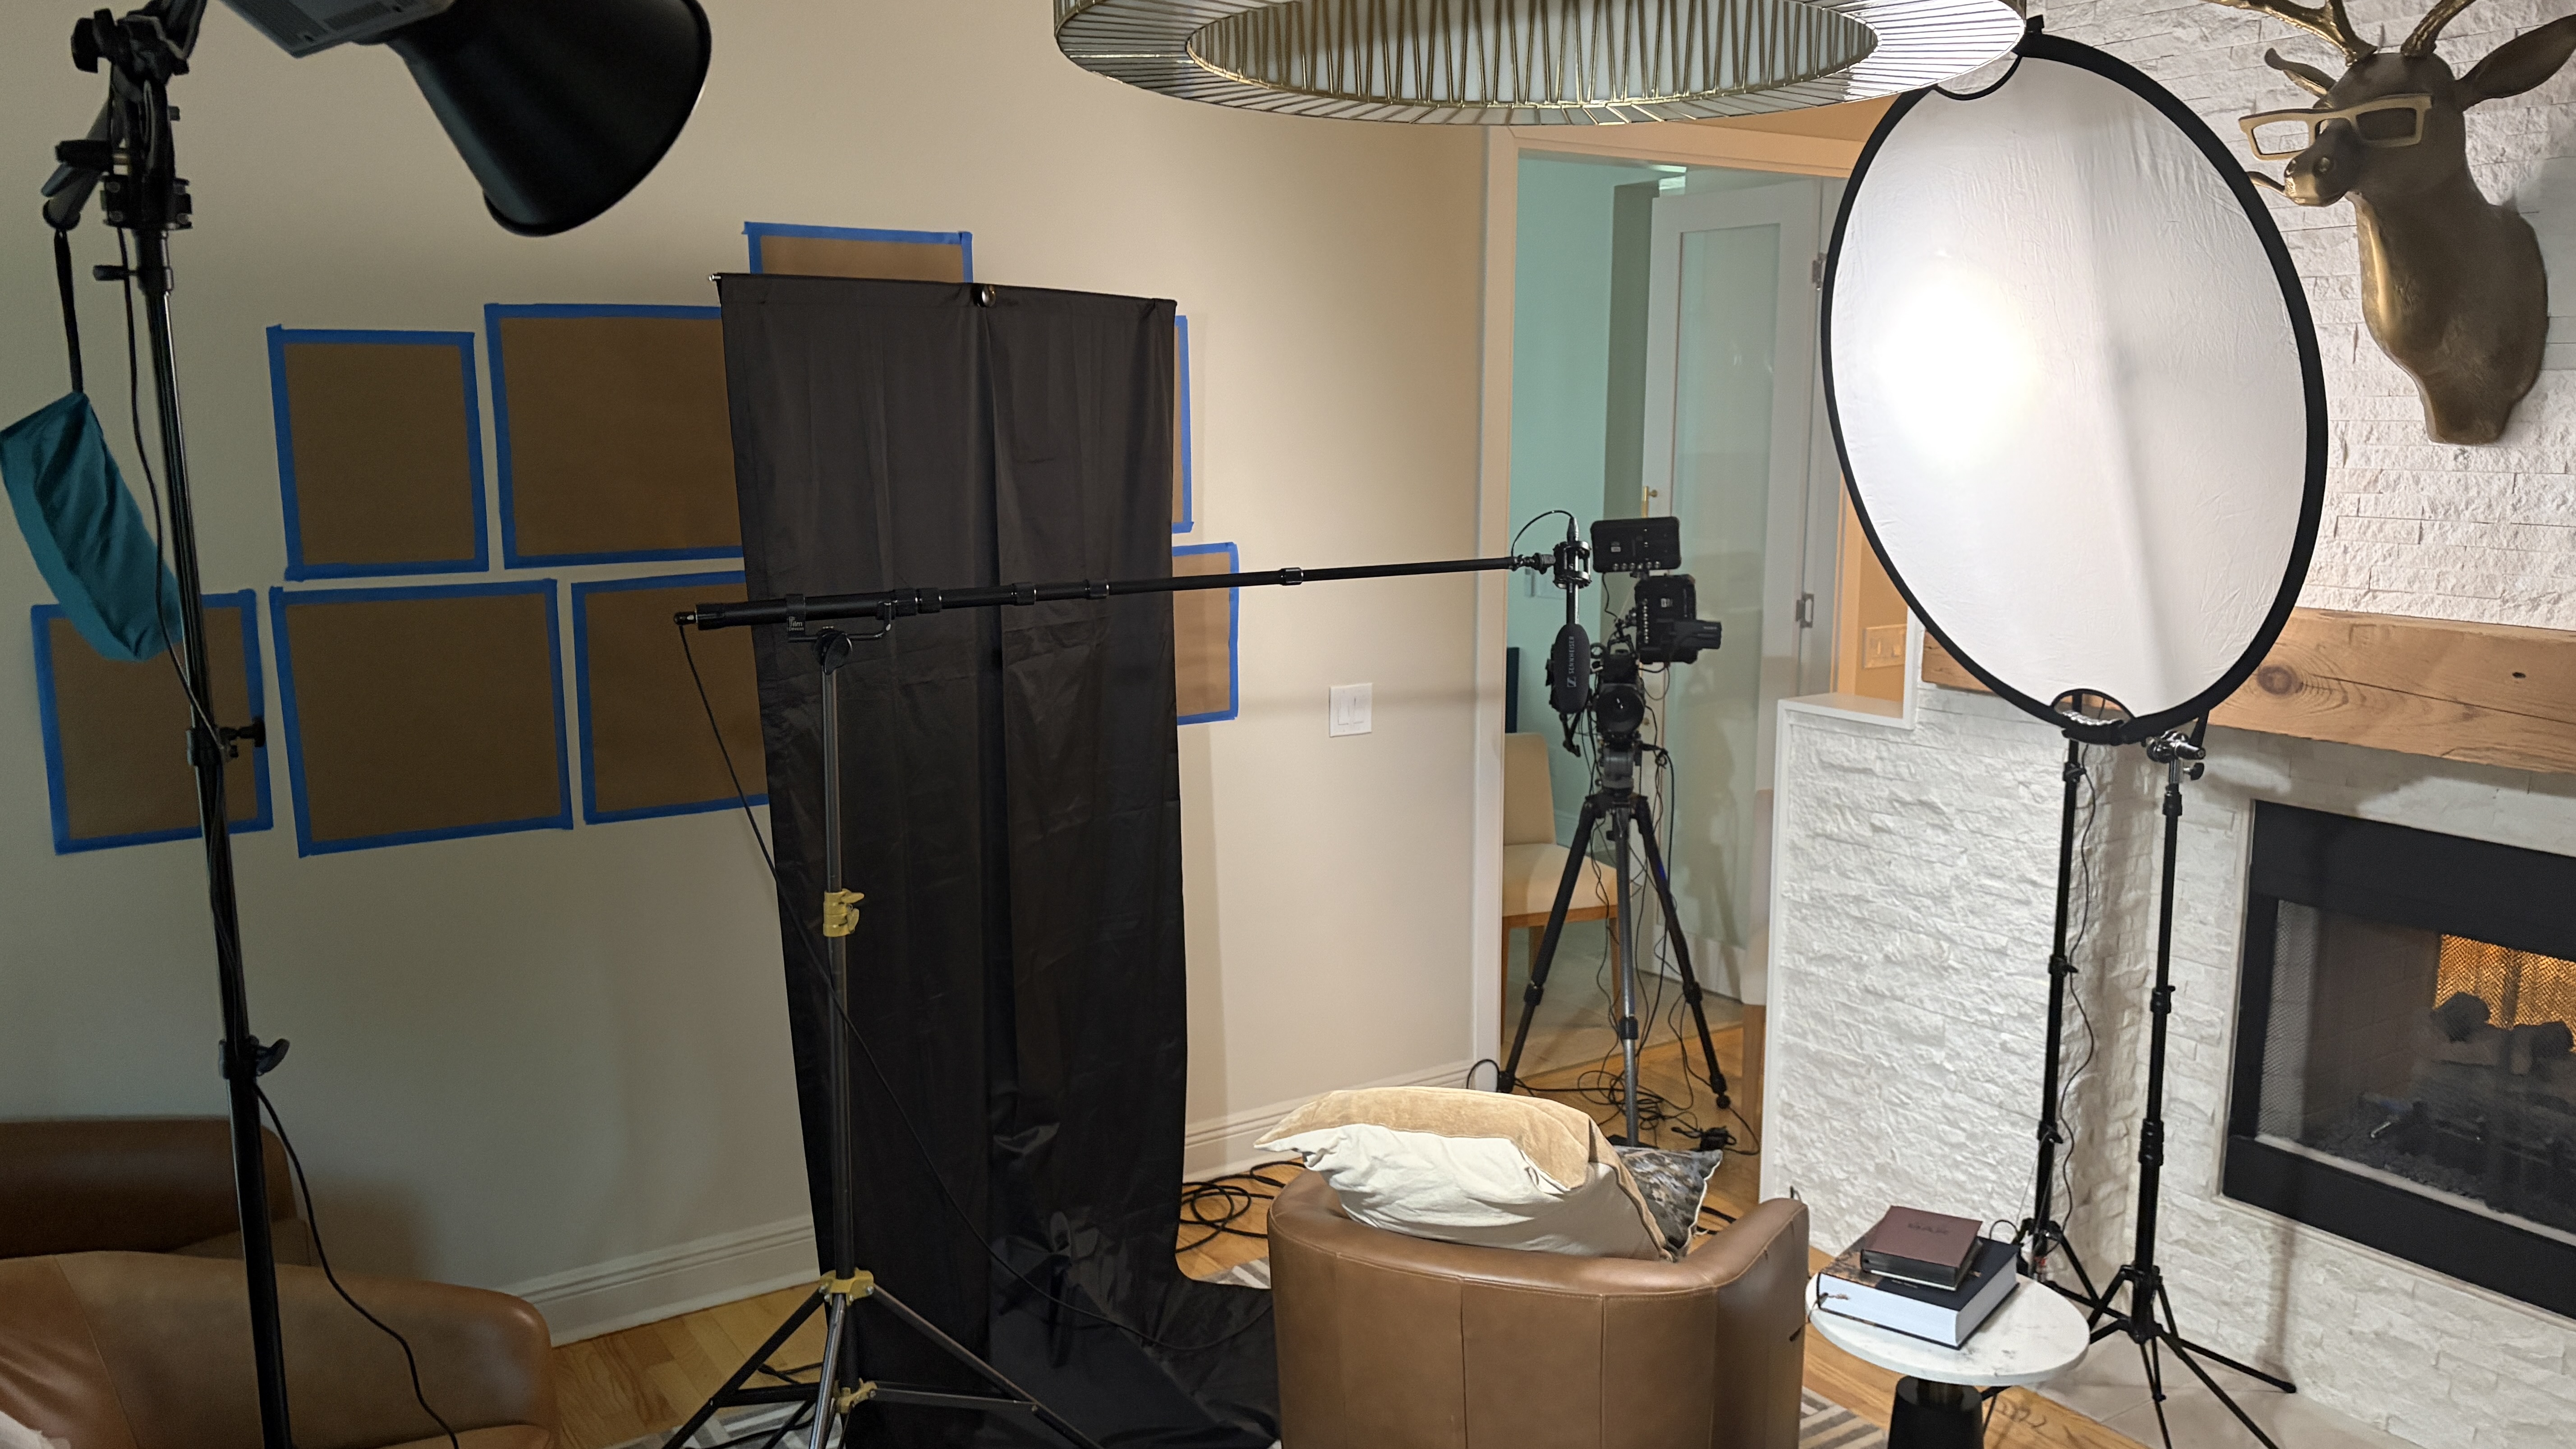
This follows the same principle I use when working with difficult exterior light: establish the uncontrollable part of the environment first, then shape the subject relative to it. The process is broken down further in How to Control Natural Light for Cinematic Outdoor Lighting.
Recreate the idea, not the exact rig
The next day, we needed a second interview in a different house. The exterior angle did not allow the same fixture placement, so the light moved inside. The goal was not to reproduce every stand position. It was to preserve the visual idea: a directional source motivated by the windows, a controlled key, and enough contrast to keep the two interviews in the same world.
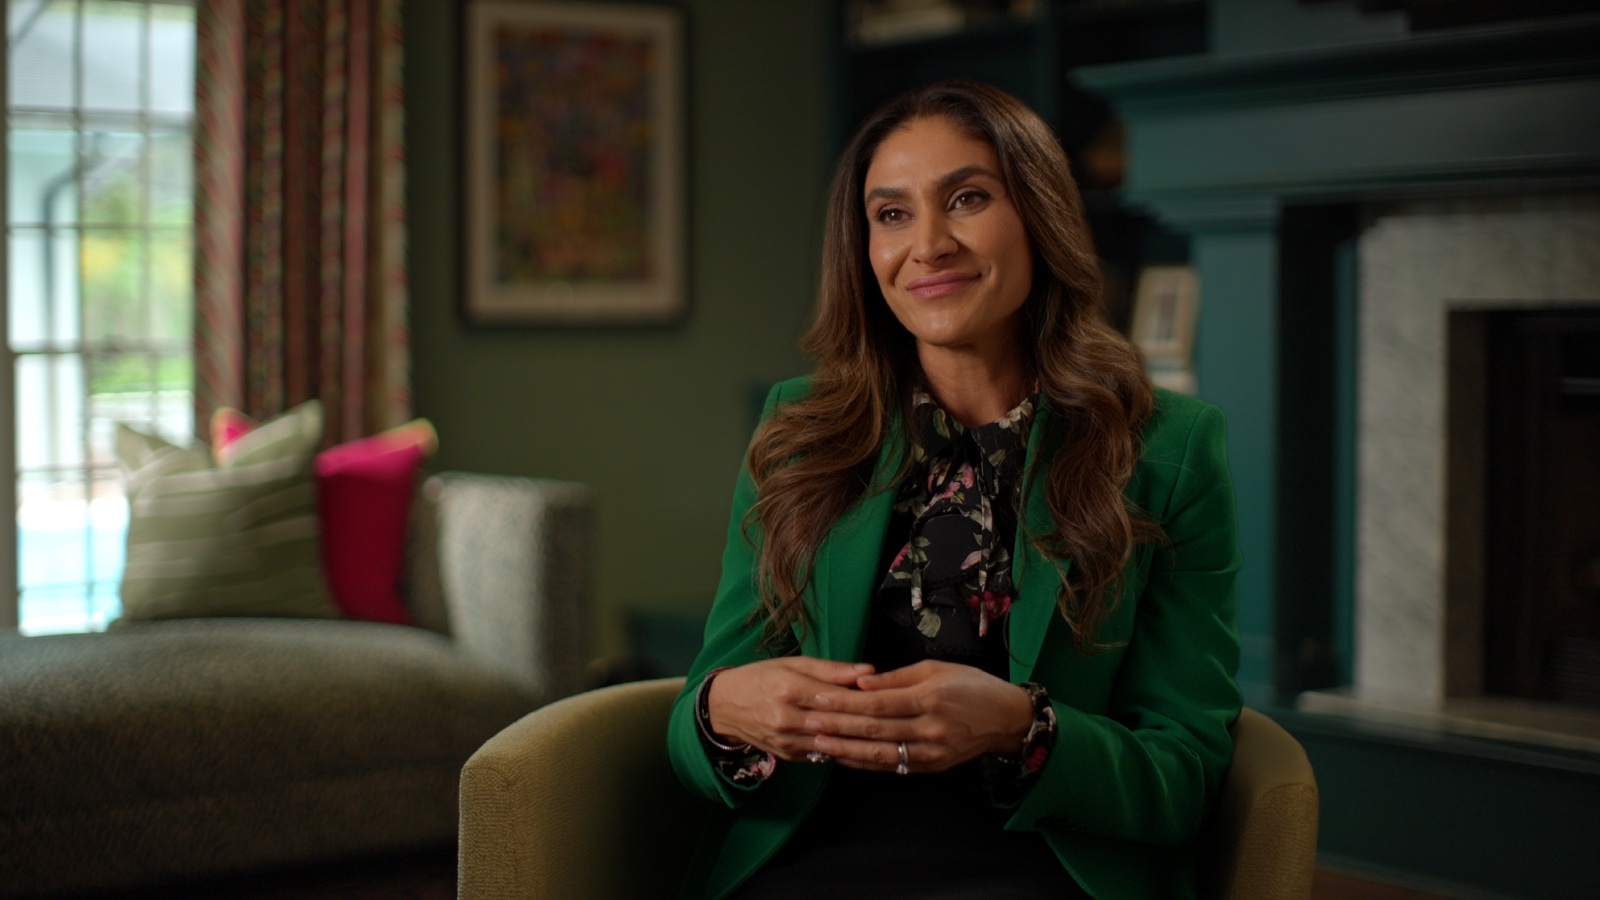
That is a more useful definition of consistency than duplicating a diagram. Match the qualities the audience will notice: direction, softness, contrast, background density, and separation.
A practical location-first workflow
- Turn off the overheads and study the room. Look for windows, doorways, surfaces, and architectural lines that can motivate the light.
- Choose the frame before choosing the fixture. Decide which part of the location deserves emphasis and what should remain subdued.
- Test the familiar solution. A ceiling bounce or room wash may be the right answer, but evaluate whether it adds shape or only adds level.
- Try one directional background source. Use a window or doorway to create a believable path of light through the composition.
- Light the subject separately. Add the key and edge only after the room has the direction you want.
- Subtract uncontrolled fill. Bring in negative fill when walls and windows flatten the face.
- Match the principle across locations. Preserve direction, contrast, and motivation even when the equipment positions must change.
For another interview built around a difficult architectural feature, see How to Light Interviews in a Glass Conference Room.
Give yourself time to discover the setup
This approach requires a little time and permission to test. If I had committed immediately to the familiar room-lighting setup, I would never have discovered what the exterior source could do. The experiment was practical because the patio conditions supported it, but the decision came from staying open to the location.
You do not need to put a fixture outside every window. The larger lesson is to avoid beginning every interview with the same diagram. Study what is already strong in the room, identify the part you want the audience to notice, and use light to embellish that feature rather than erase it.
Use the free Placing Your Exposure guide as an on-set reference for waveform, false color, stops, and IRE. For the complete camera and exposure workflow, explore Essential Camera Settings.
by Chris Tinard © cNOMADIC 2026
Learn more about cNOMADIC's cinematography philosophy and training at cNOMADIC.com.